Viewing entries in
lunch & dinner

Basil Ricotta Ravioli with EVOO

Comment

Basil Ricotta Ravioli with EVOO

I had some girlfriends over for dinner a few weeks ago and along with some other delights, we had homemade dried pasta and homemade pesto out of the freezer. It was a brilliant reminder of the joy that comes with making large batches of homemade ingredients so your future self has seriously easy, totally homemade meals that can be thrown together in twenty minutes flat. Ravioli is the epitome of that joy in my mind as homemade ravioli feels really fancy (even though it isn't difficult to make). A ravioli meal never goes by in our house without a bag-full making it into the freezer for quick weeknight meals. 

This ravioli came out of celebration over the first local basil of the year arriving at our neighborhood farmers market. Basil has always been a summer delight to me, and I had grown accustomed to waiting quite a long time for it in the cold Michigan spring. I couldn't help but buy a bunch the minute I spotted it at the market, and instantly knew I would be making ravioli with it. A simple blend of ricotta cheese, basil, and garlic allows that herbal flavor to shine. 

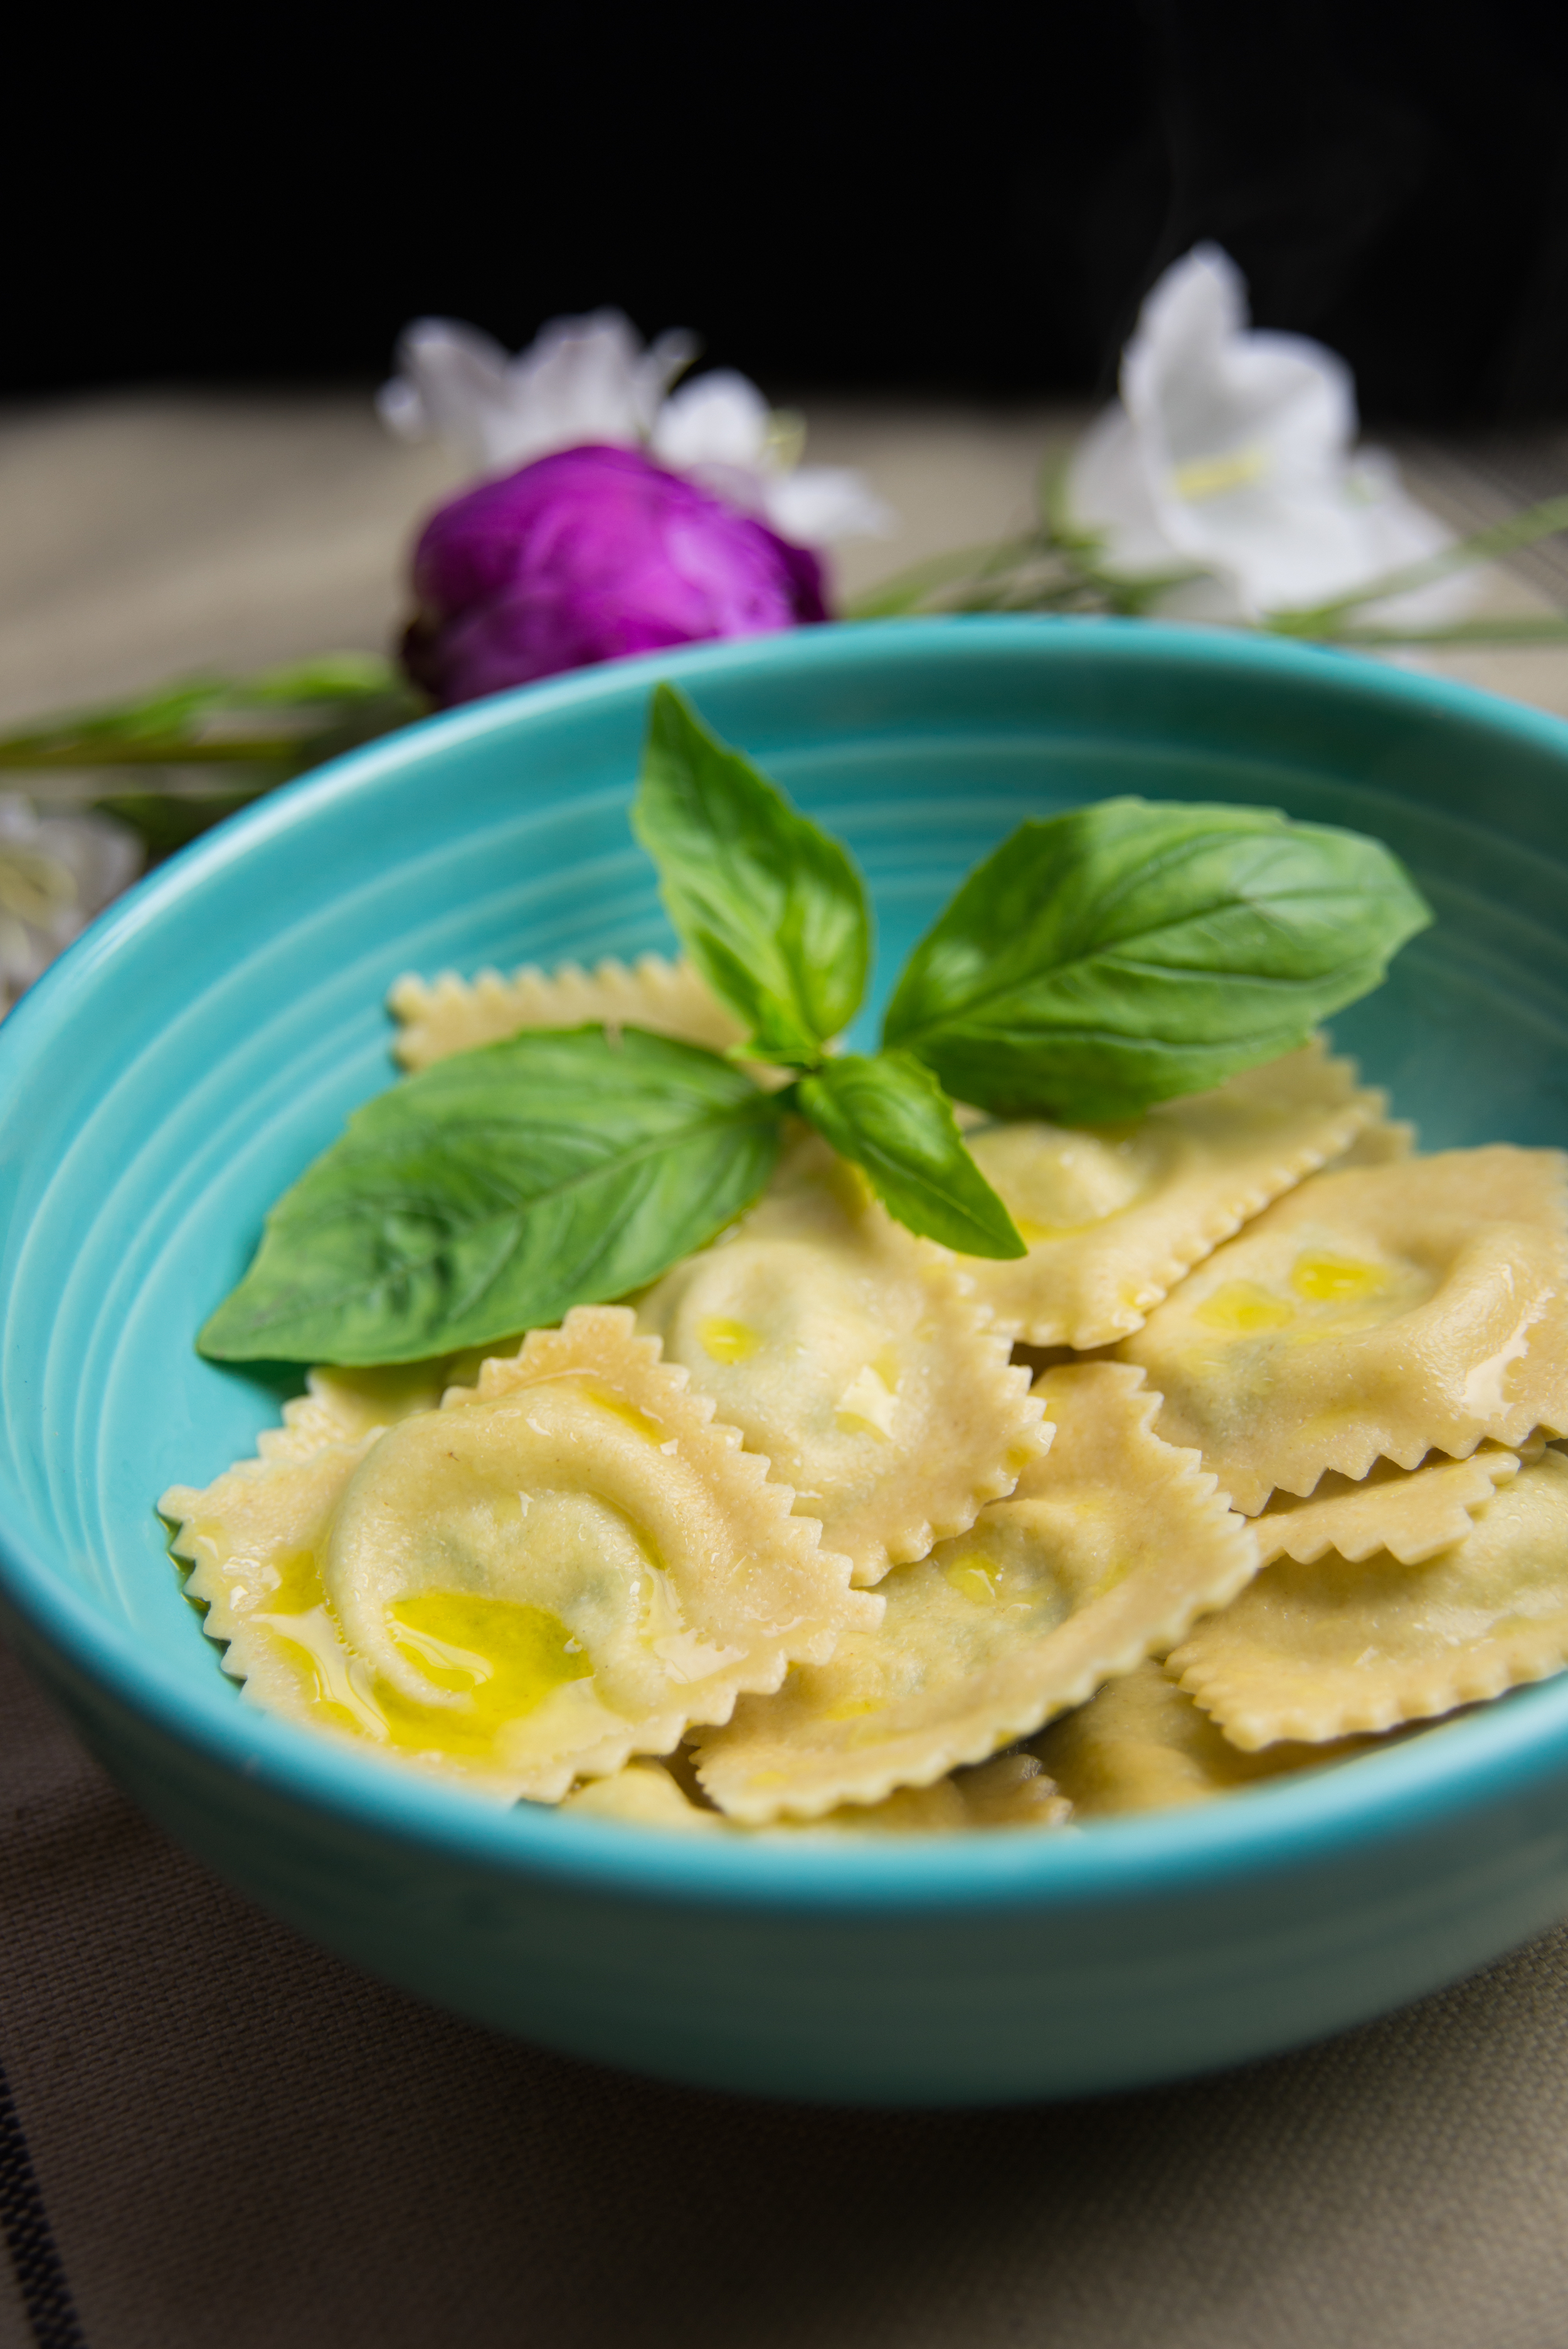
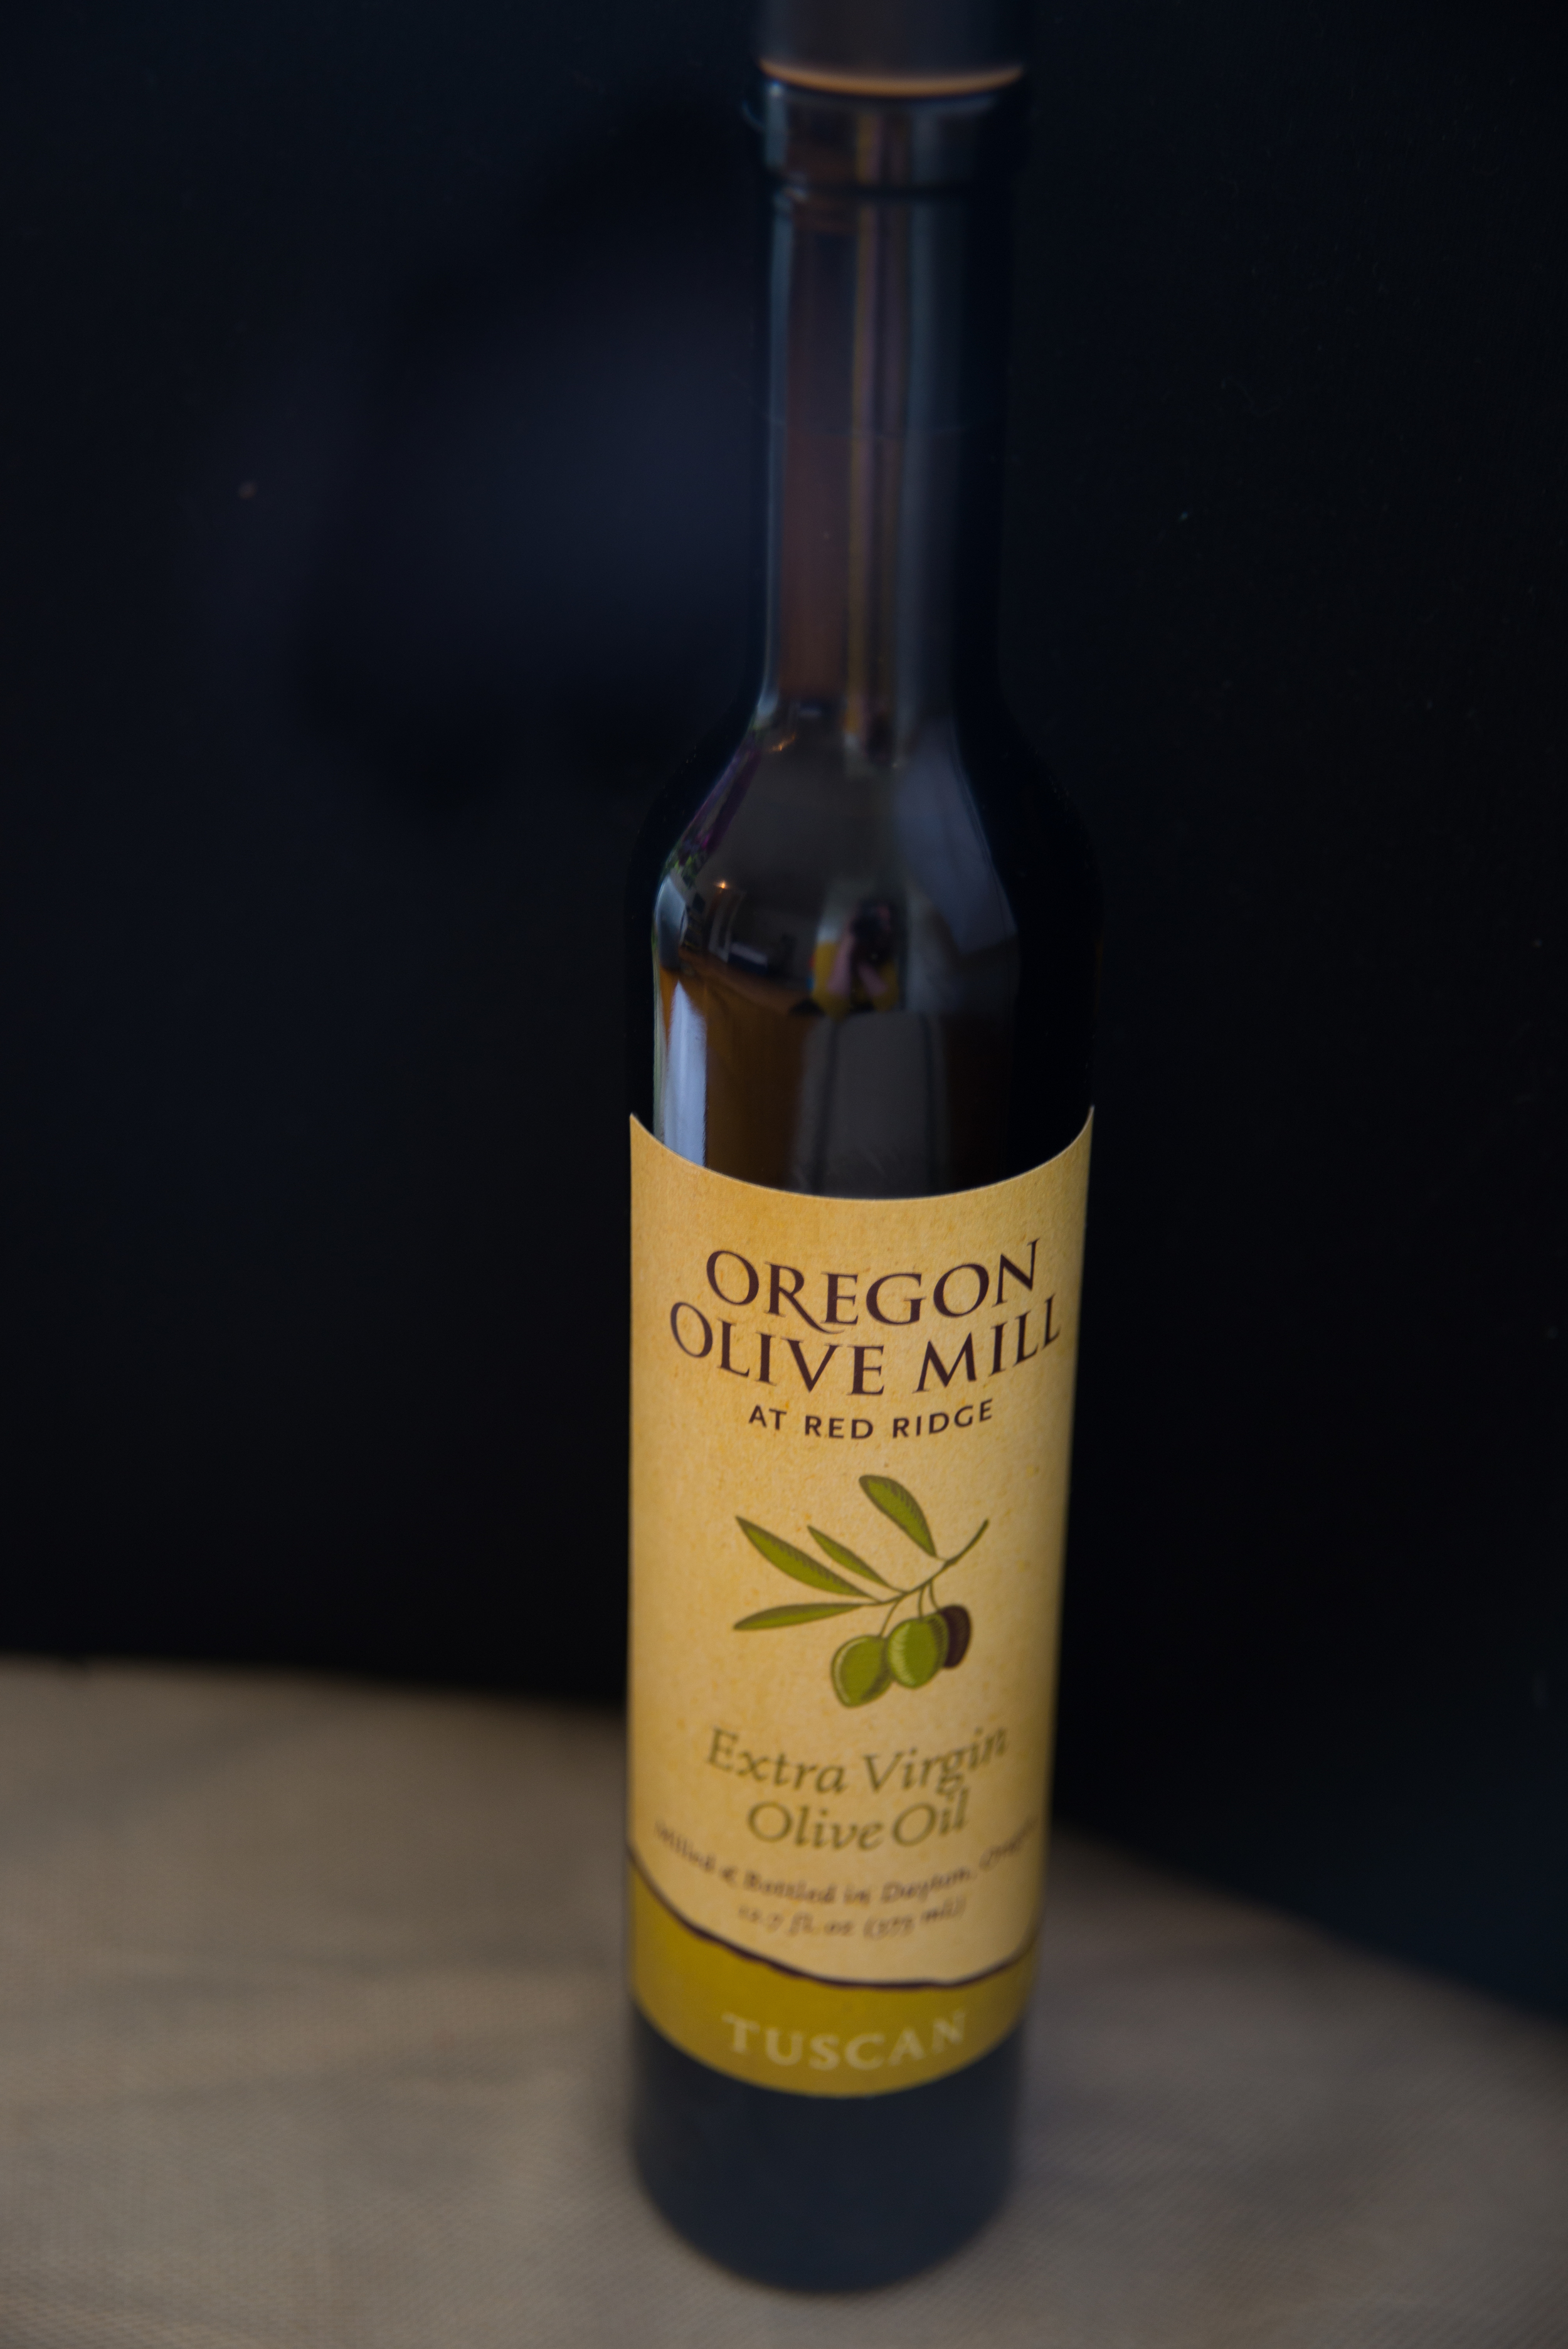
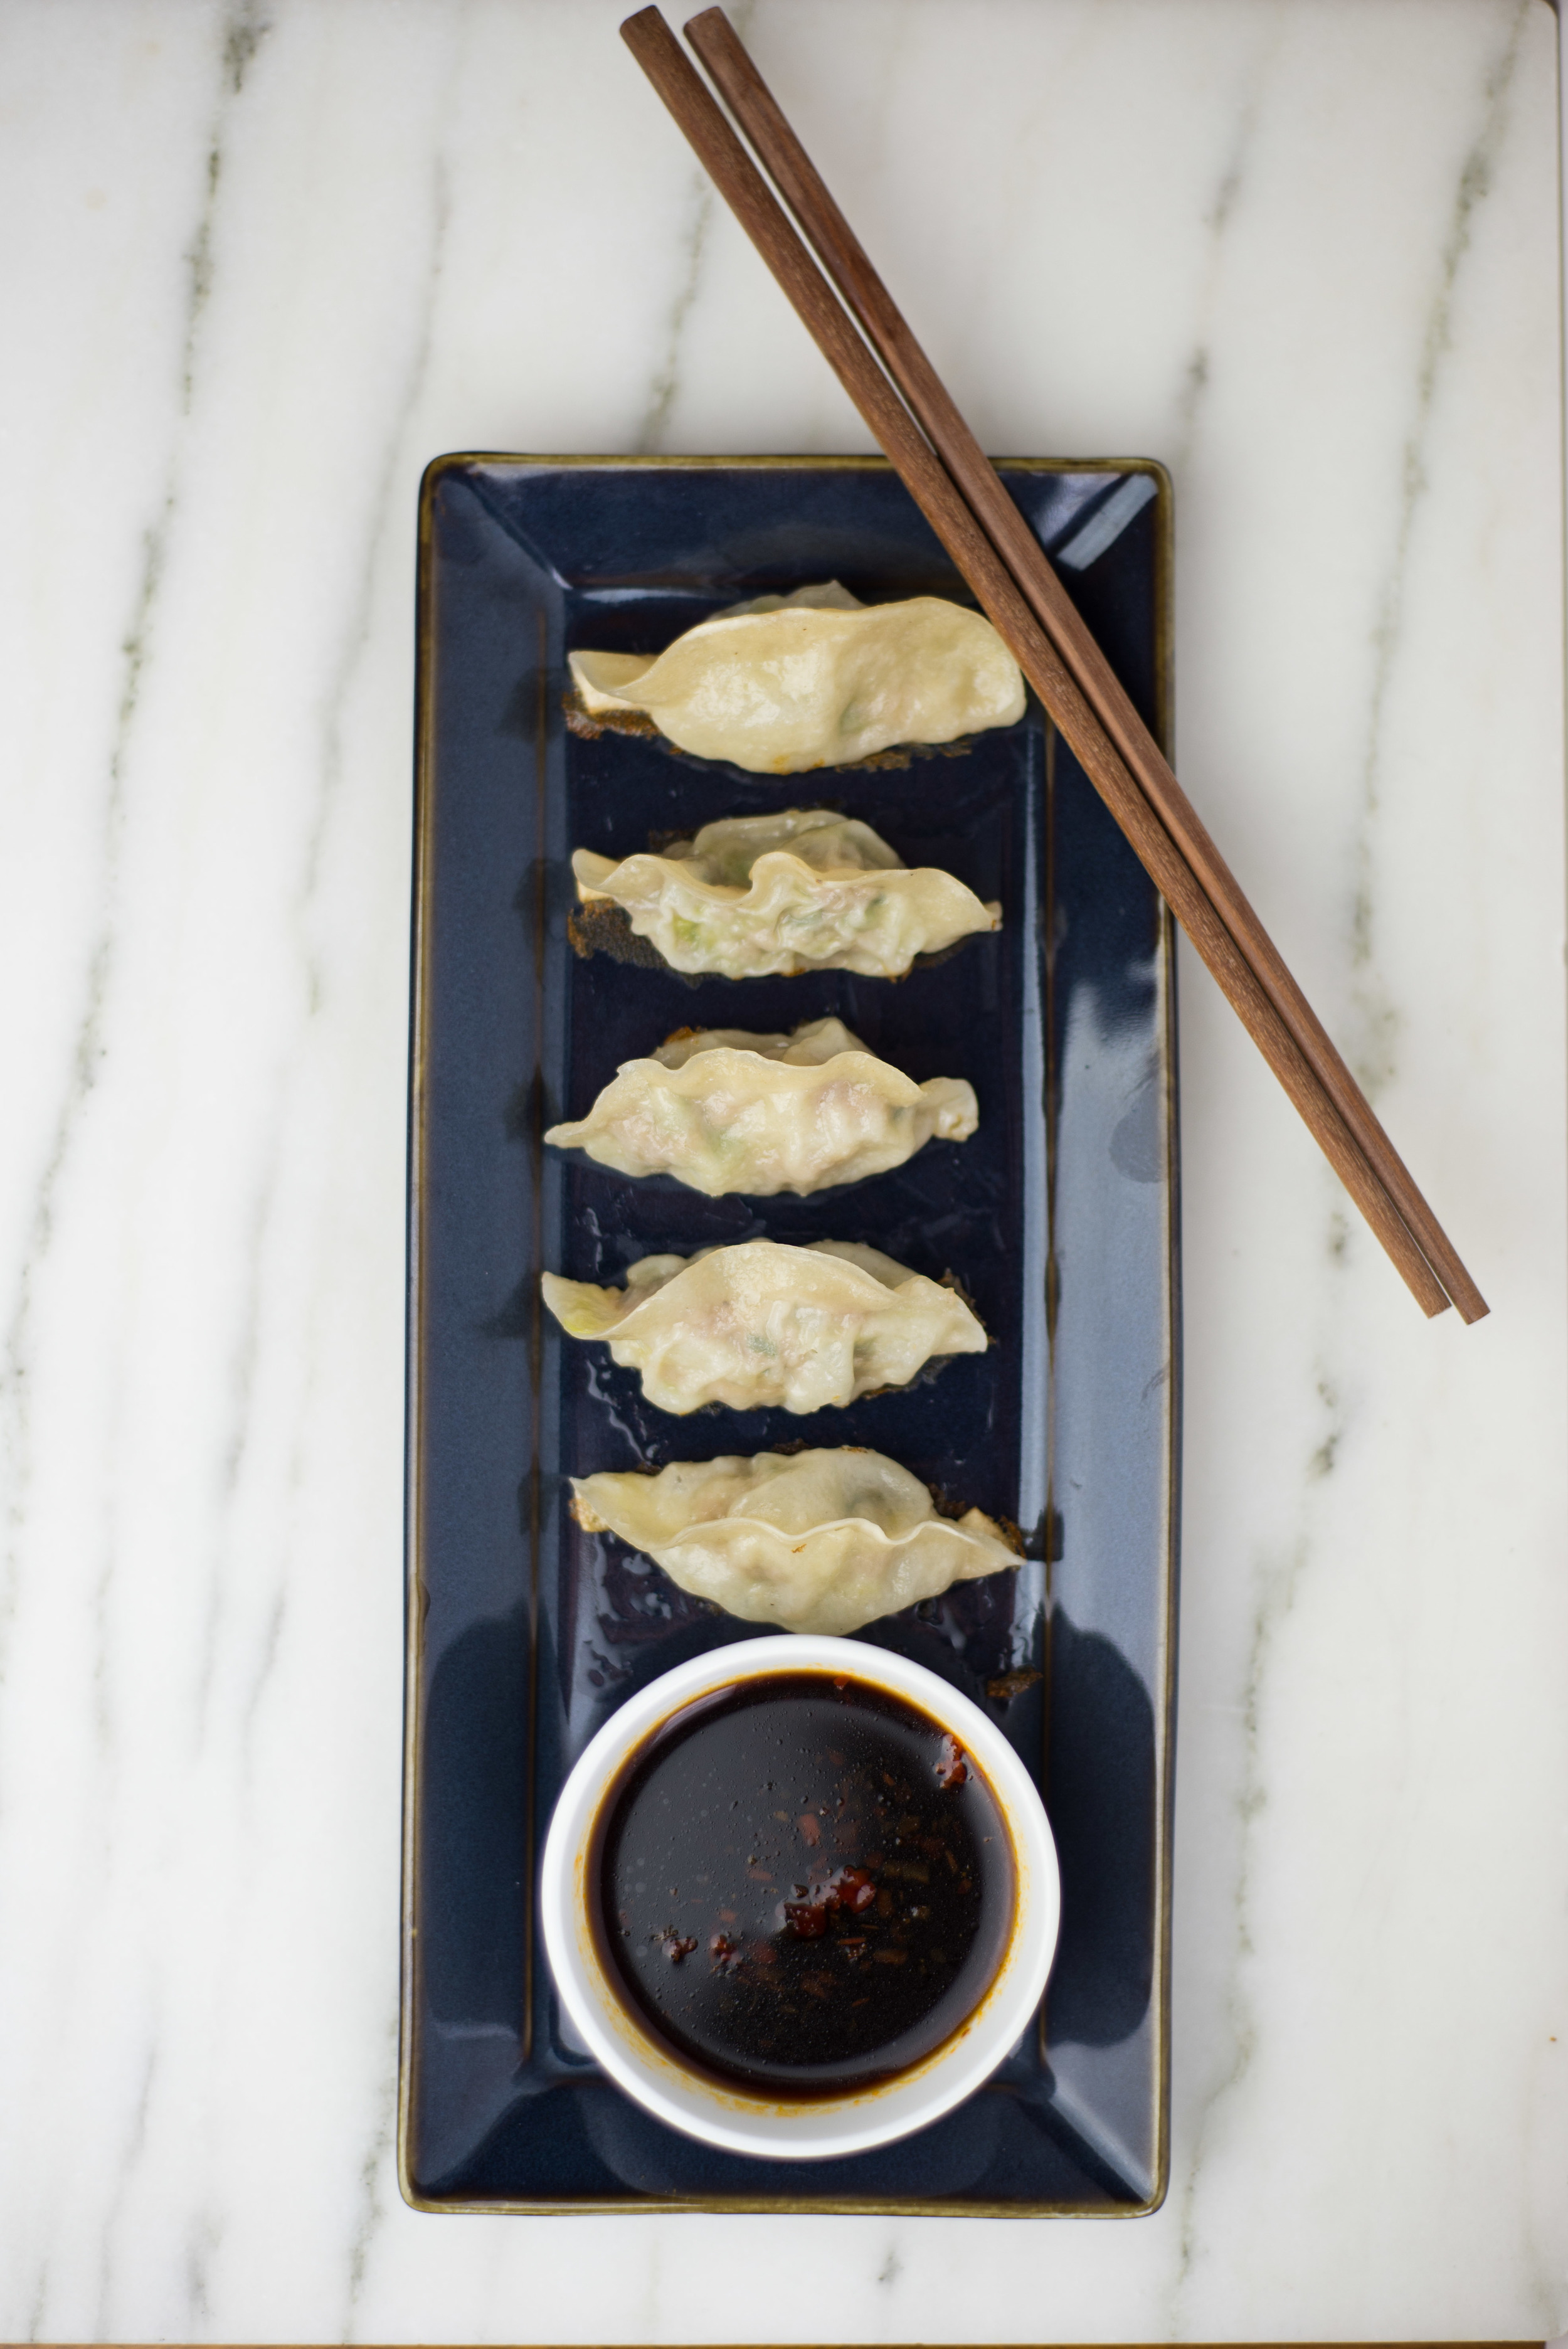
Homemade raviolis are such a special treat that I rarely find the need to cover them in sauce. Instead, I find them best served with a drizzle of a flavorful olive oil and maybe a bit of parmesan cheese. I used Oregon Olive Mill's Tuscan EVOO this time around, which lent a perfectly peppery note to the dish.  Upon moving to Oregon, I was beyond excited to learn that I could support a local farm and business in purchasing olive oil (an ingredient that in Michigan was one of those things you always had to buy from afar). Oregon Olive Mill at Red Ridge Farms has 12,000 olive trees in their orchard, and makes their oil from a blend of their own olives and some from California. Yum! 

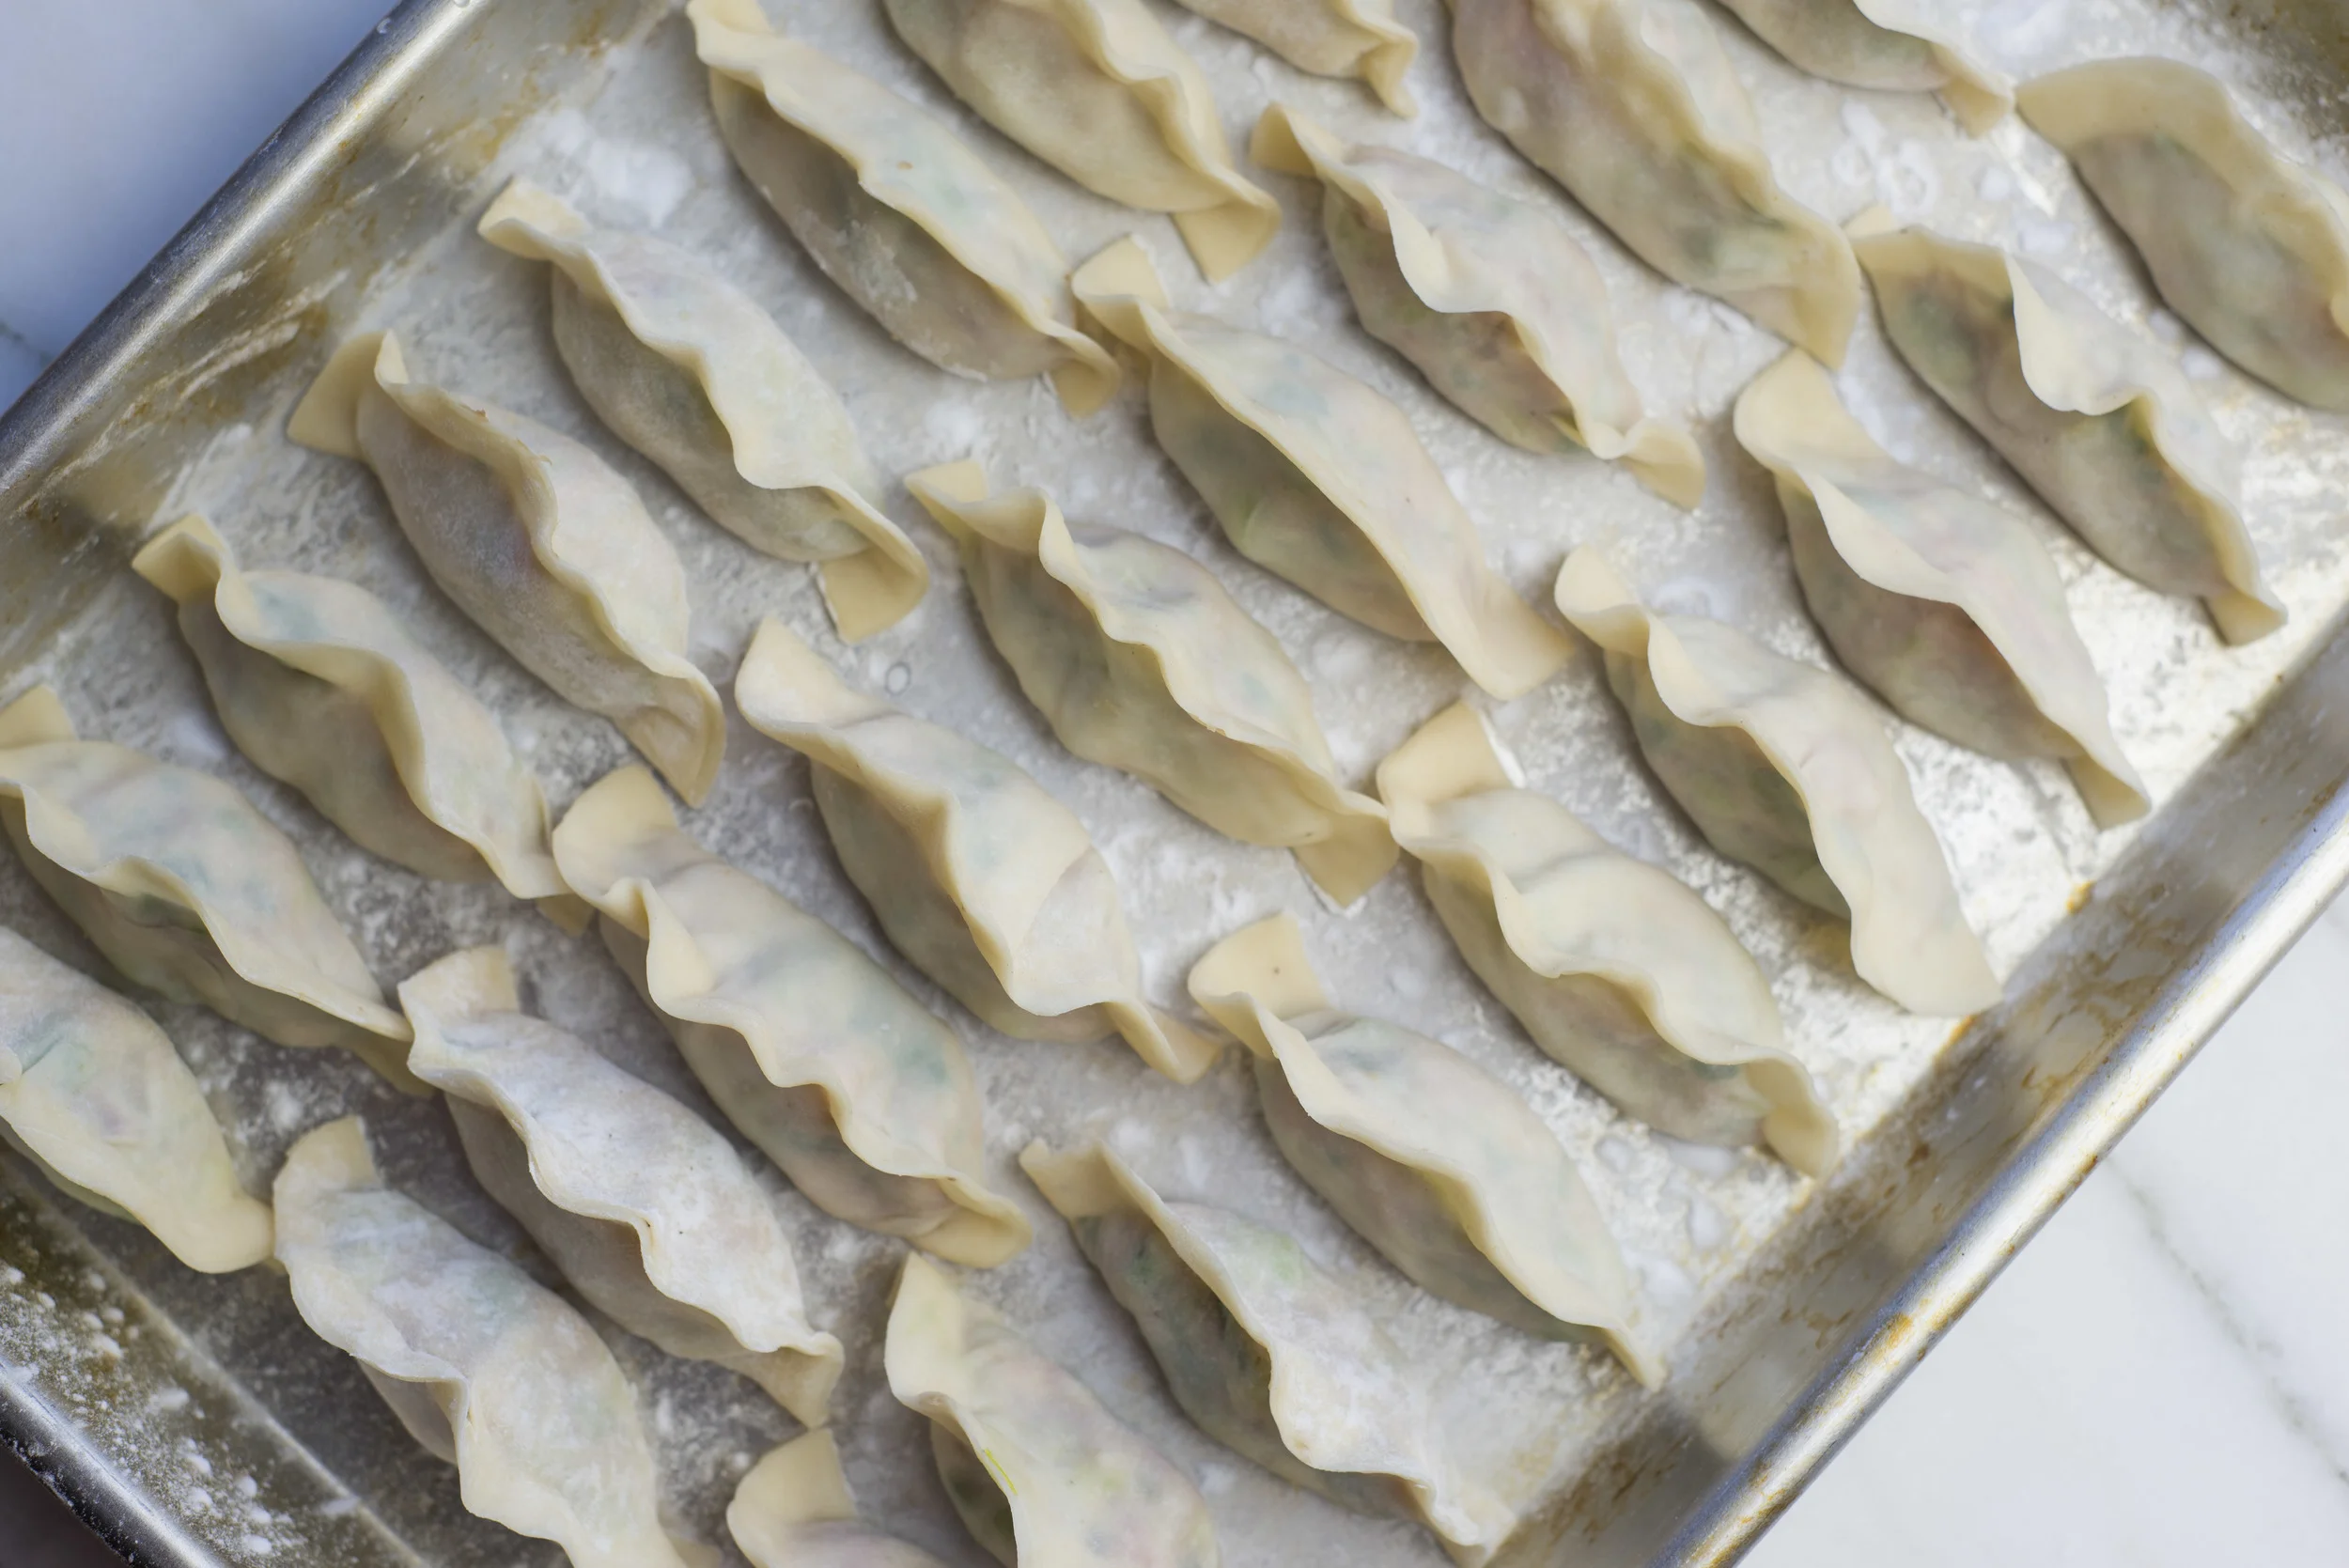
This recipe will make about seven servings of ravioli, which means a few meals for our family of two. If you want to save some of your raviolis, line them up on a baking sheet and toss them in the freezer. Once they're solid, transfer them into an airtight freezer bag. They can be cooked straight from the freezer. 

Pasta Dough 

7oz semolina flour 

7oz whole wheat pastry flour (or white flour if you prefer!) 

4 large eggs 

  • Whisk together flours in a wide medium bowl. Create a well in the middle, and crack the eggs into it. 
  • Whisk the eggs to break the yolks, then slowly start to incorporate the flour while continuing to whisk. Continue whisking until enough flour has mixed in that the whisk is no longer an appropriate tool. 
  • Switch to a wooden spoon and stir to combine the rest of the flour, leaving behind any flour that is difficult for you to incorporate (eggs vary in size, so the amount of flour you'll use will too). 
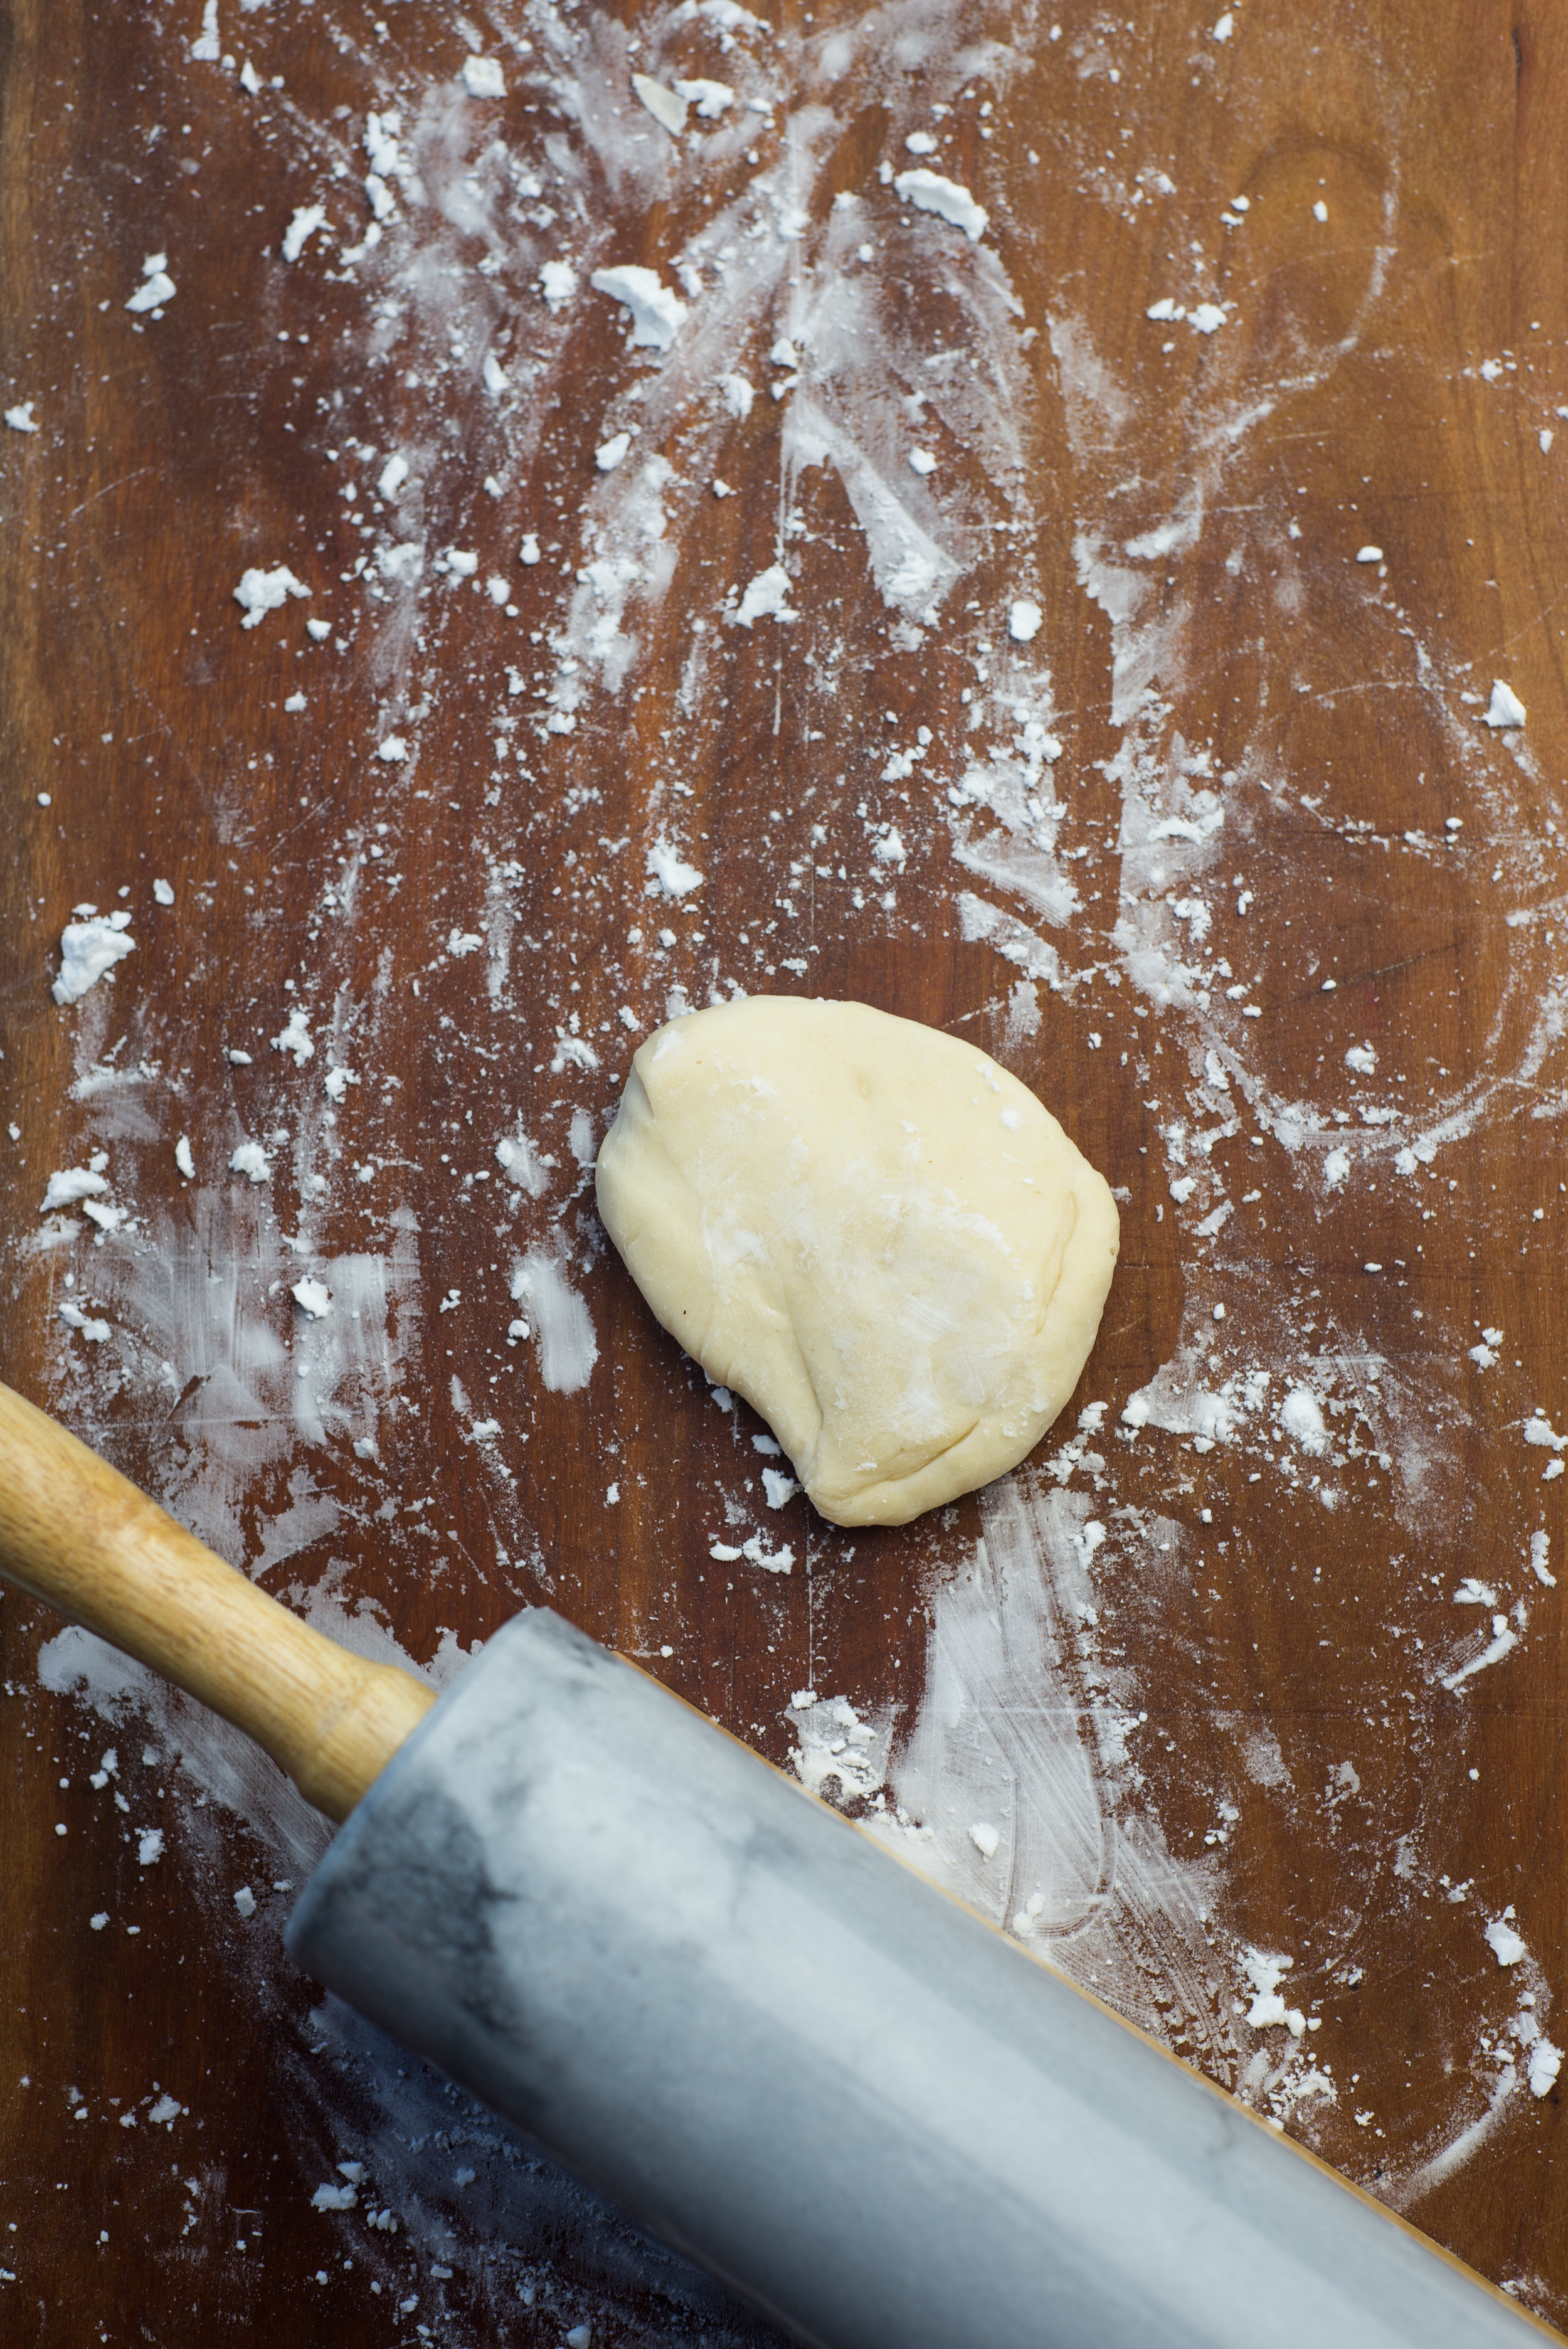
  • Dump the dough out onto a clean work surface and knead for 5-8 minutes, working in more flour if the dough is sticky. 
  • Let the dough rest for about 30 minutes before using. 

Filling 

1.5 cup whole milk ricotta cheese 

2.5 cups fresh basil, finely chopped 

3 Tbsp green garlic or 2 garlic cloves, minced 

salt & freshly crushed pepper to taste 

  • Simply stir together all ingredients until they're evenly combined. 

Assembling & Serving

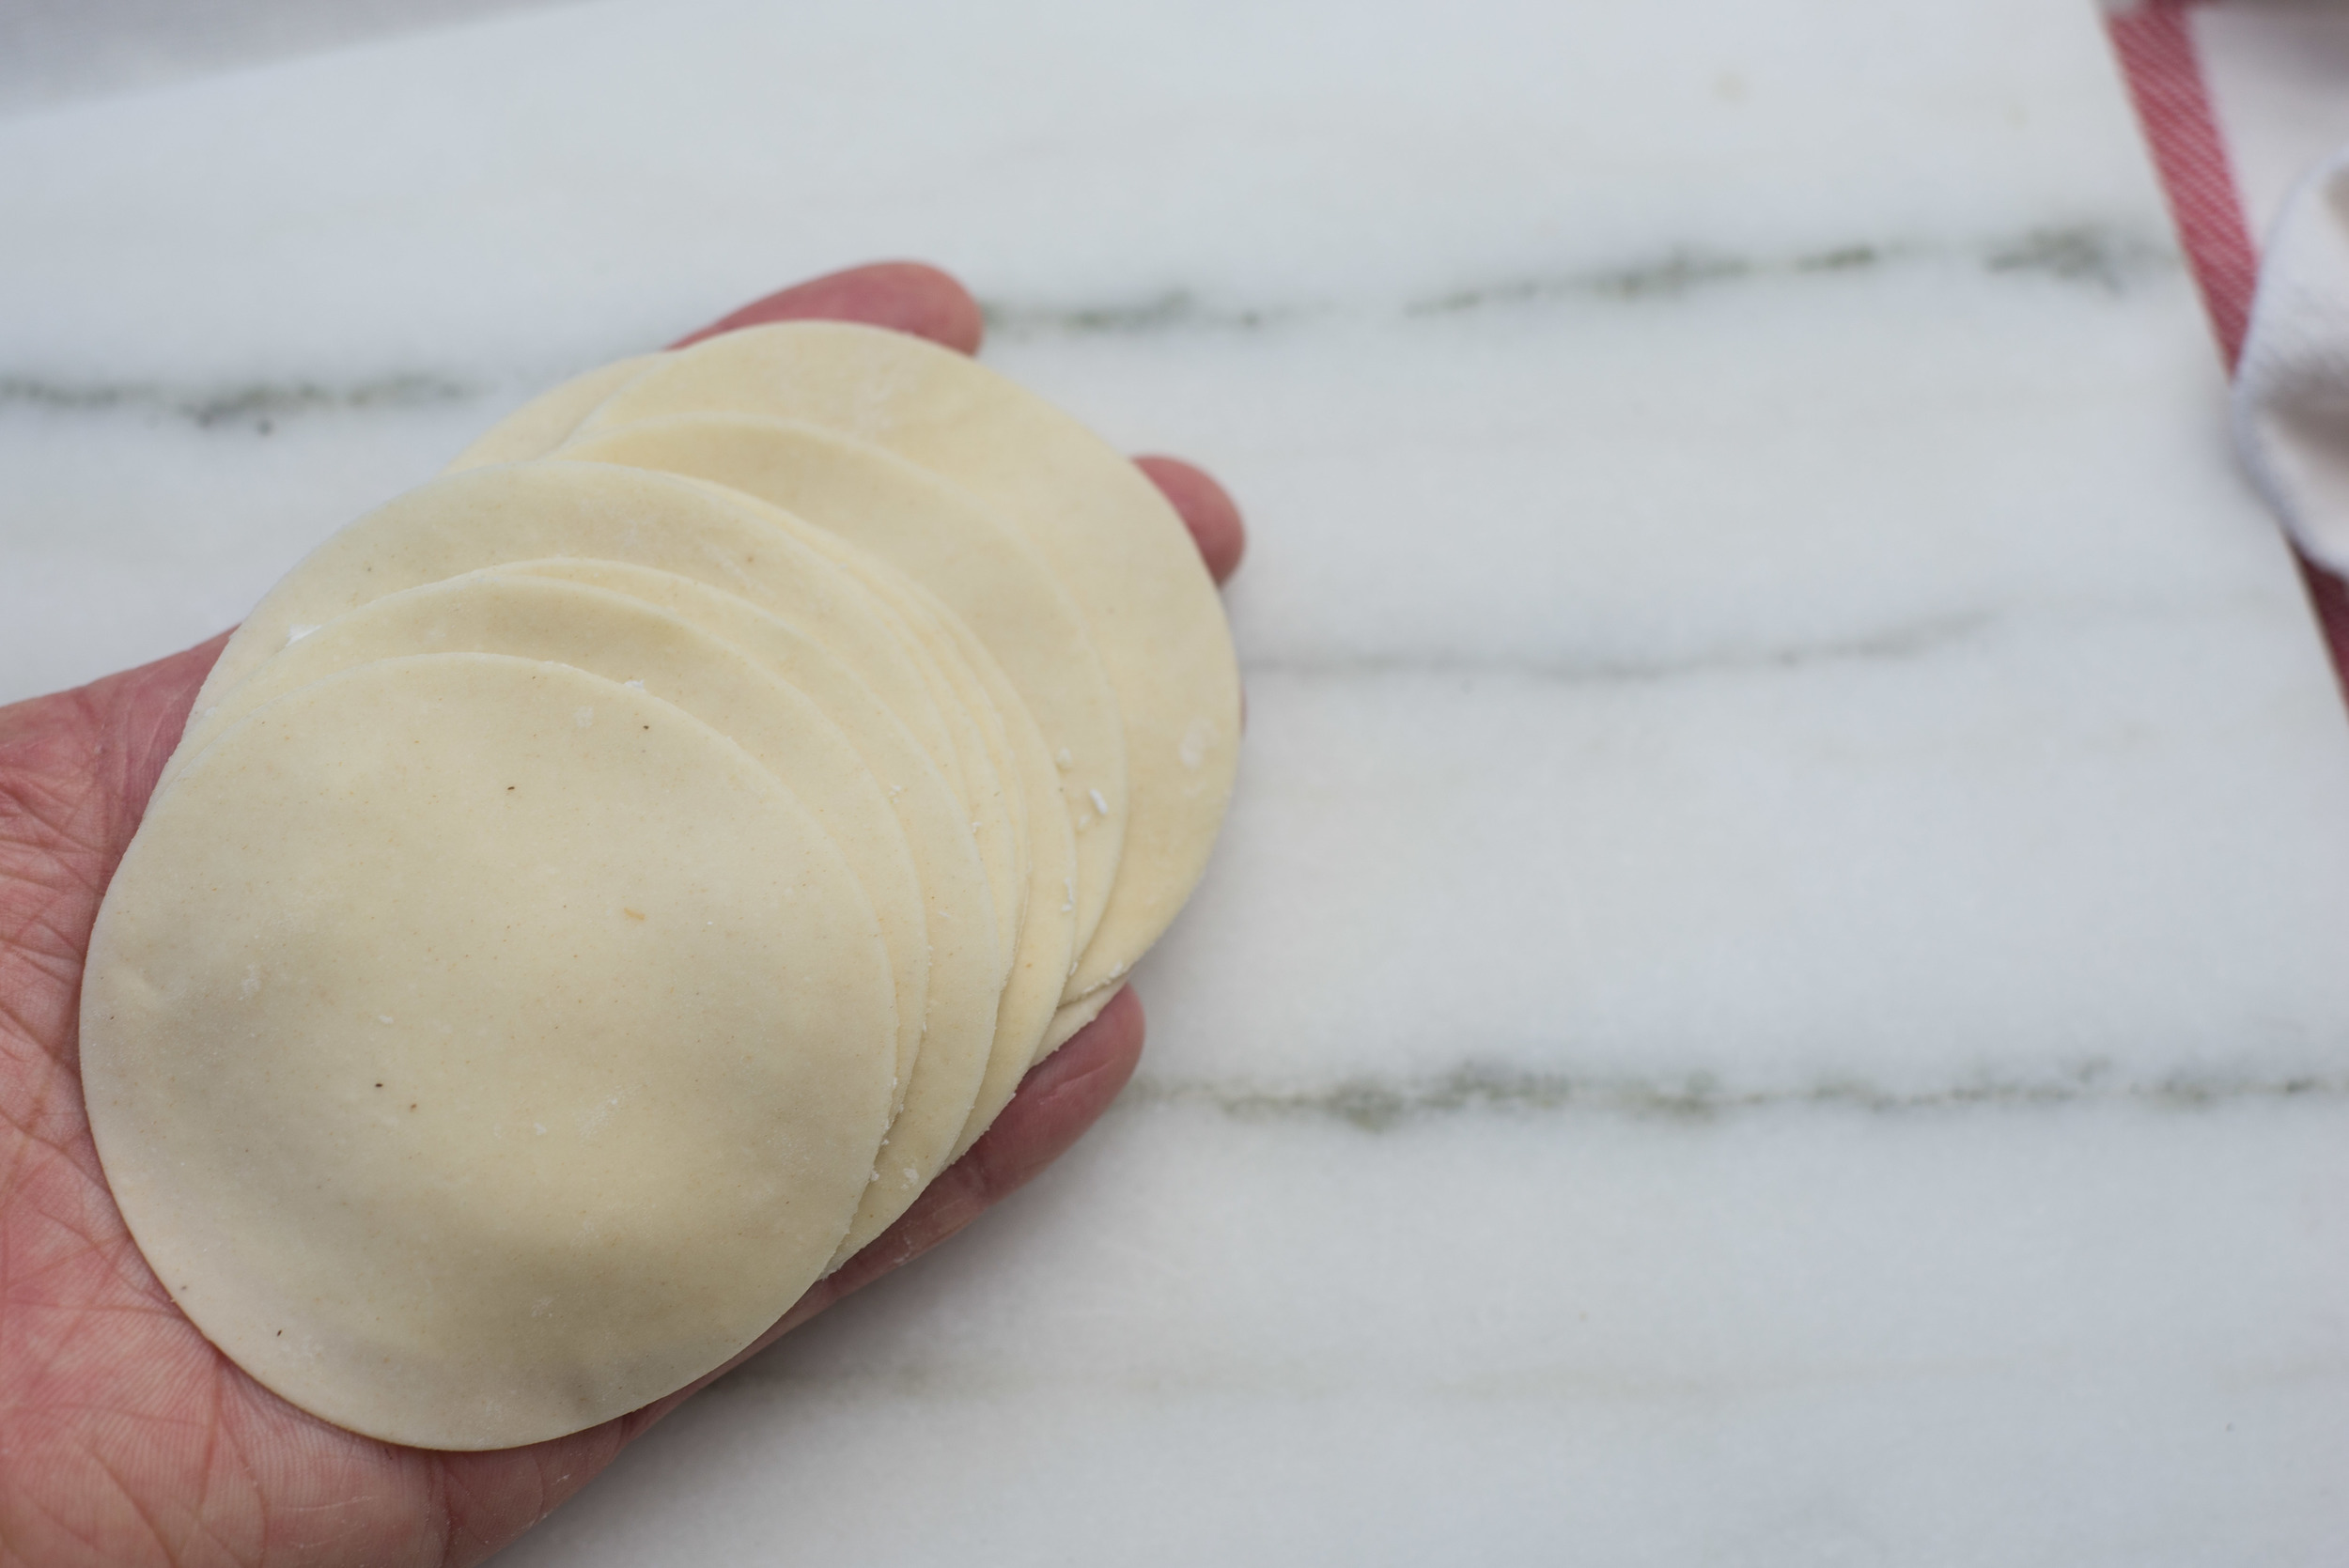
This process will depend a bit on whether or not you own a pasta roller and/or ravioli maker. I happen to make ravioli on a pretty regular basis, so I have both. I use a pasta roller attachment for my stand mixer, and have a super simple ravioli maker like this one. The ravioli maker is nice to make raviolis that all look exactly the same, but I made plenty of raviolis before having this tool (or the pasta roller!). 

extra virgin olive oil 

  • Start by rolling a small amount of the pasta dough. I like to roll it to the #6 thickness on my Kitchenaid pasta rolling attachment. Alternatively, you can roll it as thin as you can get it with a rolling pin. 
  • If you have a ravioli maker, follow whatever process makes sense for the model you own - they're all a little different. 
  • If you don't have a ravioli maker, start with a strip of dough that is 3-4 inches wide. Dollop spoonfuls of filling along one half of the strip, then fold it over so each dollop of filling is covered by a second layer of pasta. Using your fingers, gently push the air out and close the pasta around the filling. Using a knife or pizza cutter, cut each ravioli apart. As you move each one off the work space, give the edges a little pinch to make sure it's sealed. Freeze any you won't be eating right away. 
  • Cook the ravioli's in boiling salted water for about 5 minutes, just until the pasta is cooked through.
  • Serve with a drizzle of extra virgin olive oil and a little bit of basil. 


* I received free product or money from the noted business before writing this post. I hold the content of this blog to the greatest scrutiny, and promise to never recommend products to you that I would not purchase with my own money and use in my kitchen. Accepting free product or money from brands that I trust and believe in allows me to devote my time to sharing the wonders of my kitchen with all of you. 

Comment

Pork Gyozas (Japanese potstickers)

Comment

Pork Gyozas (Japanese potstickers)

Just about every cuisine has some form of dumpling sitting near the center of what we consider comfort food. Indian cuisine has the samosa. Eastern Europe has the pierogi. Latin America has the empanada. Italy has ravioli. Japan has the gyoza, commonly known throughout Americanized Asian restaurants as the more generic potsticker. 

I can get behind all of these dough-wrapped delights, and slowly I'm learning to make each and every one of them from scratch at home. It's a labor of love to form each and every one of those little pockets - something often done with many hands - but my goodness is it worth it! 

While gyoza wrappers can be found in the freezer section of most Japanese markets, I wouldn't be honoring my inner self if I didn't take the time to make the wrappers from scratch. The recipe is simple, and doesn't take all that much time to bring together. I've even simplified it a little more by rolling out the dough in sheets, where many recipes I've seen call for each individual gyoza wrapper to be rolled individually... efficiency, friends! It makes all of our lives easier. 

But don't worry! I won't judge if you decide to just buy your wrappers at the store. We all have to honor our true selves, and that convenience is what many of us crave! 

Here we have them! The wrappers start to stack up, ready to be filled with their flavor-packed filling. 

I chose to start by making a classic pork gyoza with cabbage, garlic chives or green garlic (if you're making these during the magical time of spring when it's available), and ginger. The flavor of these beauties is powerful, but pleasing in a way that they should be enjoyed by just about everyone! 

Like I mentioned, assembling any form of dumpling is a commitment to a long process. It's meditative in the best way as a solo-task, and a great way to connect and laugh together with friends or family when done with many hands around the table. 

As I see it, once you're putting the effort into forming gyozas at home, you might as well take the time to make a big batch! This recipe will make about 50 gyozas, enough to serve a large party or be saved for a quick snack or side dish in the future. You can very easily freeze the gyozas and cook them straight from the freezer. Believe me, your future self will thank you! 

So here they are in all their ready-to-eat glory - crispy on the bottom, and ready to be gobbled right up! 

Homemade Gyoza Wrappers 

 from Just One Cookbook

Note: I know for many of you, making these at home will seem like a huge commitment. I love knowing that I made every part of what I'm eating from scratch, so am generally happy to put in the extra work. If this feels overwhelming and you live near a Japanese market, feel free to use store-bought wrappers! Having spent much of my life in places where ethnic shopping options are slim to nonexistent, having the recipes to make dishes like this from scratch is a life-saver! 

2 cups (240 grams) all purpose flour 

1/2 tsp salt 

1/2 cup boiling water 

potato starch for dusting 

  • Place flour into a medium bowl, sifting it as you put it in or giving it a good whisk to make sure it's nice and fluffy before you start. 
  • In a liquid measuring cup (or small bowl), whisk salt into boiling water until it has dissolved. 
  • Slowly add the water to the flour, stirring with a spatula or wooden spoon as you go. If needed, add additional boiling water in 1 tsp increments, until the dough comes together. You may need to use your hands partway through this process! 
  • Transfer the ball of dough onto a clean work surface and knead for about ten minutes. The dough will be nice and smooth when you're finished. 
  • Divide the dough in half, wrap each half tightly in plastic wrap, and let rest for 30 minutes. 
  • After it's finished resting, start with one half of the dough. Cover your work surface with potato starch and roll the dough until it is just about as thin as you can get it. Use a 3 inch round biscuit cutter, cookie cutter, or glass to cut as many circles as you can. Stack the circles in a damp kitchen towel as you go to keep them from drying out. Squeeze together any extra dough and set it in the damp towel as well. 
  • Repeat this process with the second half of the dough, and then with all the scraps together. 

Gyoza Filling, Assembly, and Cooking 

filling recipe every so slightly adapted from Tadashi Ono's Japanese Soul Cooking

3 cups finely chopped napa cabbage (you can also use green or savoy cabbage) 

1/2 tsp salt 

1 cup garlic chives or green garlic, finely chopped

2 small cloves garlic, minced (if you use green garlic, I would omit this!) 

1 Tbsp grated fresh ginger 

2/3 lb ground pork 

2 tsp soy sauce 

4 Tbsp toasted sesame oil 

1/2 tsp freshly ground black pepper 

1/2 tsp salt 

2 tsp sugar 

3 Tbsp potato starch, divided (plus extra for dusting) 

  • Start by putting the cabbage in a large bowl, and mixing in the salt. Let this mixture sit for about 15 minutes at room temperature. Transfer the cabbage to a large clean kitchen towel, or nut milk bag and wring it out with all your might! You want to remove as much liquid as you possibly can from the cabbage. 
  • Place the cabbage back in the large bowl, and add the rest of the ingredients, reserving 1 Tbsp of the potato starch. 
  • Using your hands, toss all of the ingredients together mixing until they are evenly distributed. Mash the mixture together between your fingers for a few minutes until it holds together enough to be spooned into the dumplings. 
  • Mix the remaining 1 Tbsp potato starch with 3 Tbsp of warm water in a small dish. This will act as your glue to close the dumplings. 
  • Hold one of the wrappers in your hand, then dip a finger into your potato starch mixture and wet the entire edge of the wrapper with the liquid.  Place about 1 Tbsp of filling in the center of the wrapper, then fold it in half, squeezing together the wrapper to seal it up. 
  • Place finished gyozas on a plate that has been lightly dusted with potato starch. Any that you're not planning to eat right away, freeze on a baking sheet then toss into a freezer bag. Fast and easy gyozas for busy nights in the future! 
  • Now, for cooking the gyozas. Heat a pan big enough to fit however many you would like to cook over high heat for about 5 minutes. You want it to be fully heated! I recommend using a non-stick pan if you have one (or a cast iron skillet). Add about 1 Tbsp of sesame oil to the pan and spread it around. Place the gyozas into the pan with the seam side up and let them cook for about 30 seconds, then add 2/3 cup water and quickly cover the pan. Let them cook for about 4 minutes (8 minutes if you're cooking them from frozen). At this time, most of the water should have cooked off. Remove the lid and cook for 1 additional minute. Carefully scoop them up and onto the plates! 
  • If you're a fan of Hane, the crispy skin often found on Japanese gyozas connecting them all together, add 1 1/2 Tbsp of flour to the 2/3 cup water before adding it to the pan. I have a horribly uneven stove, so the liquid pools over on one side of the pan. This makes the hane cook unevenly, and it really just won't happen well. My biggest suggestion if you decide to cook the hane is to use a non-stick pan. It'll make your life much much easier. 

Dipping Sauce 

1/4 cup soy sauce 

2 Tbsp rice vinegar 

1 Tbsp chili sauce, or another spicy condiment you have on hand 

  • Whisk all the ingredients together, and serve alongside your gyozas for dipping! 


Comment

Palak Paneer

Comment

Palak Paneer

In sharing my recipe for Chana Masala, I shared about my apprehension to make Indian food, followed by serious excitement once I actually started doing it and realized that it isn't so difficult. Palak Paneer has since been my other go-to Indian dish, gracing our table particularly often come the season of endless greens. 

For those of you who haven't had it before, palak paneer is a dish of spinach, tomato, and spices simmered into a thick sauce and tossed with cubes of paneer cheese. While Indian folks may scoff, I make palak paneer with whatever greens I have on hand and sometimes even replace the paneer with cubes of tofu (!!!). Of course it always tastes best with the paneer, but sometimes we're on a healthy kick or just don't have milk or paneer on hand. 

As for what greens to use, I've used a lot of different things with great success across the board. Spinach of course. Kale. Radish greens. Beet greens. Chard. A mixture of whatever we have! The meal of palak paneer photographed in this post was actually made with 100% stinging nettle greens that we harvested while hiking in the Colombia River Gorge. They're packed with amazing nutrition and made an amazing substitute for spinach - yum! Plus, a meal always tastes better when you harvested some of the ingredients yourself. 

It wouldn't be a discussion of cooking Indian food at home without me making a plug for grinding your own spices! They taste so much more flavorful, and the little bit of work it takes is totally worth it. Plus, if you do the job in a mortar and pestle - it's a good dose of free stress release pounding the heck out of those spices : ) you're welcome. 

Now, the paneer! Another day I'll share my recipe for making paneer at home, but if you're interested for the time being, check out this resource from The Kitchn to learn more. Making cheese at home may seem like a difficult task... but paneer is the number one easiest cheese you can make yourself. It's a great way to learn the beginnings of cheesemaking, and enjoy paneer if you live somewhere it is difficult to find! 

Alright friends - lets all soak up the springtime vibes with a nice big bowl of palak paneer to enjoy! 

Palak Paneer 

3 Tbsp ghee or high heat oil 

1 small onion, diced 

2 medium tomatoes 

1 Tbsp fresh ginger, grated

2 tsp whole coriander, ground 

2 tsp cumin seed, ground 

1 tsp turmeric 

1 tsp chili powder 

pinch of hing powder (if you don't have this, the dish will still taste great without it!) 

1 tsp salt 

4 cups packed chopped spinach, or any other green you please 

1/3 lb paneer cheese or tofu, cut into cubes 

1/3 cup cream (optional) 

  • Heat a wide bottomed pot or deep-sided pan over medium heat, add 1 Tbsp of the ghee or oil and let it heat. Add the onions and let them cook, stirring occasionally until they start to brown. 
  • While the onions are cooking, puree the tomatoes and ginger in a blender. Set aside. 
  • Once the onions are starting to brown, add in the coriander, cumin, turmeric, chili powder, and hing. Stir the spices in with the onions and let them toast until fragrant. This should take about 30 seconds. 
  • Once the spices are fragrant, quickly add in the pureed tomatoes so they don't burn. Stirring occasionally, cook the mixture for a few minutes until the liquid has reduced by almost half. 
  • Add the spinach, and cook until it is fully wilted. 
  • Transfer the entire contents of the pot into your blender, or use an immersion blender, and blend it a bit to break down the spinach. 
  • Return to the pot, and let simmer over for about 10 minutes, or until it has thickened. If you're using the cream, stir it in towards the end of this process. 
  • While the final simmer is happening, we'll brown the paneer cheese or tofu. Heat the remaining 2 Tbsp of ghee or oil over medium high heat in a pan large enough for the paneer cubes to fit in one layer with a little space between each one. Brown the cubes by cooking for about a minute on each side (or at least most of the sides!). 
  • Stir the paneer into the spinach, or place it on top of each bowl when you serve. 
  • Serve with rice or naan

Comment