Viewing entries tagged
food blog

Chana Masala

Comment

Chana Masala

When it comes to comfort foods that warm my soul on a cool rainy Portland evening, the spiced dishes of India are one of my many go-tos. For a long time, I was hesitant to try my hand at cooking Indian food, because it seemed like a lot of work. While there is a long list of spices in almost every recipe, and many Indian dishes benefit from a slow simmer all day long - you can still make great Indian dishes in a short amount of time and with a small collection of spices on hand. Chana masala and palak paneer are my two favorites to make at home, so I thought it was high time I share those recipes with you fine people! 

One of the biggest ways to create great flavors in Indian dishes (and plenty of other cuisines as well!) is to start with whole spices. Once spices are ground, they start to go stale and lose their flavor really quickly. So if you're not constantly buying fresh ground spices, it's likely that all those spices you have hiding away in a cupboard are nowhere near as flavorful as their freshly ground counterparts. 

This may seem overwhelming, and like a lot of work... but I promise it isn't! And the flavor power you'll notice will totally rock your world and make it all worthwhile! The two best ways to grind spices are in a mortar and pestle (aka free therapy, and a great stress reliever after work!) and in a coffee grinder. Grabbing a cheap coffee grinder at a resale shop and keeping it on hand just for spices works great. Just give it a quick wipe after use to keep the flavors separate. 

If you get really excited about grinding spices, like we have in our kitchen... there are a ton of ways to make it easier on yourself. Just start by buying all the spices you're able to as whole spices. Then, I grind them up and keep a small amount of ground spices that I've ground myself on hand for quick and easy additions. That way it doesn't feel like a chore every time you cook. You got this! 

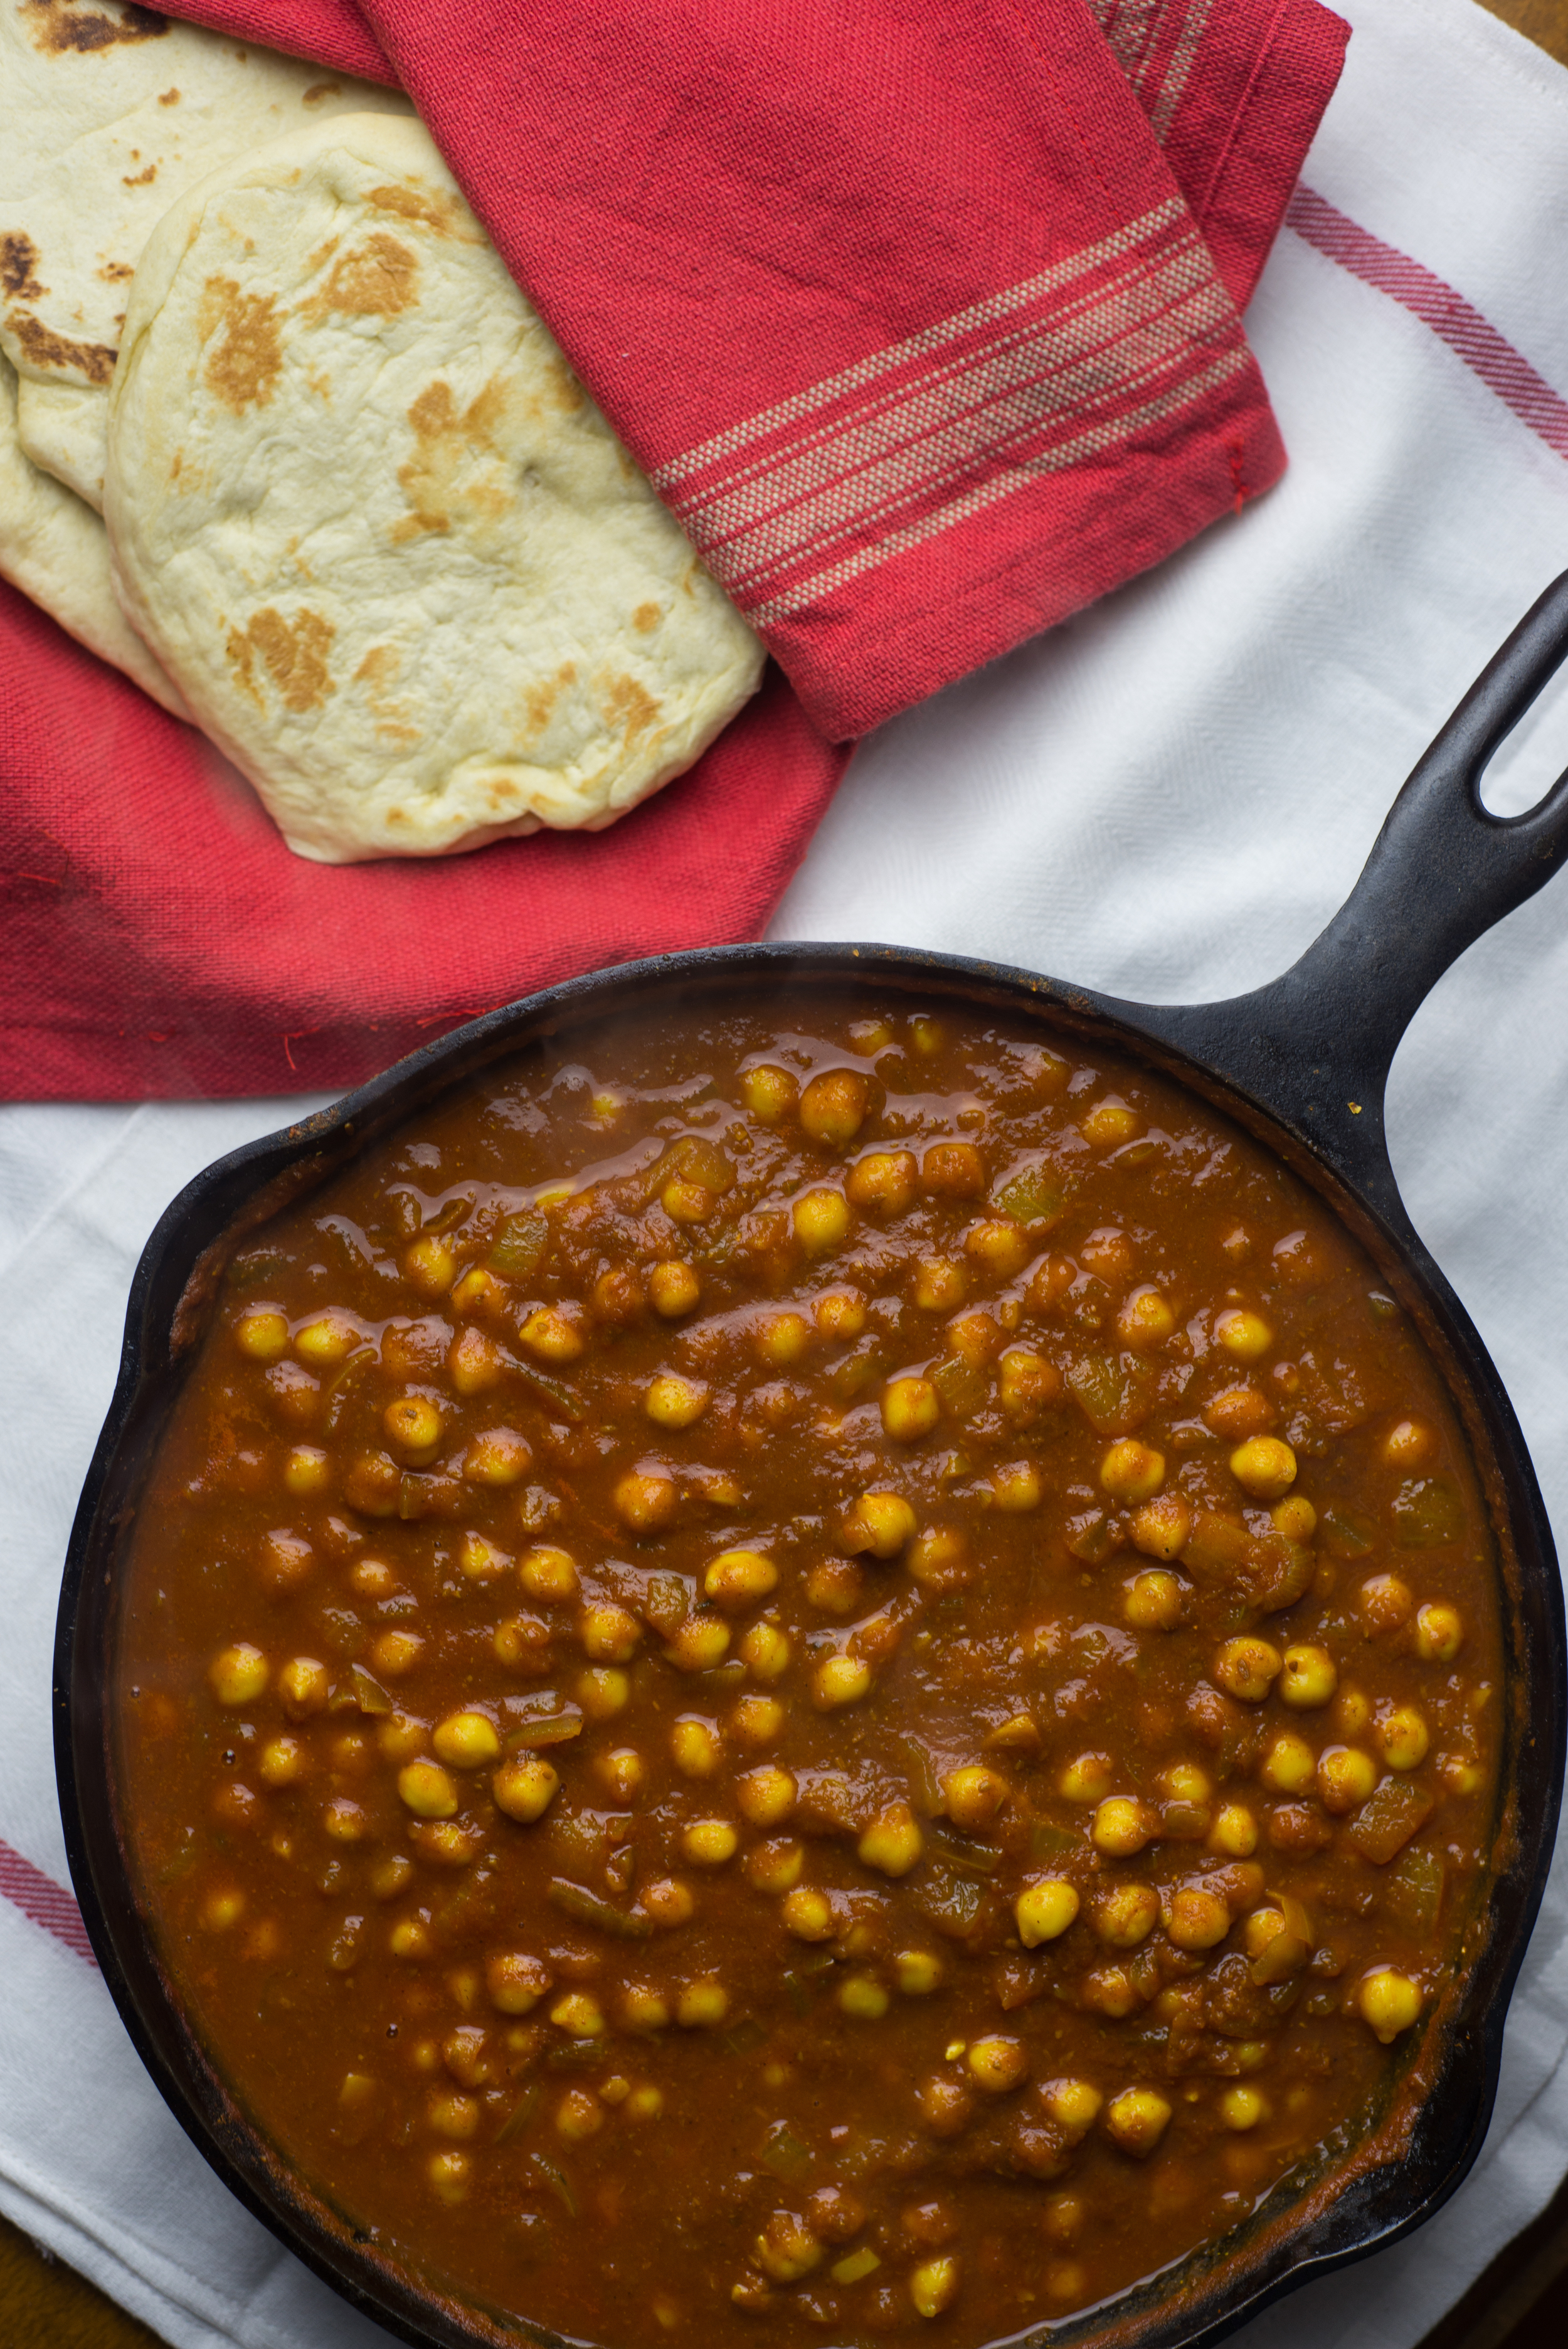
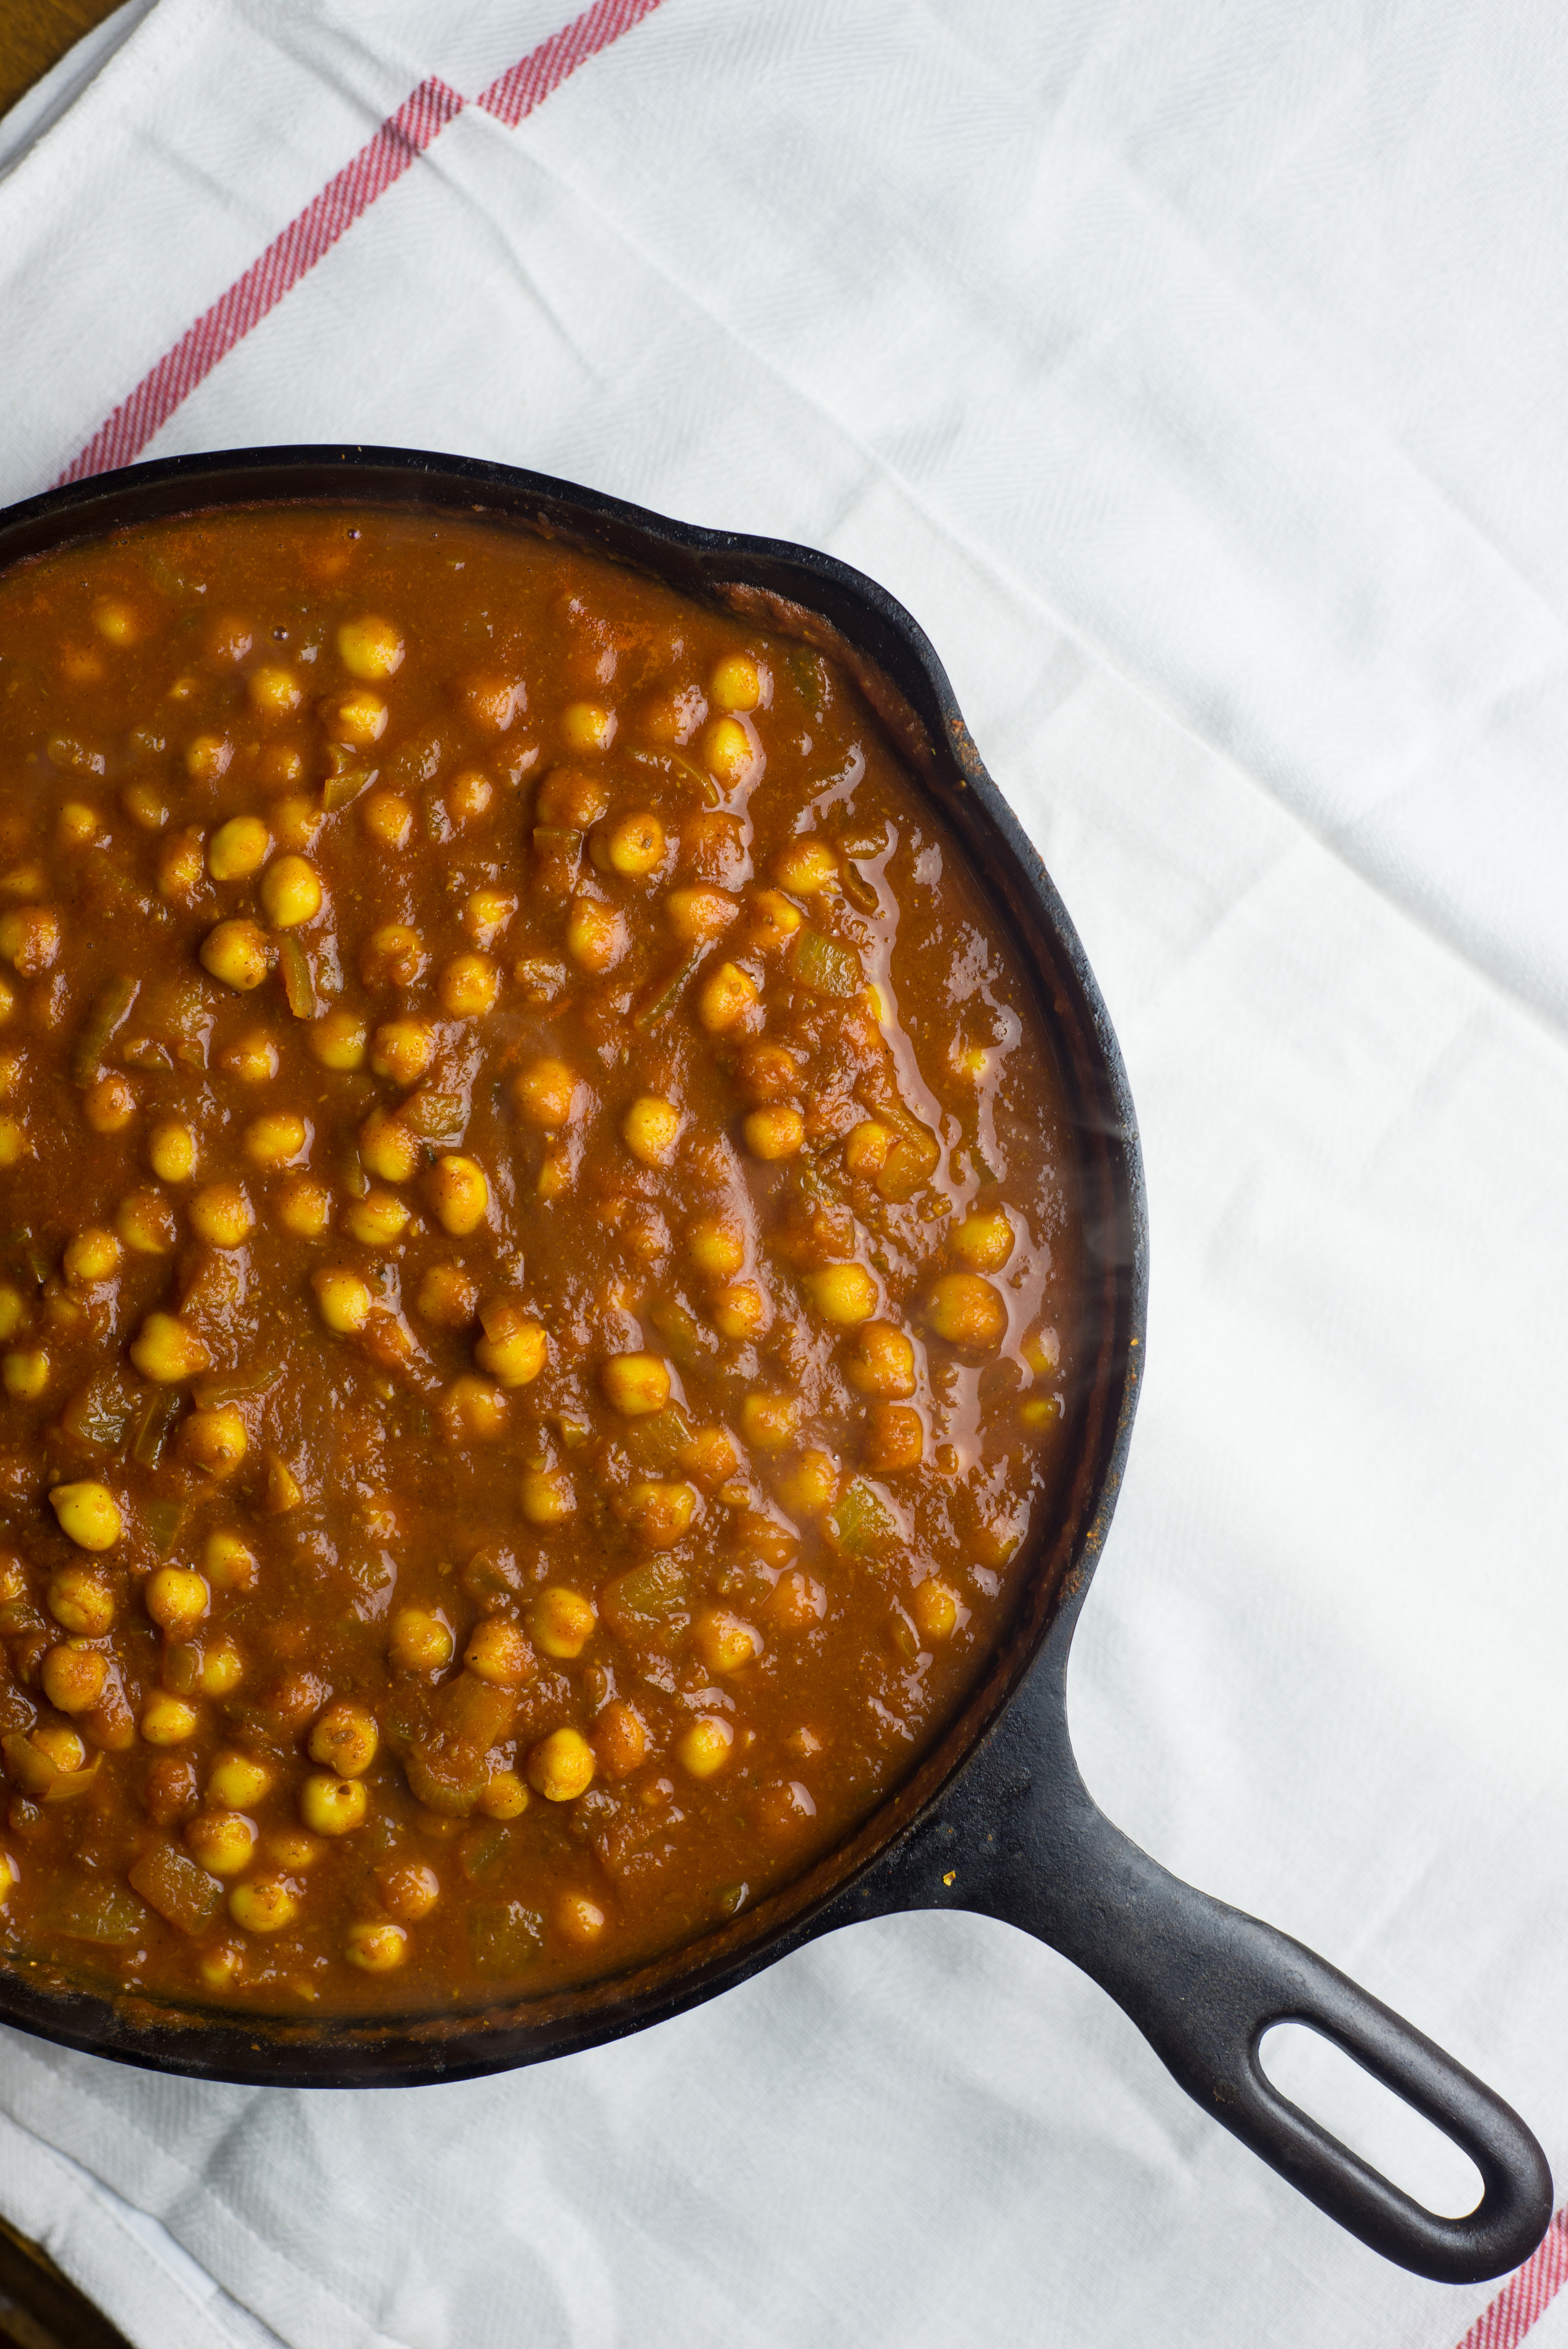
So, about that chana masala. If you've never had it before, chana means chickpea and masala is the name used for spice blends. So chana masala is chickpeas cooked in a highly spiced sauce, which is made mostly of tomatoes. To make it, all you need are those chickpeas and tomatoes, and your mega flavor powers of some spices, garlic, ginger, and onions. 

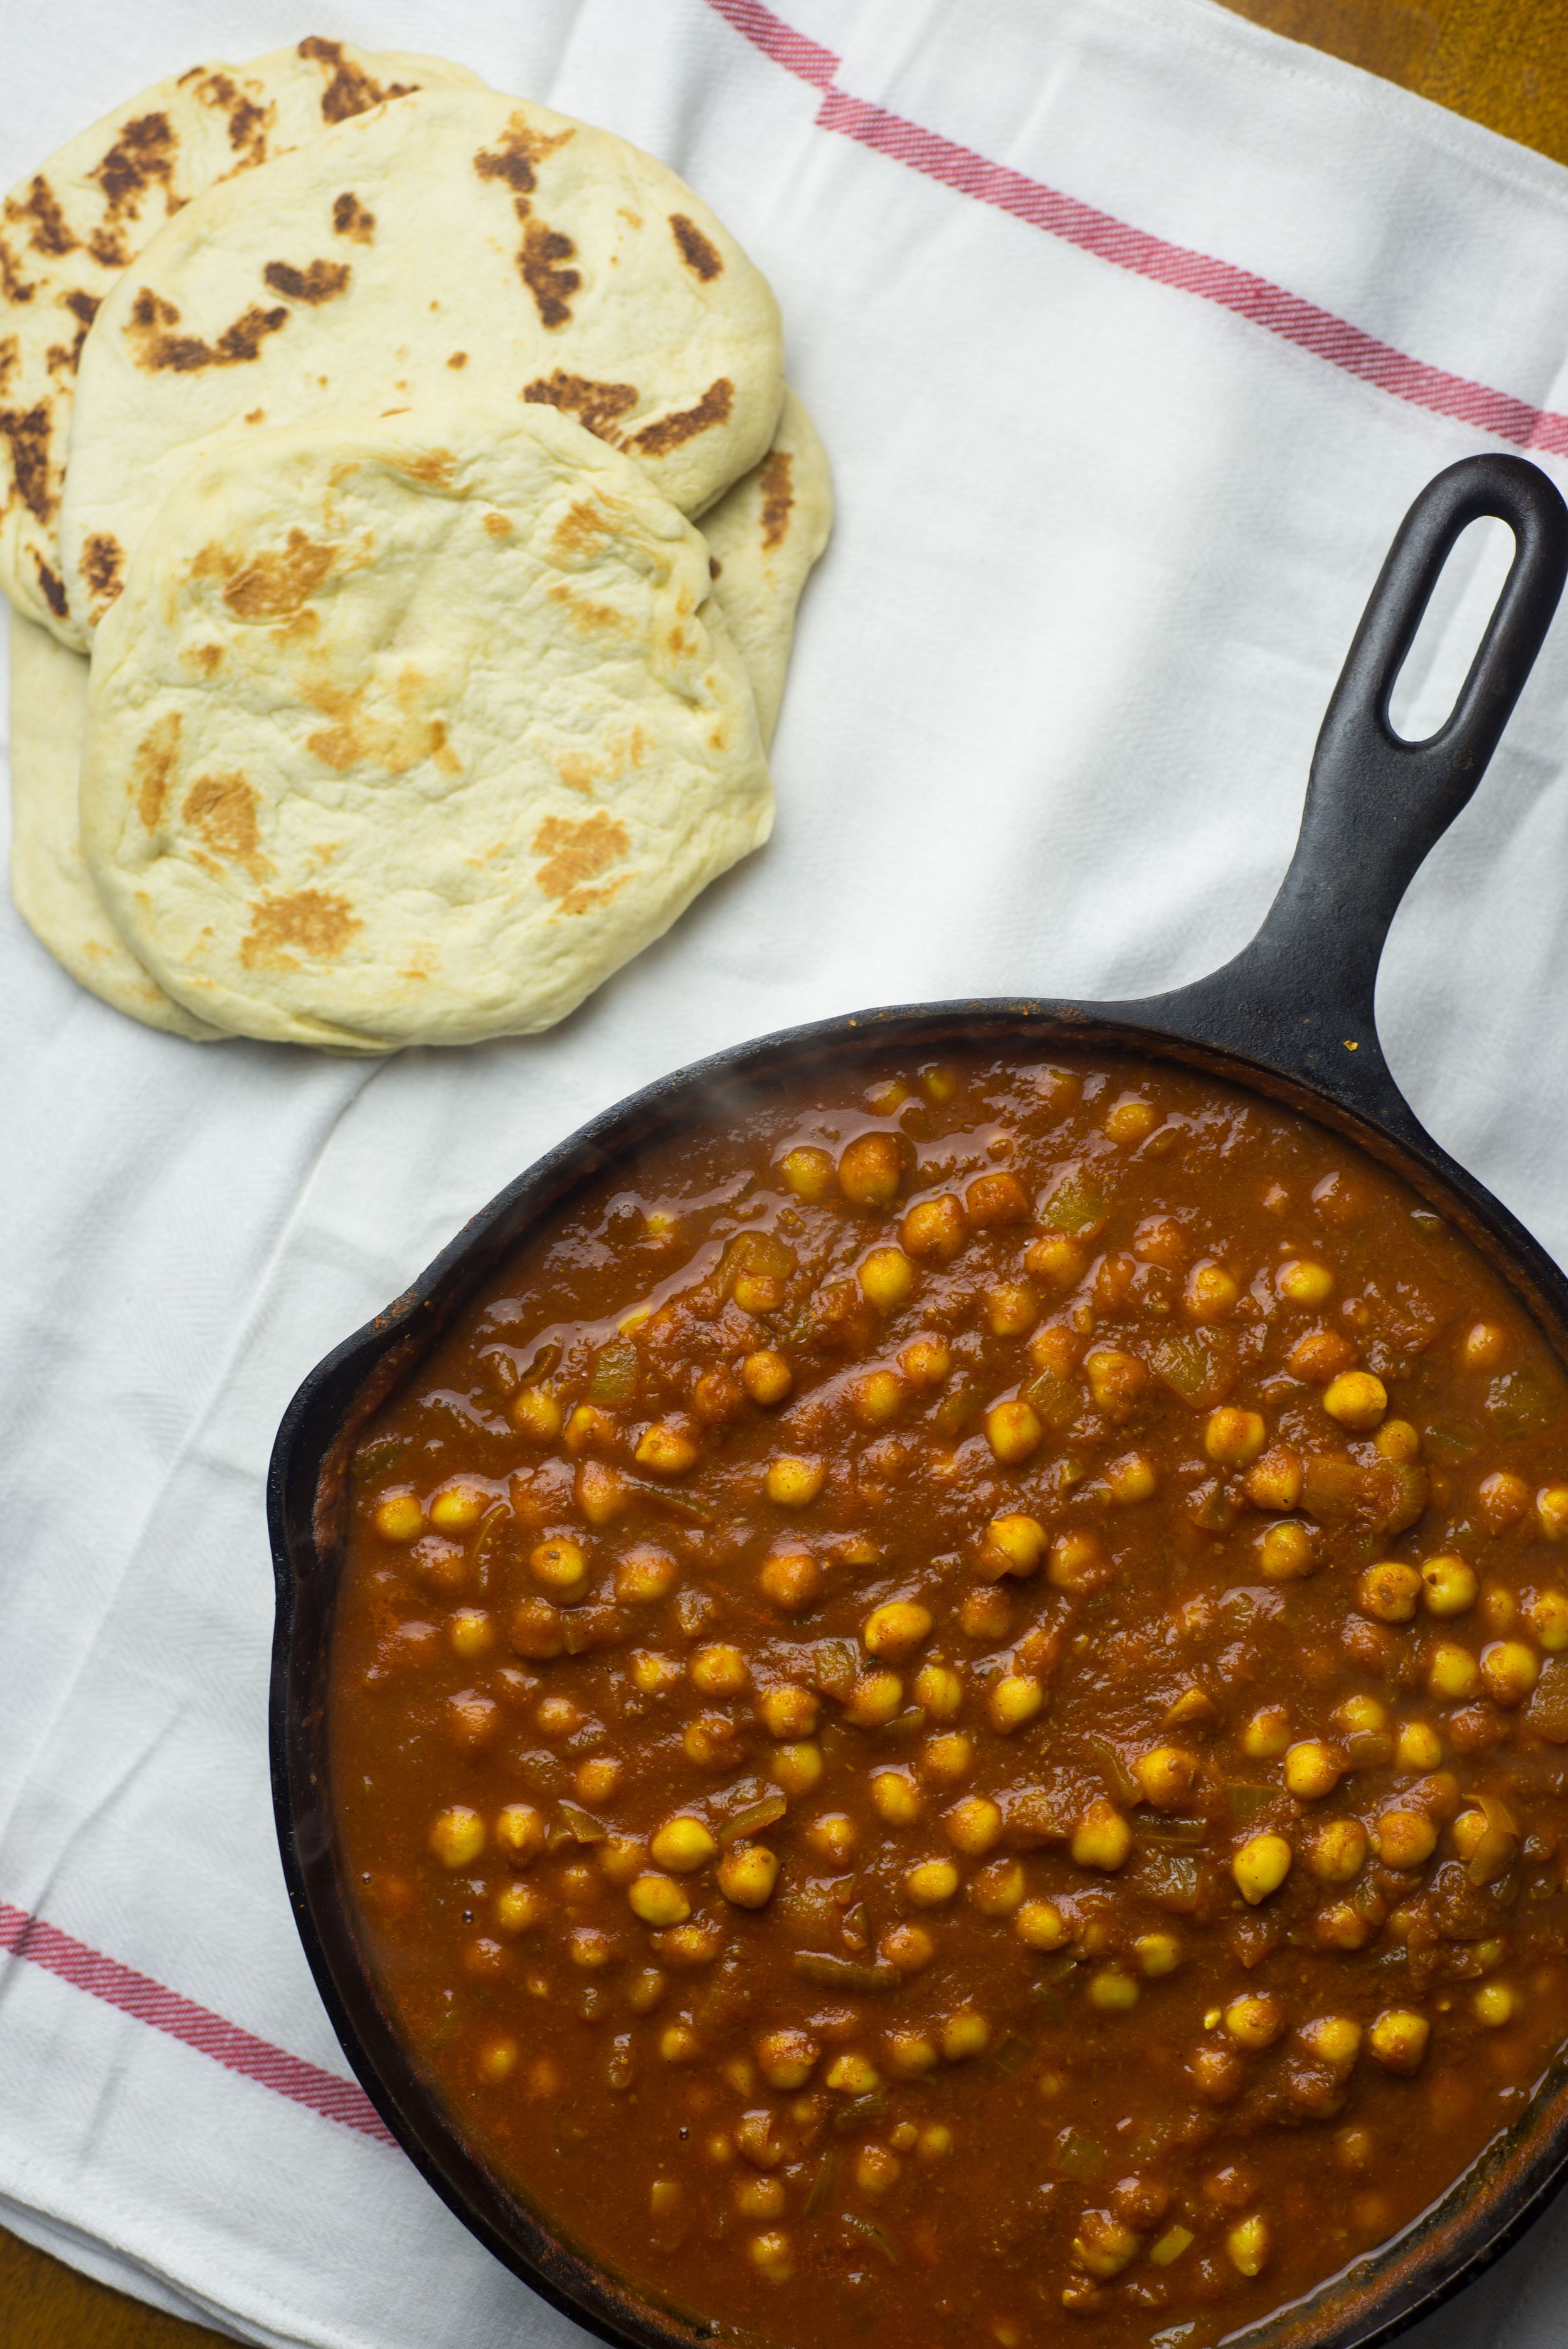
I love making homemade naan to serve alongside my Indian dishes, so I'll be sharing that recipe with you next week! It's a yeasted dough so it does take some time to make, but the hands-on time is relatively little! Rice always makes a great accompaniment as well, and will cook easily in the time it takes to whip this dish together. 

Chana Masala

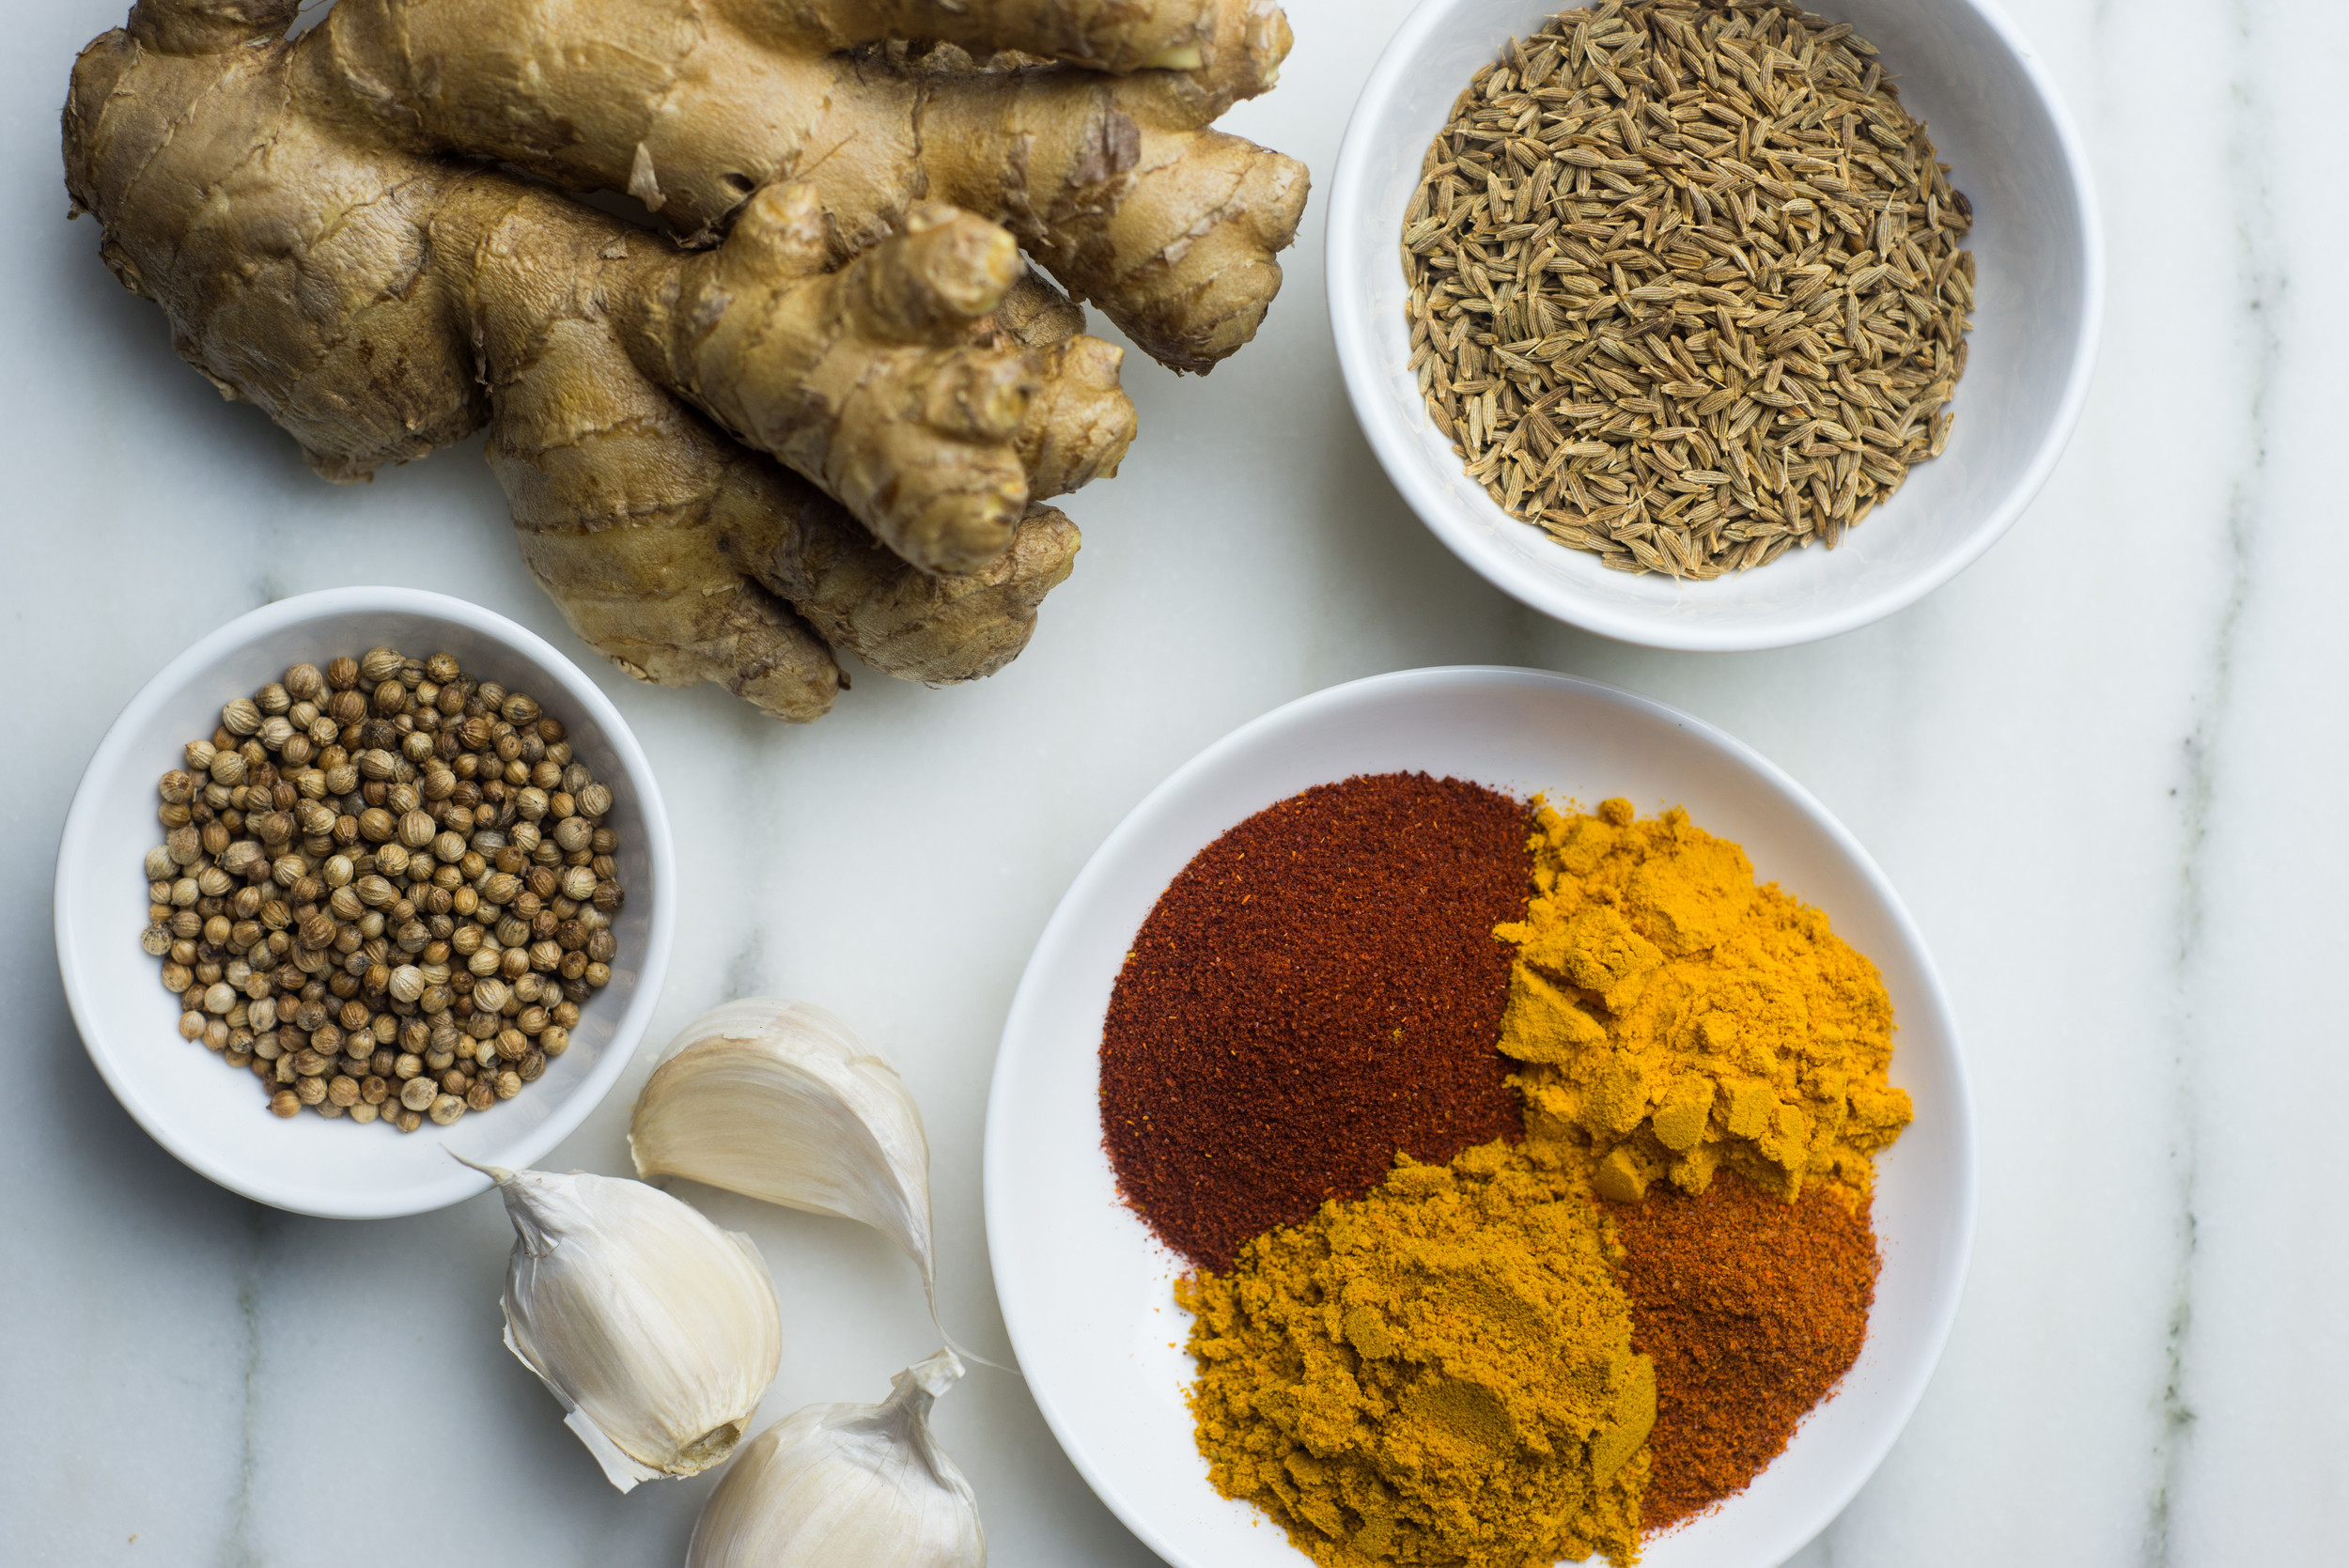
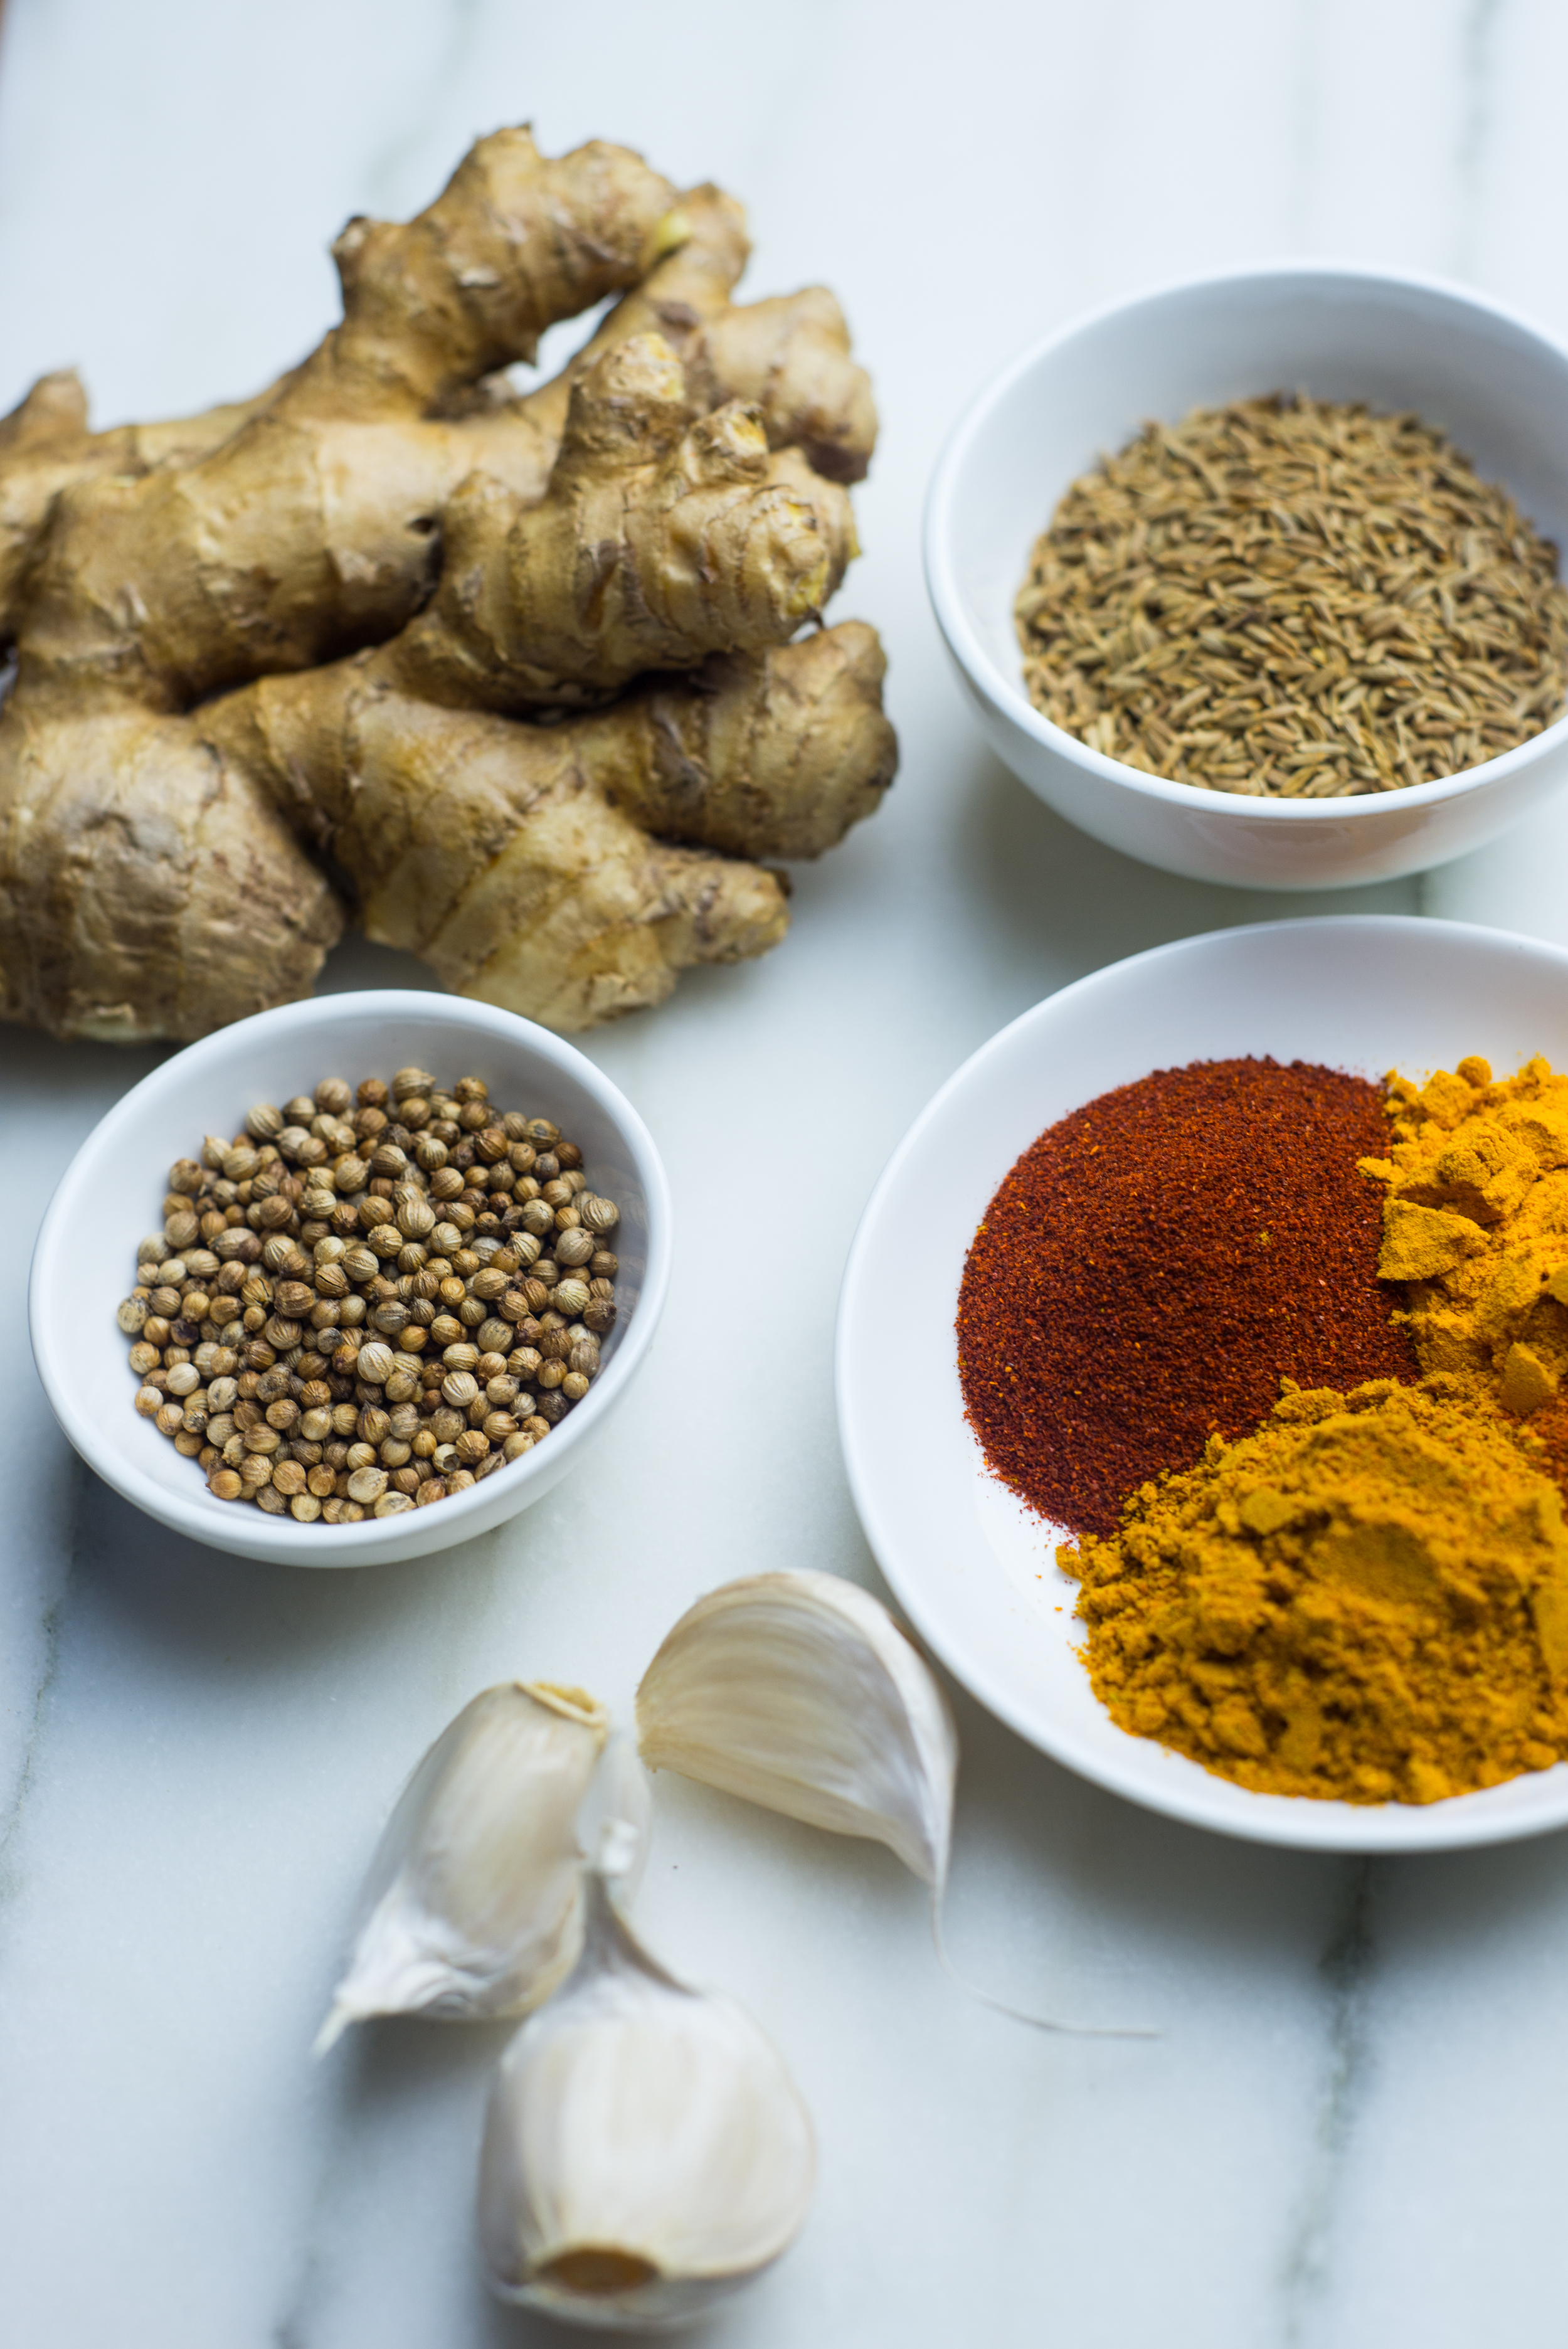
1 Tbsp whole coriander seeds 

2 Tbsp whole cumin seeds 

1/2 tsp cayenne 

1 Tbsp turmeric

1 Tbsp paprika 

1 Tbsp garam masala (or curry powder in a pinch)

2 Tbsp vegetable oil, butter, or ghee 

2 medium onions (or 1 big one!), minced 

3 cloves garlic, minced 

1 Tbsp grated fresh ginger

1 Tbsp amchoor powder, or 2 Tbsp lemon juice

28oz can diced tomatoes (or about 2lbs fresh tomatoes), pureed 

4 cups cooked chickpeas 

  • In a small frying pan over medium-high heat, toast whole coriander and cumin seeds until they become fragrant (a few minutes). Add cayenne, turmeric, paprika, and garam masala and toast for another 30 seconds, or until fragrant. In a clean coffee grinder or mortar and pestle, grind the spices. Set aside. 
  • In a large deep pan over medium heat, heat the oil. Add onions and cook, stirring occasionally, until they are translucent. Add the garlic, and continue to cook until onions have started to turn a golden brown.
  • Add the spices you set aside and stir just until they coat the onions before moving on to the next step. 
  • Add ginger, amchoor or lemon juice, and pureed tomatoes. Simmer mixture for about 10 minutes, until the tomatoes have thickened a bit. 
  • Add chickpeas, and continue cooking for 10-15 more minutes. 
  • Serve with rice or naan! 


Comment

Hazelnut Chia Pudding - two ways!

Comment

Hazelnut Chia Pudding - two ways!

Today I'm excited to share a few of the magical secrets (sort of) of chia seeds! Of all the "superfood" "health craze" foods out there, chia seeds are by far the one I can get behind in the biggest way. They are SO much fun to create dishes with, and packed with omega 3's, which just about everyone could use more of. 

While I love to toss chia seeds into all sorts of dishes, their ability to make this crazy easy pudding is what truly classifies them as magic in my world. I'll include some more notes about how many things you can do with this basic recipe, but for the sake of simplicity today I'm sharing a straight up hazelnut chia pudding as well as one packed with some dark chocolate powder for a nutella-esque yet totally healthy treat. 

Chia seeds' magic comes in the way they interact with liquid when soaked. The outer shell absorbs some of the liquid to create a gel-like texture. So when you mix together enough chia seeds with any liquid, you end up with a pudding-like texture of delicious. All it requires is a minute or two of whisking, and a few hours in the fridge. MAGIC! 

I'll be honest, the first time I stumbled across a reference to chia pudding, I didn't waste much time at all whipping up my first batch... and I was immediately hooked. If chia seeds weren't so darn expensive, I'd probably still be eating chia pudding every morning of the week for breakfast. It's not only totally delicious, but it's so packed with nutrients that it's a great start to the day and keeps you full for hours! 

The best part? This pudding is incredibly flexible, and easy to experiment with. The constant you need to keep an eye on is your balance of chia seeds to liquid, but as long as you maintain that balance - the options are endless! Use any type of dairy/nut-milk you want, or coconut milk! Mix in some pureed fruit to make a fruity version, change up the sweetener or sweetness level, add whatever flavor you like! Or... pack that pudding full of chocolate for a totally healthy dessert : ) 

For the sake of these photos, I kept things simple... but this pudding can also be topped with anything you like. I love having it for breakfast with a little granola and fruit sprinkled on top! 

This chia pudding will be on the thick side, and can easily be made thinner by decreasing the amount of chia seeds added to the mixture! 

Hazelnut Chia Pudding

2 cups hazelnut milk 

2/3 cup chia seeds 

4 tsp vanilla 

1/4 cup maple syrup 

1/4 cup cocoa powder (optional, for chocolate version) 

  • Combine all ingredients in bowl or jar, and whisk together for about a minute until the chia seeds remain suspended in the liquid. 
  • Refrigerate for a few hours, or overnight, until a pudding texture has formed. 
  • Enjoy! 

Hazelnut Milk 

1 cup hazelnuts 

2 cups water 

  • Optionally soak hazelnuts over night or for a few hours in water. This allows for a better extraction of all that hazelnutty goodness, but the milk can be made just as easily without this step! 
  • In a blender, blend the nuts and water together (use the soaking water if you soaked the nuts!) on high power for about a minute. You want the nuts to be very broken down and the liquid to look super milky! 
  • Using a nut milk bag, cheese cloth, or a fine mesh sieve, strain the milk into a container. Be sure to squeeze all the liquid you can out of the nuts! 
  • Store any extra nut milk in the fridge for later use! 

Comment

Chocolate Quinoa Bars with ginger

2 Comments

Chocolate Quinoa Bars with ginger

Have we talked about my sweet tooth? With nothing more than a quick glance over my posts, coming to the conclusion that I have a serious sweet tooth wouldn't be a challenge. My love for sugar is a serious part of who I am, and what I love to do in the kitchen. While cooking never fails to excite me, I'd be hard pressed to find something that brings me more joy than whipping up something sweet - no matter how simple or complex the recipe might be. A little piece of how Toot Sweet got it's name! 

I am a full on sugar-fiend and I'm not afraid to admit it. I even wrote a jingle about it, and it's sung frequently around our house - often while snacking on something sweet, of course! 

These bars, of course, still fit into that category - but there is something different here. There is also a hearty dose of health in these babies! I've been thinking a lot about how I can please that sugar tooth of mine, while also doing some work to better my diet this year. How can I (and you!) manage to eat less processed sugar and more whole grains without feeling like my cravings are satisfied? So when I saw the inspiration for this recipe, I knew I had found something magical! 

(of course, this tall glass of Monday afternoon iced coffee helped launch me quickly into the kitchen)

Caramelized honey binds together a whole slew of nuts and seeds packed with protein, nutrition, and healthy omega 3's - quinoa, hemp seeds, chia seeds, almonds, and walnuts. Then it's all topped with a nice layer of dark chocolate, chunks of crystalized ginger, cacao nibs, and vanilla flake salt. It makes for a perfect crunchy, chocolatey, just sweet enough treat that could pass just as well as a dessert or as a mid afternoon snack. 

Now, it wouldn't be right to take any sort of credit for these beauties. The real genius is Tieghan over at Half Baked Harvest, and this recipe differs only slightly from her Superfood Chocolate Quinoa Bark

Chocolate Quinoa Bars 

1 cup quinoa

1/2 cup honey 

2 Tbsp coconut oil 

2 tsp vanilla  

1/2 cup almonds, chopped 

1/2 cup walnuts, chopped 

1/4 cup hemp seeds 

1/4 cup chia seeds 

12 ounces dark chocolate 

1/4 cup crystalized ginger, finely chopped 

flake salt & cacao nibs to sprinkle on top (optional) 

  • Rinse quinoa under cold water. Place a few paper towels on a sheet pan or cutting board, then spread the quinoa over the top and let dry for about 5 minutes. 
  • Combine honey and coconut oil in a medium saucepan placed over medium heat. Stir as the mixture warms, until the two combine easily. Remove from heat. 
  • Add vanilla, quinoa, nuts, and seeds to the honey mixture and stir until everything is evenly coated. 
  • Cover 1-2 baking pans with parchment paper, and spread the mixture in a thin layer over the parchment. You'll want to use one large sized pan, or two if your pans are smaller. This is also a preference thing! Spread the mixture in a thinner layer, and you'll have a thinner, crisper bar. Spread it thicker and they'll be more like mine - and a little softer. 
  • Bake at 350 for 20-40 minutes (depending how thin it is). You want it to be a dark golden brown, and for the quinoa to look caramelized. 
  • While the base start to cool, melt the chocolate in a double boiler or in the microwave (stirring ever 30 seconds at the least). When it's smoothly melted, spread the chocolate over the base in an even layer, getting it as close to the edges as you can. Sprinkle with crystalized ginger, cacao nibs, and flake salt. 
  • Place the pan into the fridge and let the chocolate set for about 30 minutes.
  • Carefully transfer it onto a cutting board, and cut into squares. Layer into an airtight container with parchment, and store in the refrigerator. 

2 Comments