Viewing entries in
dessert

Dreamy Chocolate Swiss Buttercream

Comment

Dreamy Chocolate Swiss Buttercream

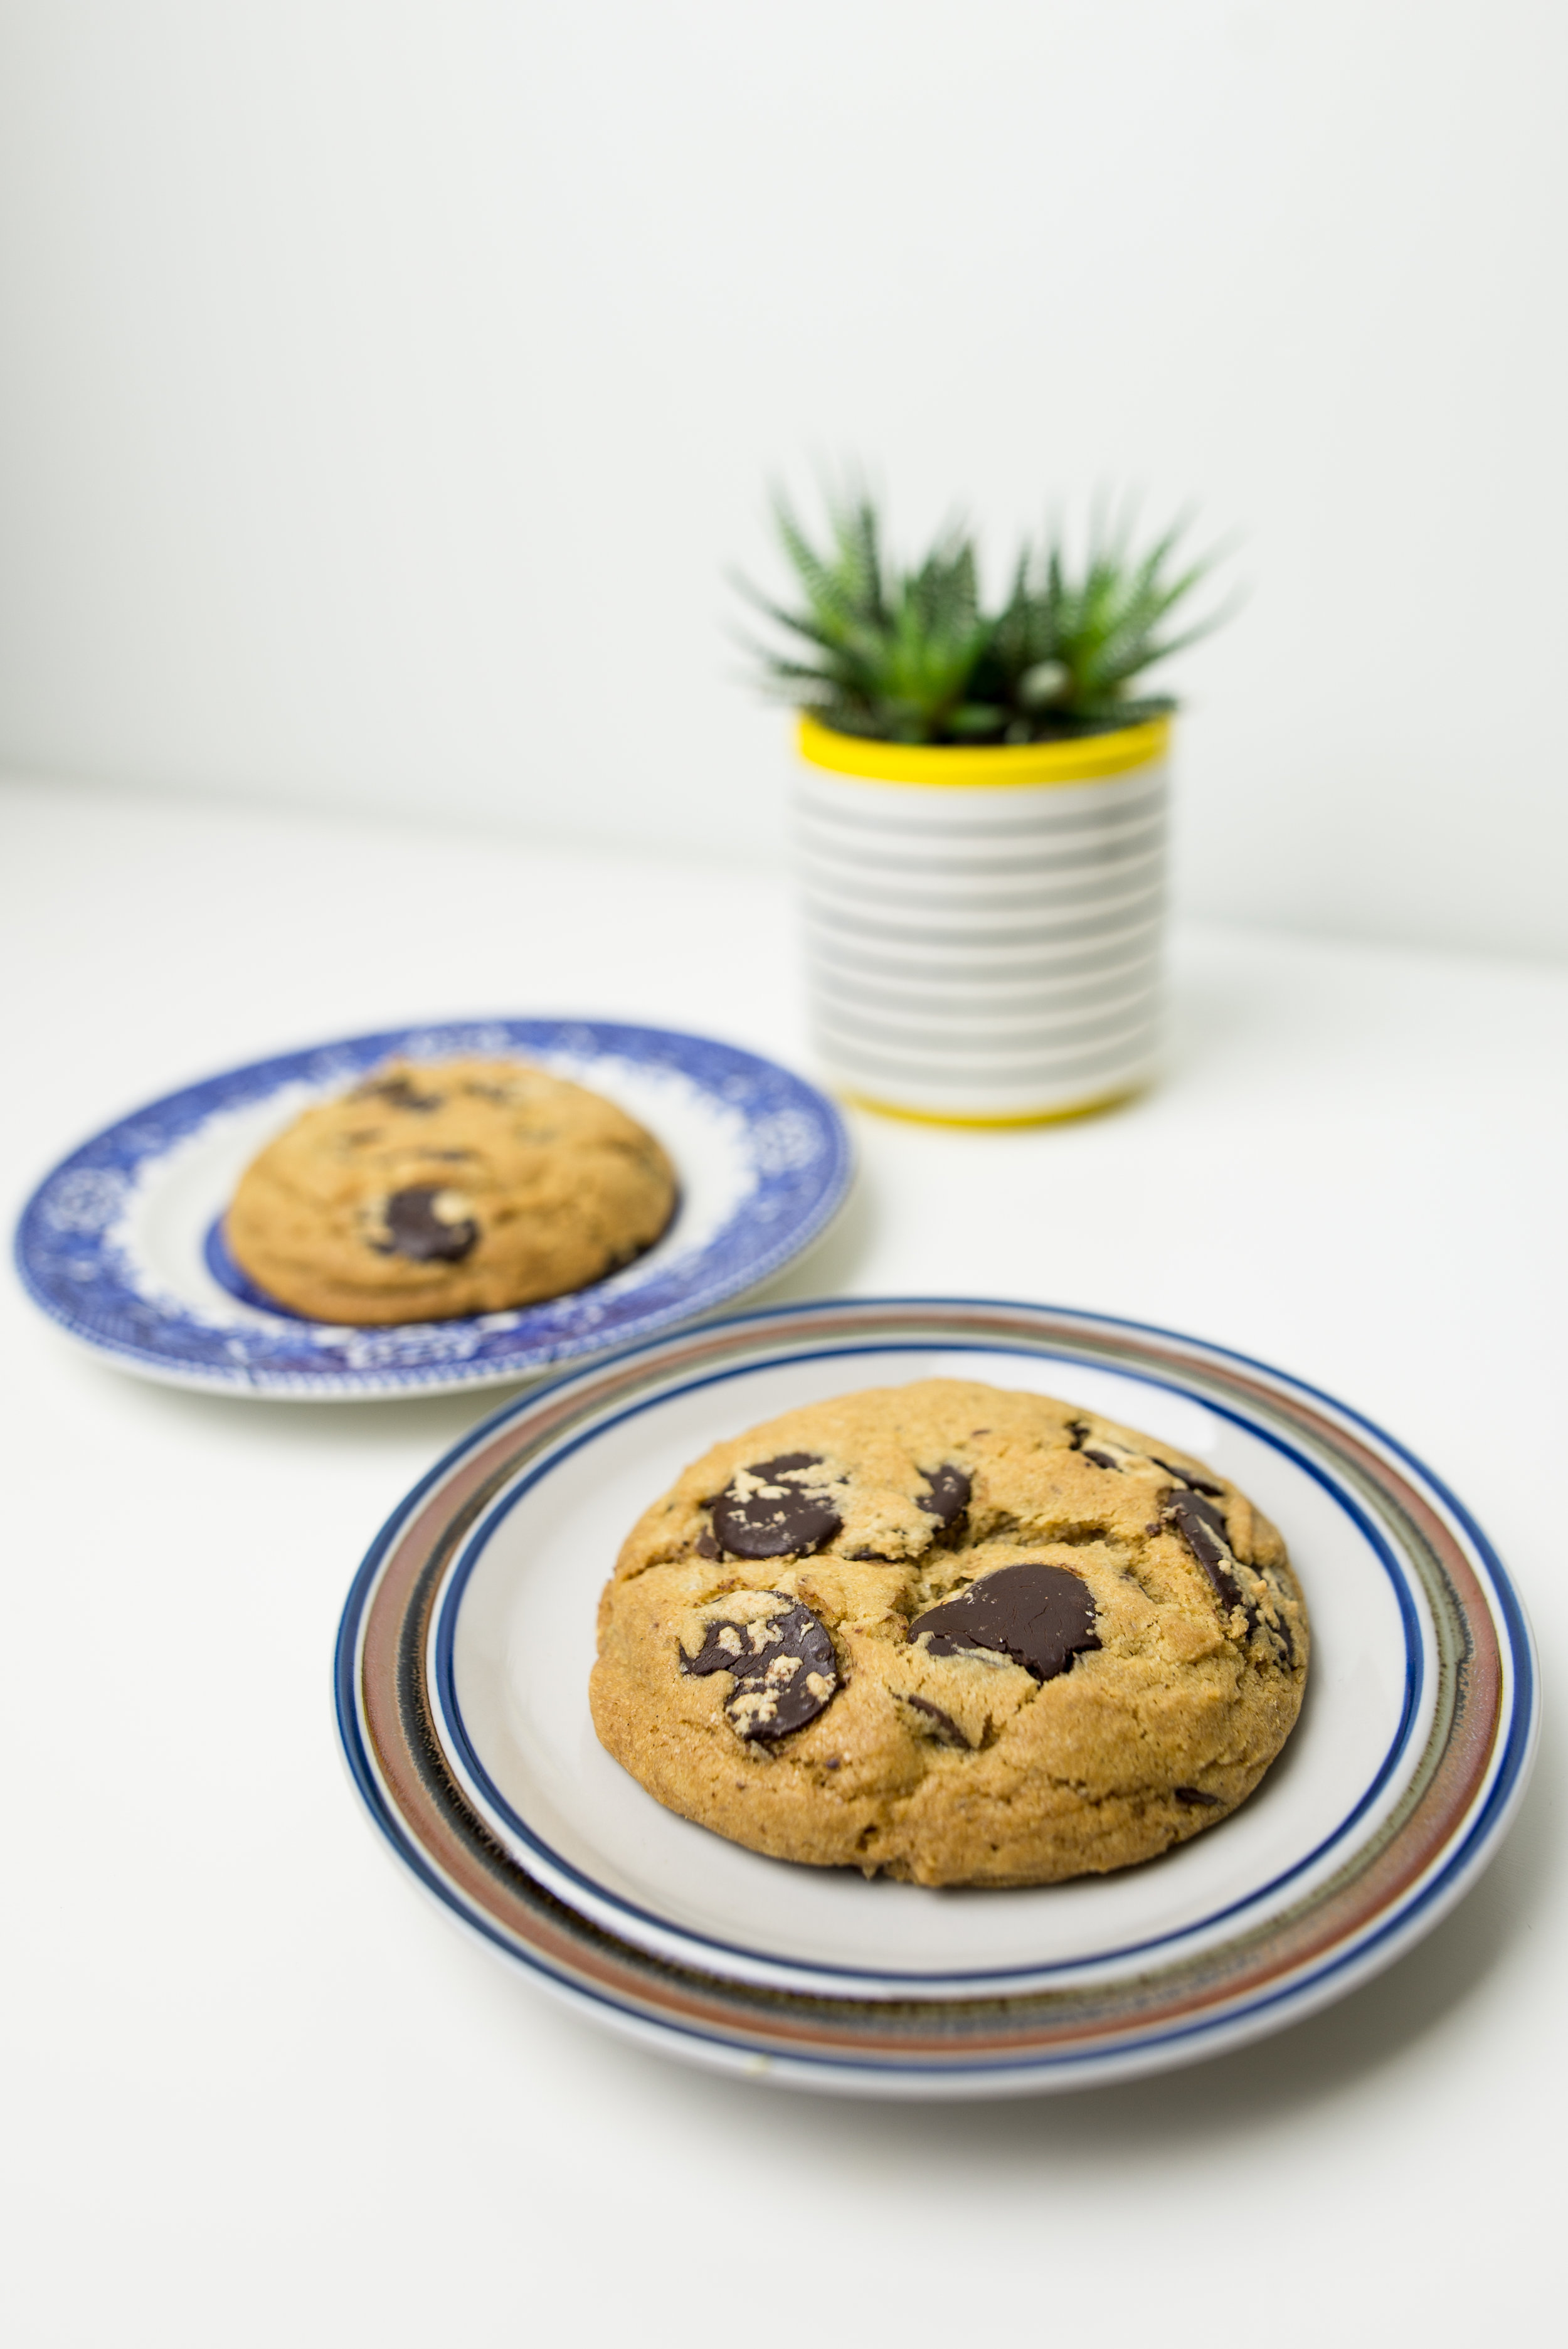
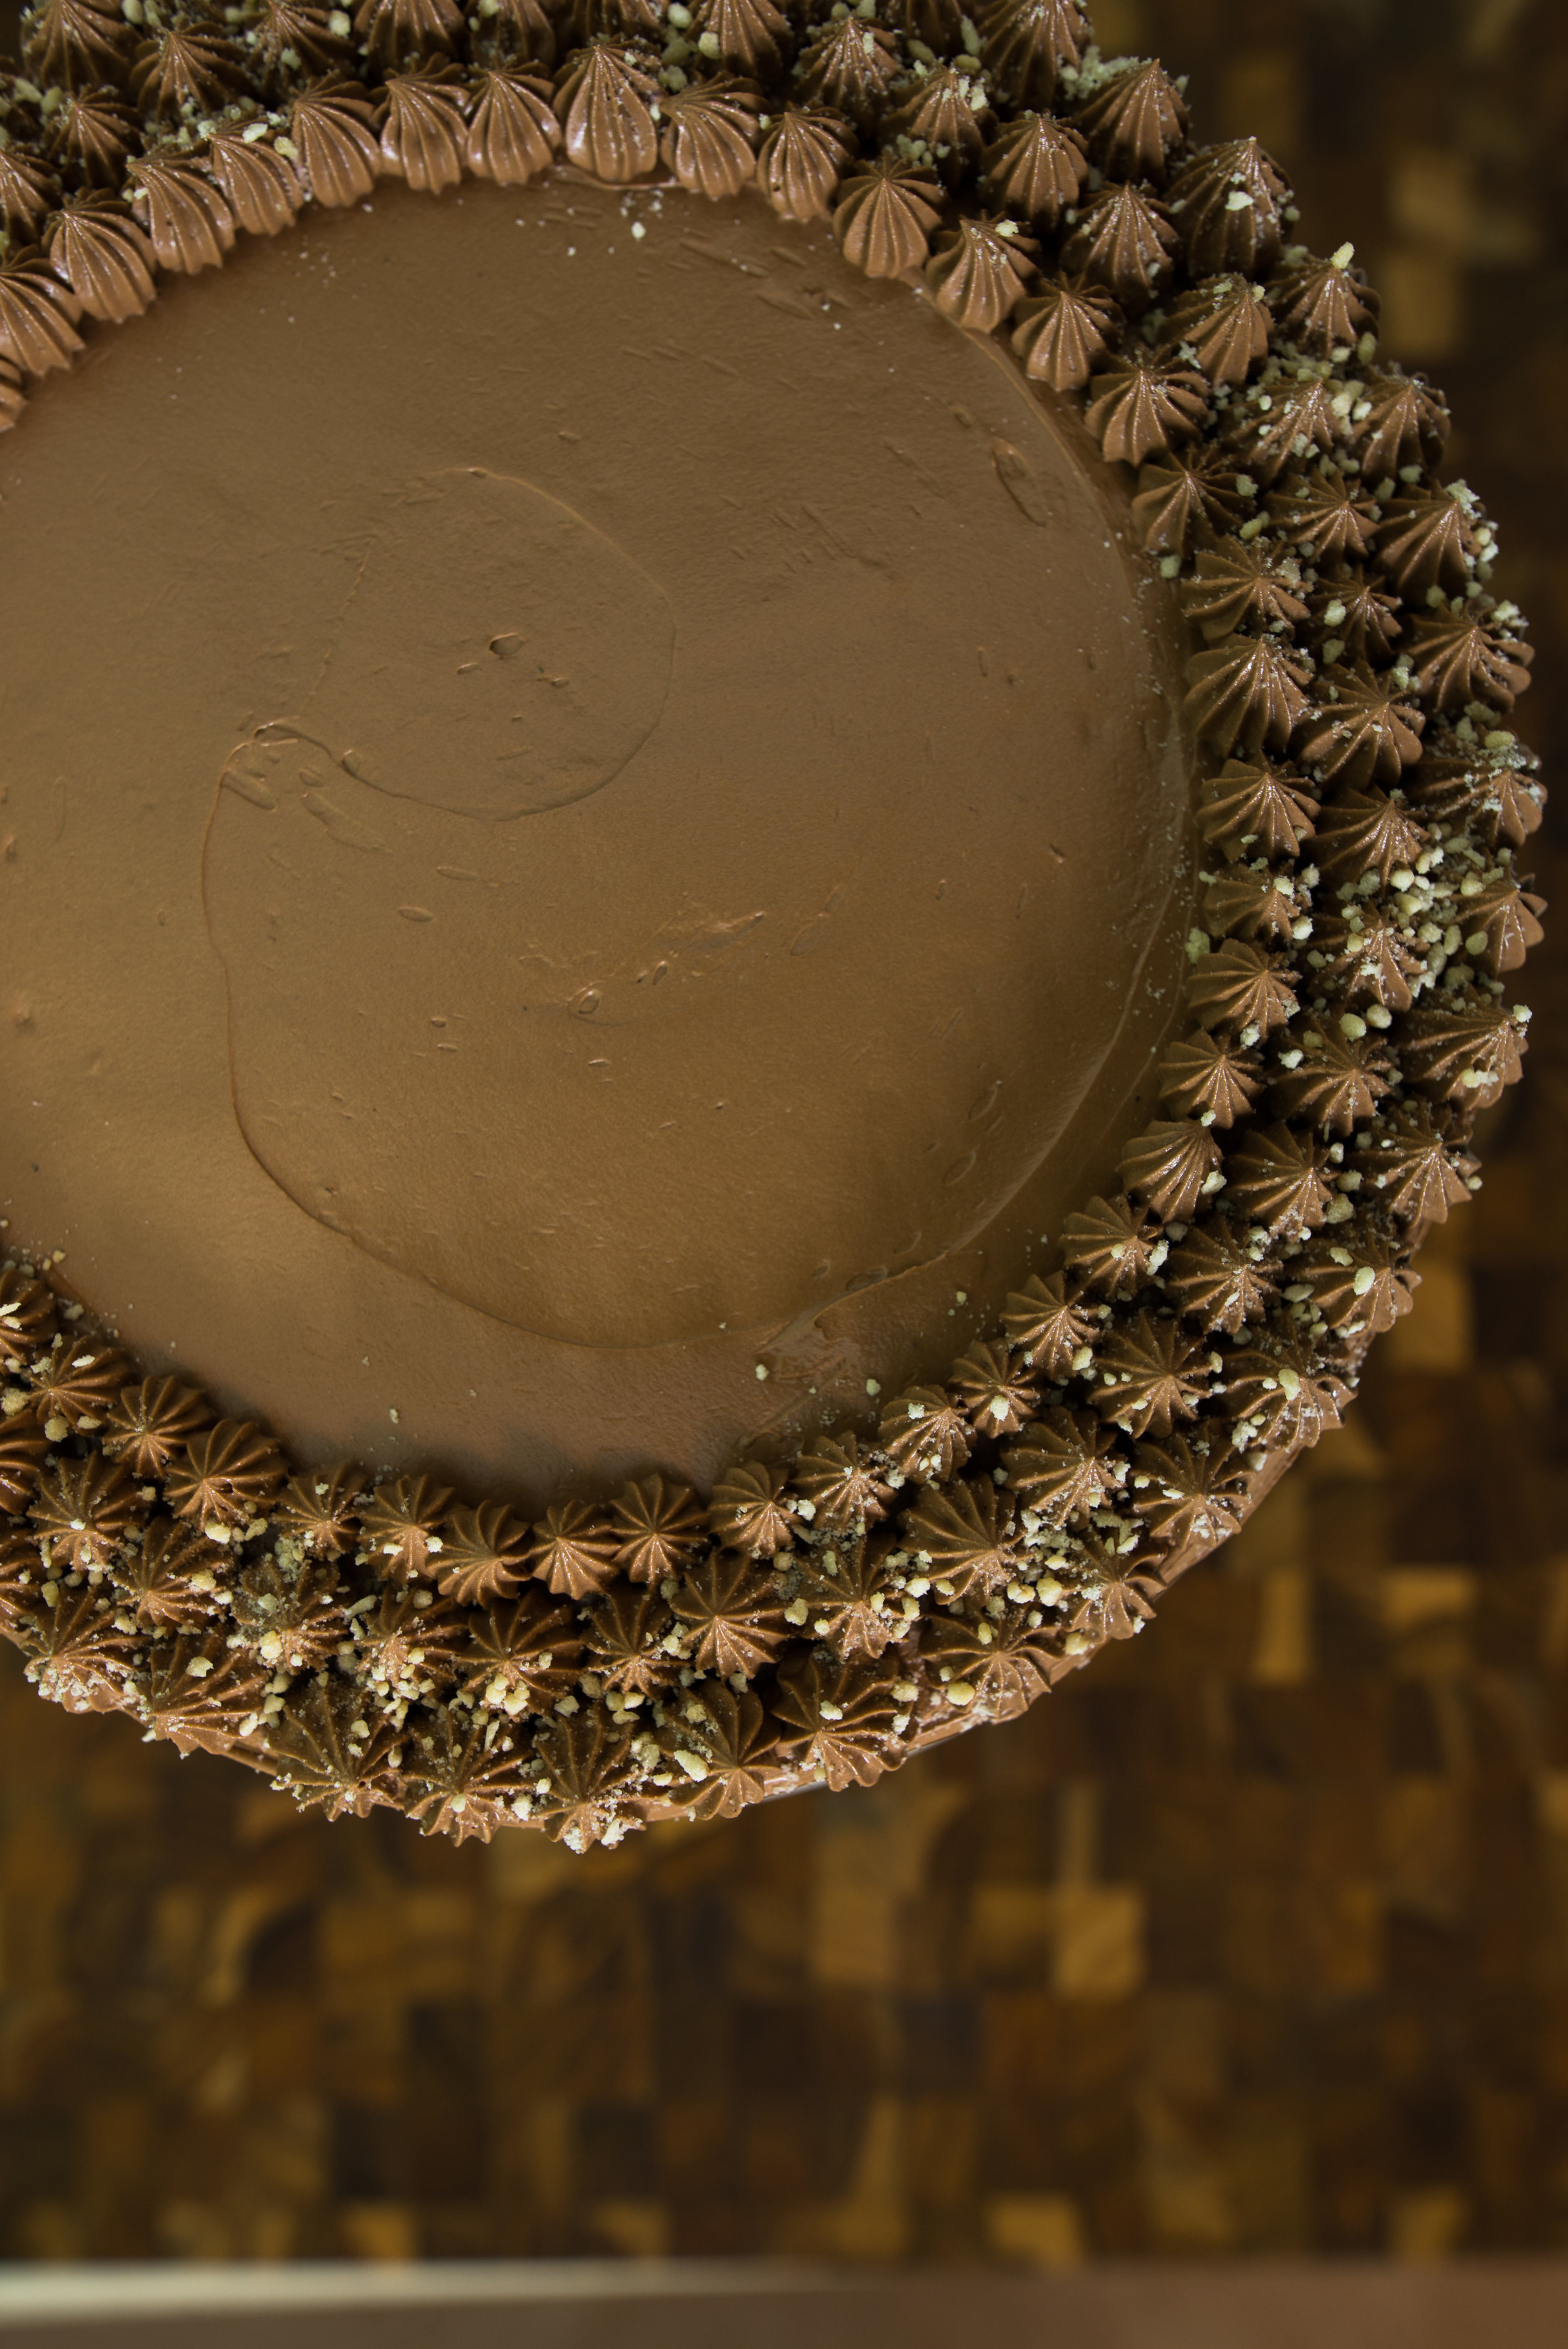
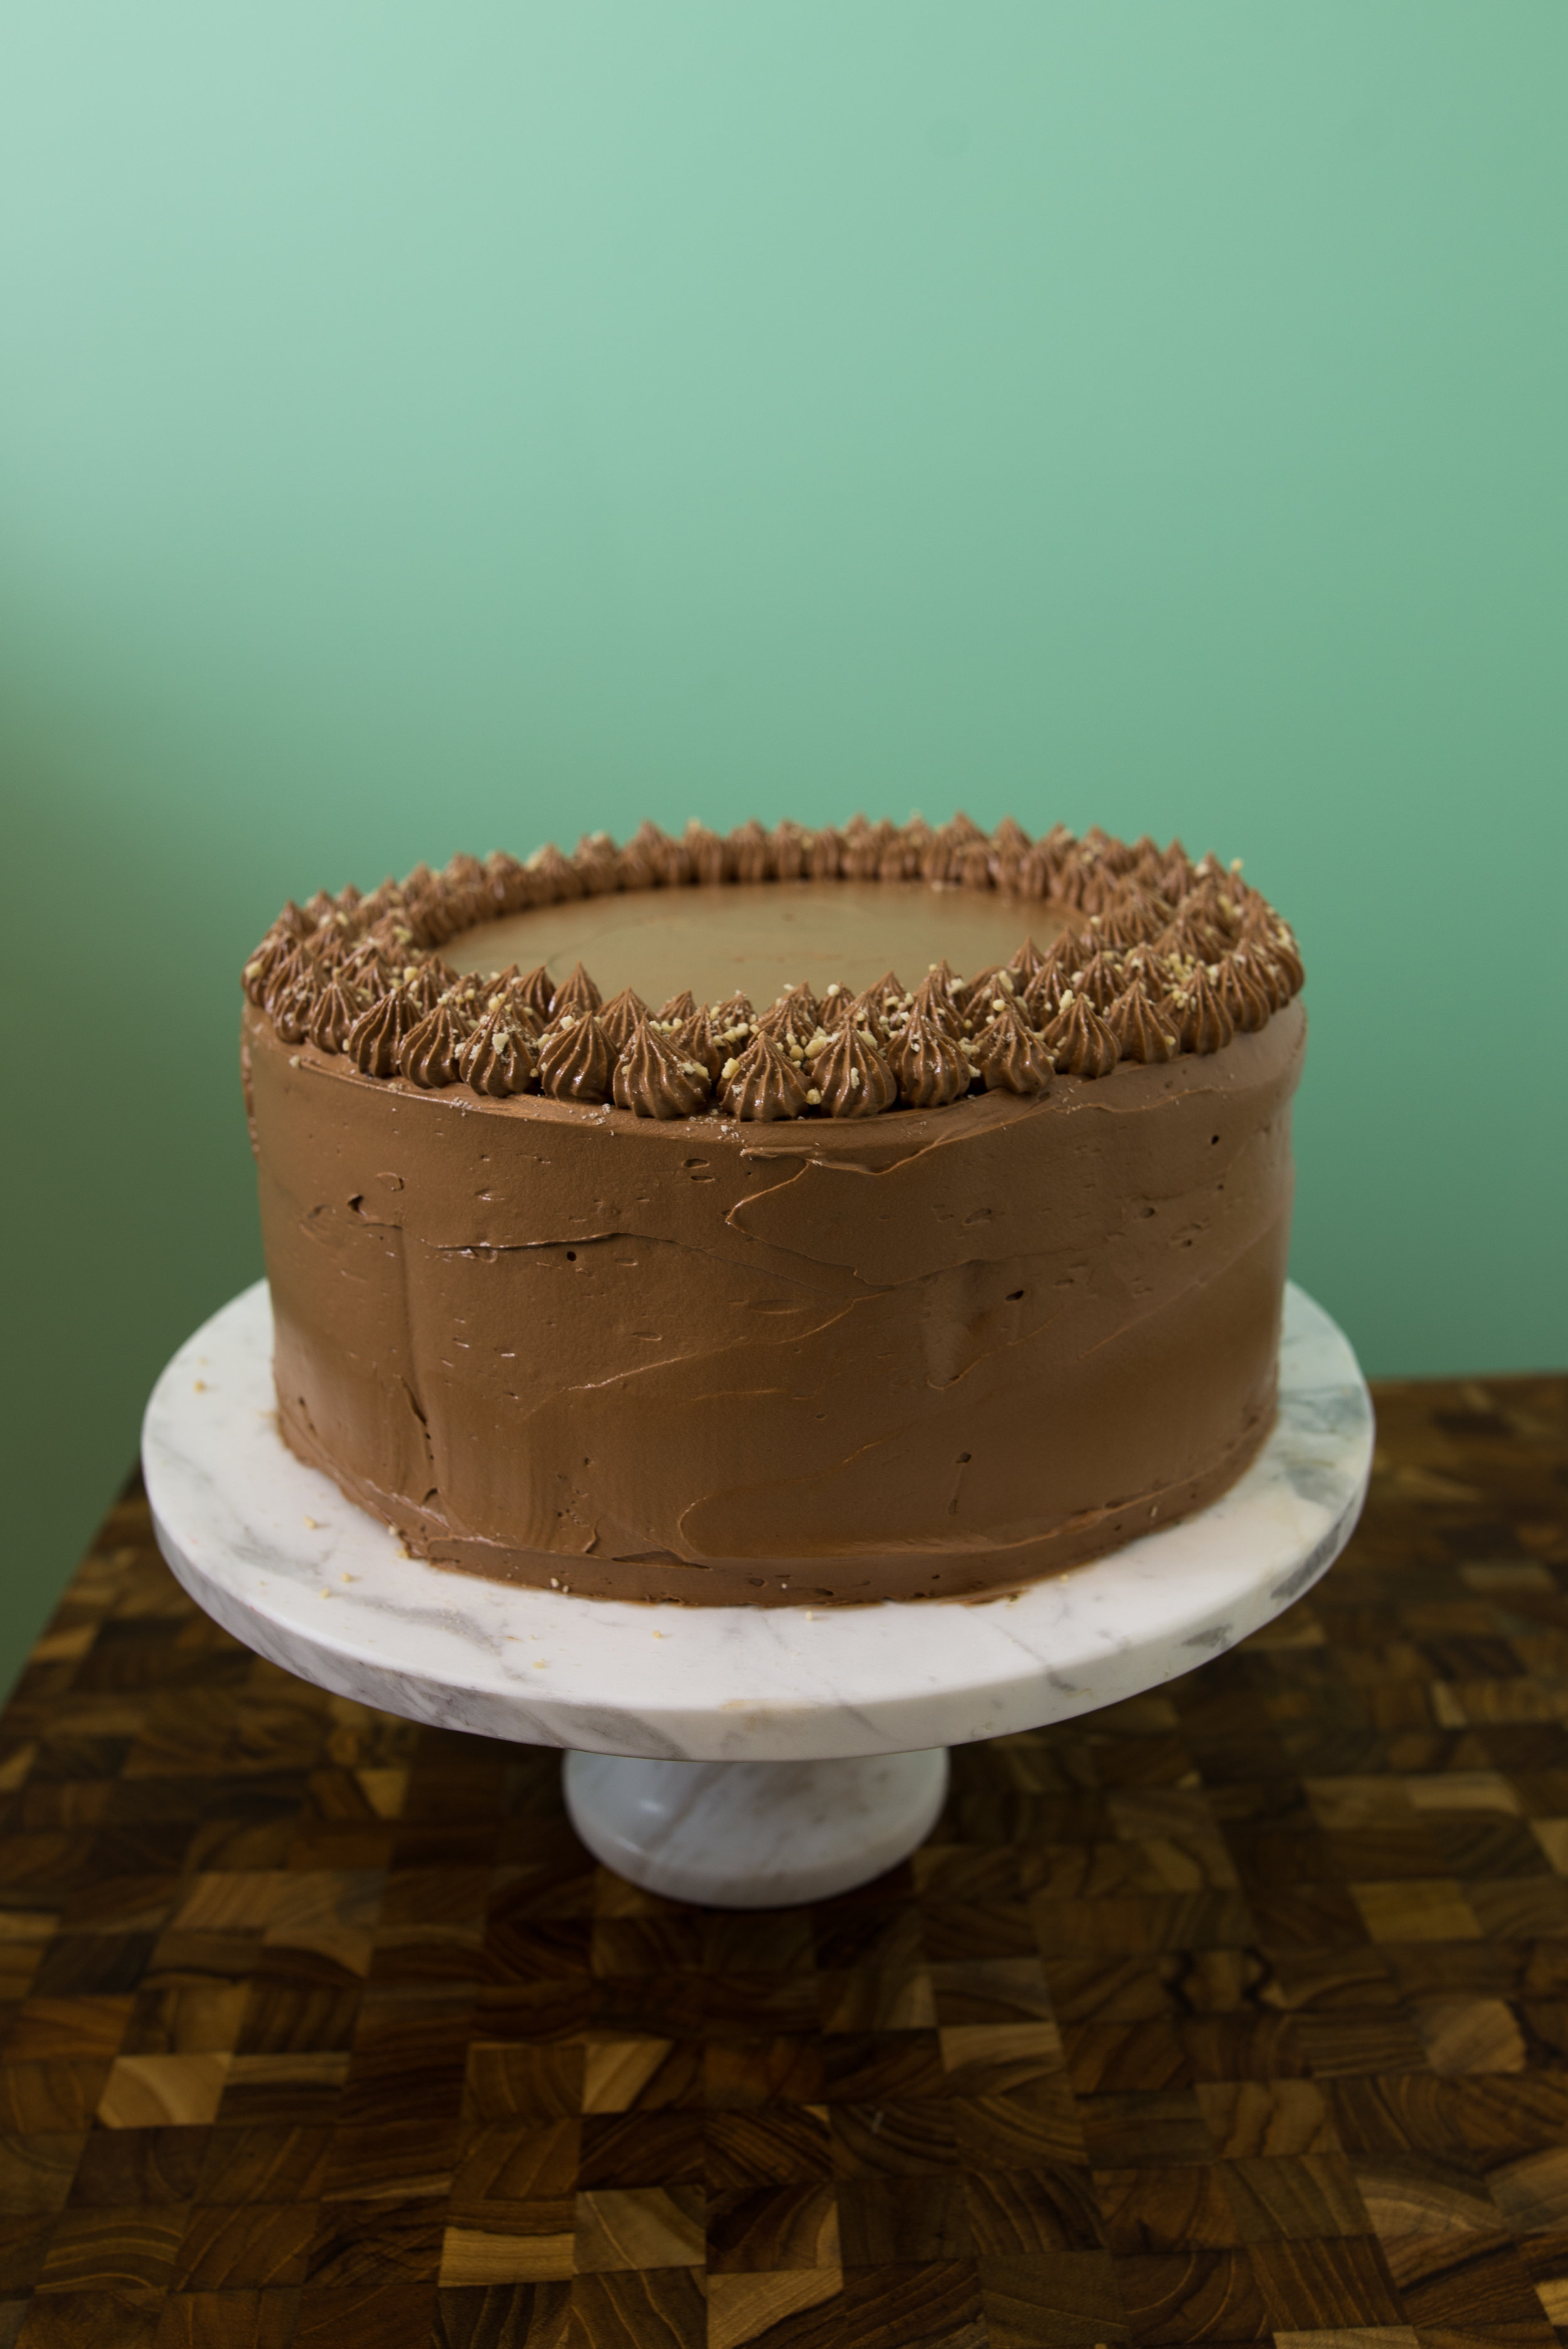
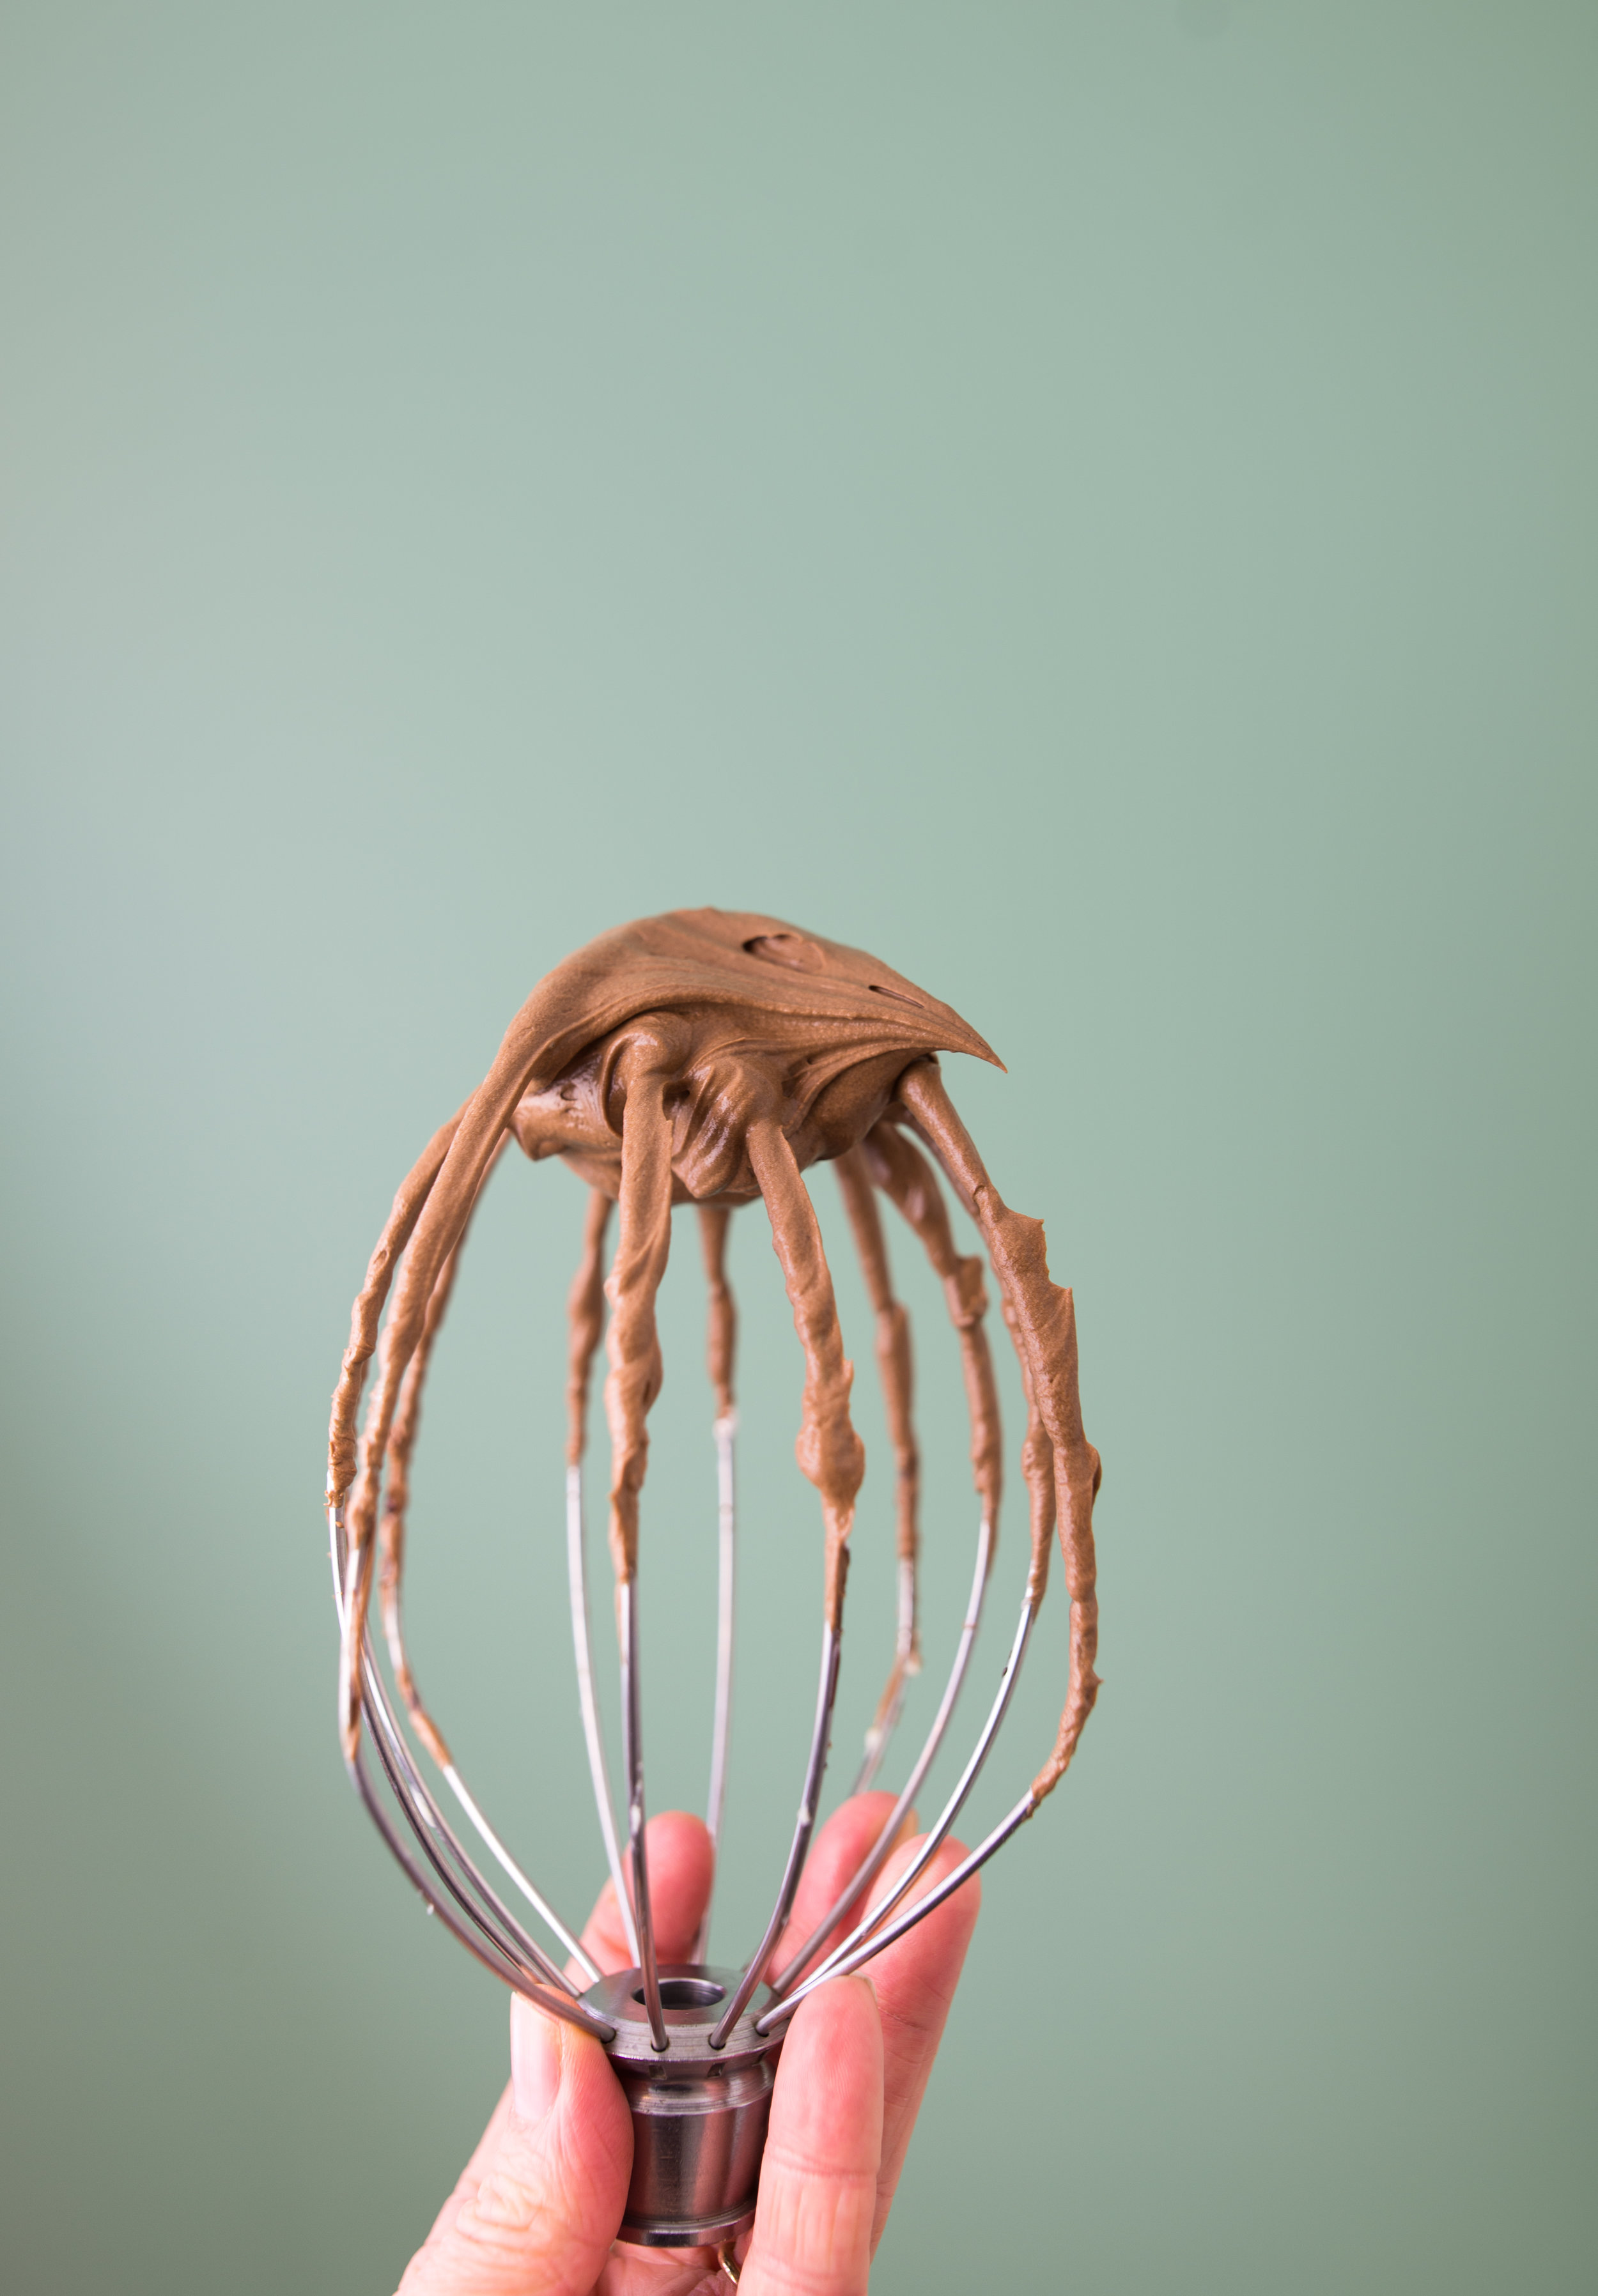
Aside from a rich and dense ganache, this is the only chocolate frosting you'll ever need - it's light and airy yet rich and full of flavor. A perfectly balanced topping for cakes, cupcakes, and anything else you can dream up (aka by the spoonful and smeared on toast for breakfast if there's extra). 

It's been in my toolkit for a while now and I'm finally ready and willing to share it with the world. The secret? I'm a huge believer in the Swiss meringue variety of buttercreams. By starting with a base of whipped egg white and sugar, this frosting is able to maintain an incredible consistency for frosting and piping without being cloyingly sweet like it's cousin the American buttercream. 

Egg white based buttercreams may seem picky and troublesome to the uninitiated, but I promise it isn't that hard and once you have it down you'll never go back. 

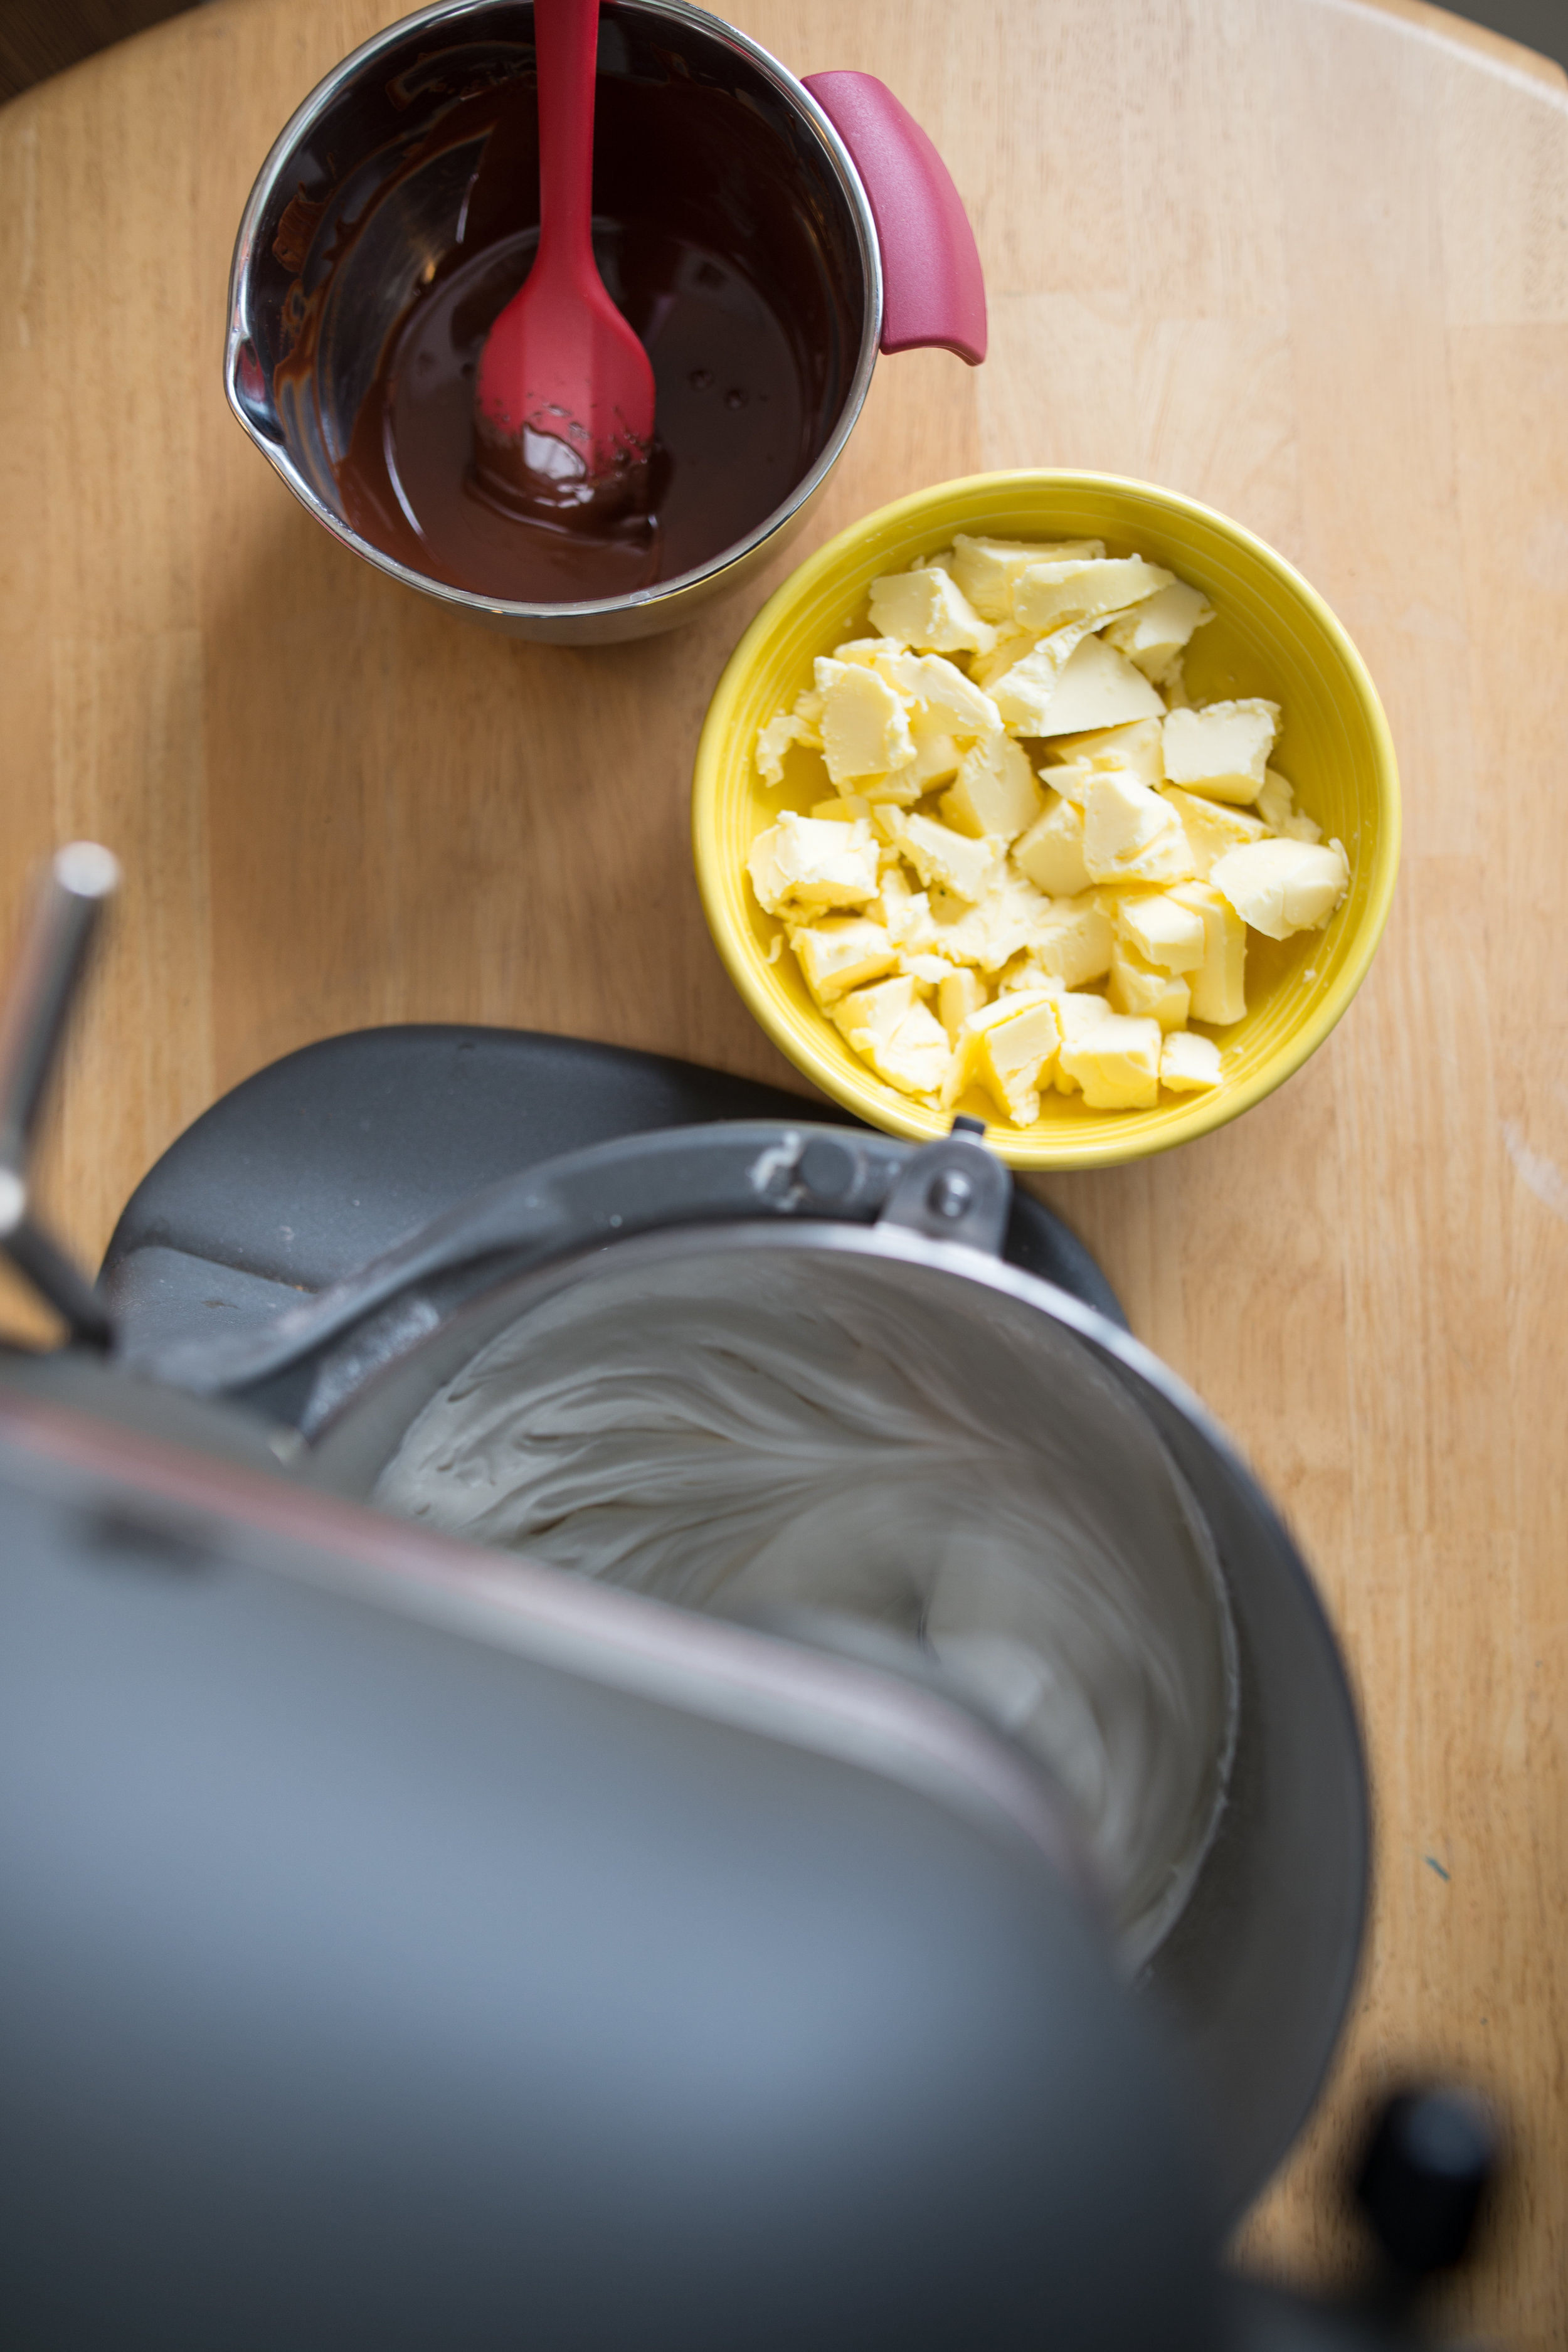
The process starts by dissolving sugar in egg whites using a double boiler, then moving directly to the stand mixer. We whip the egg whites to stiff peaks, make sure they've cooled to room temperature, then slowly mix in the butter and finally some melted chocolate. 

DSC_8364.jpg

This recipe is simple, with few ingredients, so the quality of the ingredients is what really takes this frosting over the top. Am I a broken record yet? It's always the quality of the ingredients that take a recipe to the next level. Spoiler alert -- it always will be! 

I recommend using fresh local pastured eggs, grass-fed butter and some seriously amazing chocolate. I've made this recipe with chocolate in the range from 64% to 81% with success every time. My decision is usually based on how I'll be using the frosting (or what I have in the cupboard...). 

DSC_8375.jpg

My go-to for baking is always discs from Conexion Chocolate, a woman-owned Ecuadorian chocolate company that is making some of the best chocolate I've had right in Ecuador using beans from that country. Tasting their line brings you through an incredible array of flavors brought to life from the soils of the farms, the climates of the regions throughout Ecuador and the experts making the chocolate. 

This chocolate is available in northern Michigan through the amazing folks at Grocer's Daughter Chocolate, the sweetest little chocolate shop making the most amazing truffles, bars and more in the gorgeous town of Empire. 

DSC_7406.jpg

I hate singing my own praises, but you guys - this frosting is insane. 

Totally insane. 

Every time I make Swiss meringue buttercream at least 3 people tell me they don't like frosting but they love this frosting. Because, of course - it isn't too sweet or too buttery, it's light and fluffy and flavorful. 

This last batch? Someone told me it made them weak in the knees. 

Just make it. You won't be sorry! 

DSC_7402.jpg

Dreamy Chocolate Swiss Buttercream 

Notes: This recipe makes enough to frost a 2 layer 9" cake. Temperature is the most important thing in making this frosting. If the chocolate is added while it's still too warm, chill the mixture a little before the final whip. 

7 egg whites 

13oz sugar 

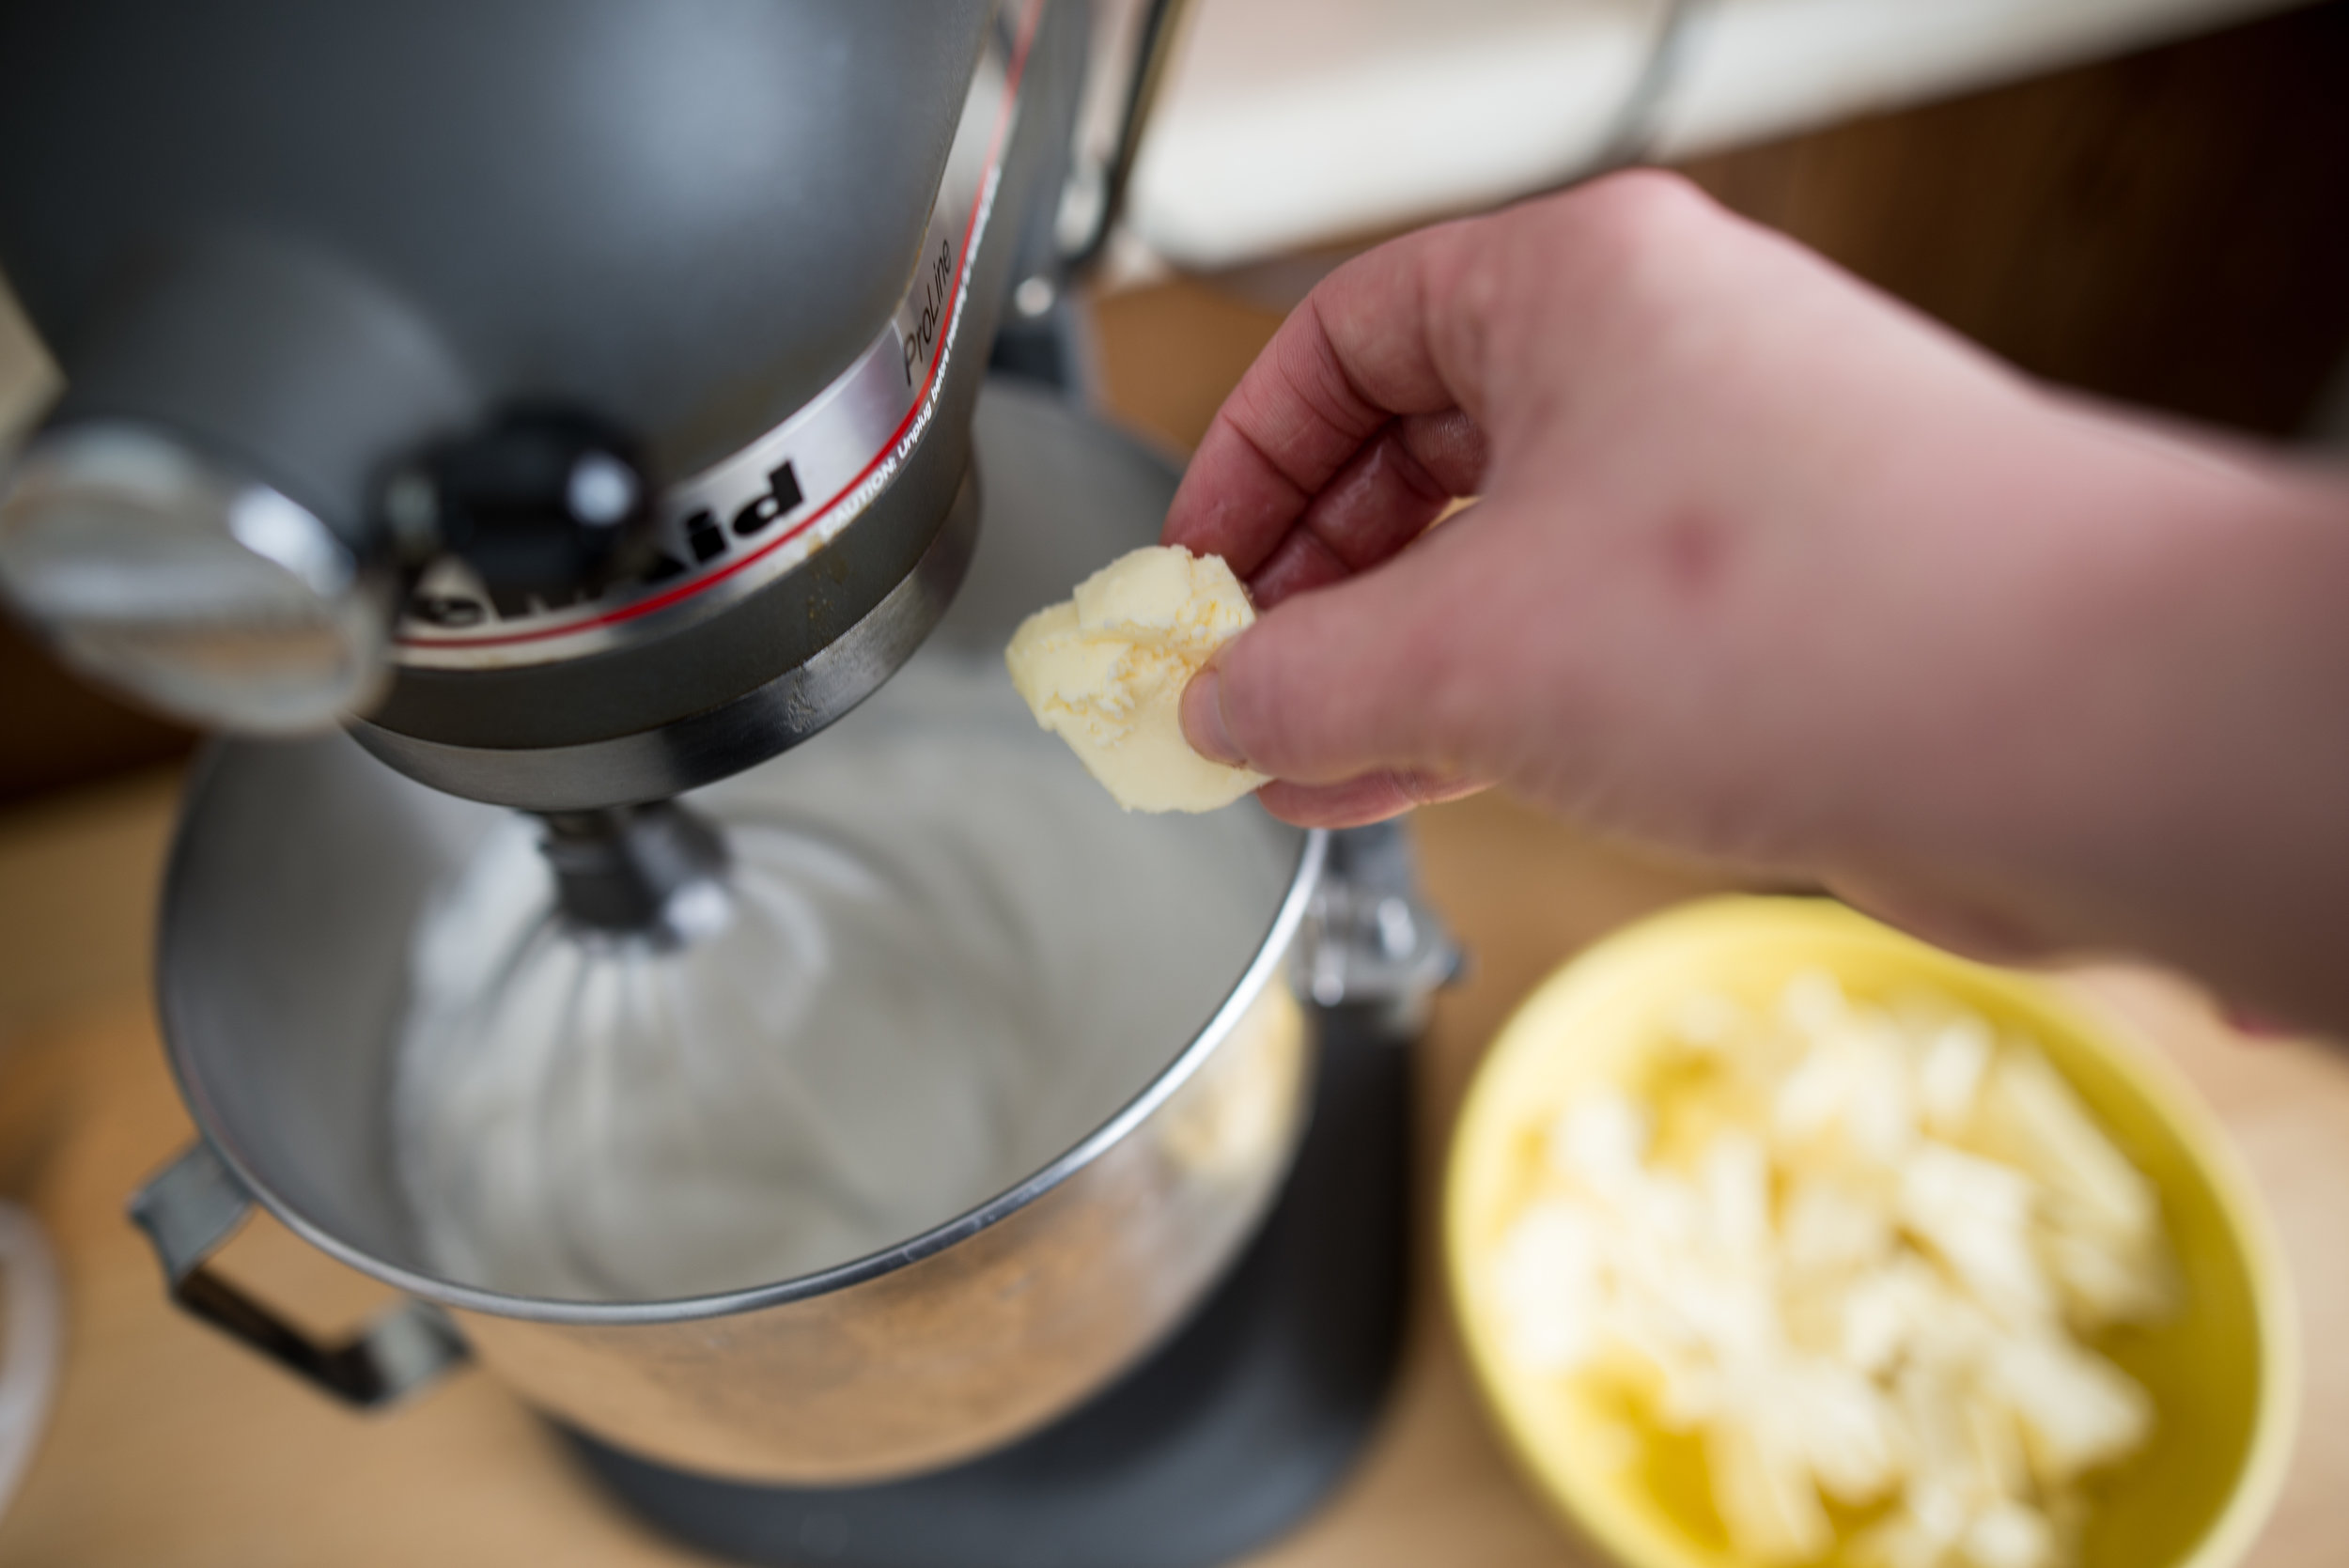
16.5oz butter, softened and cubed 

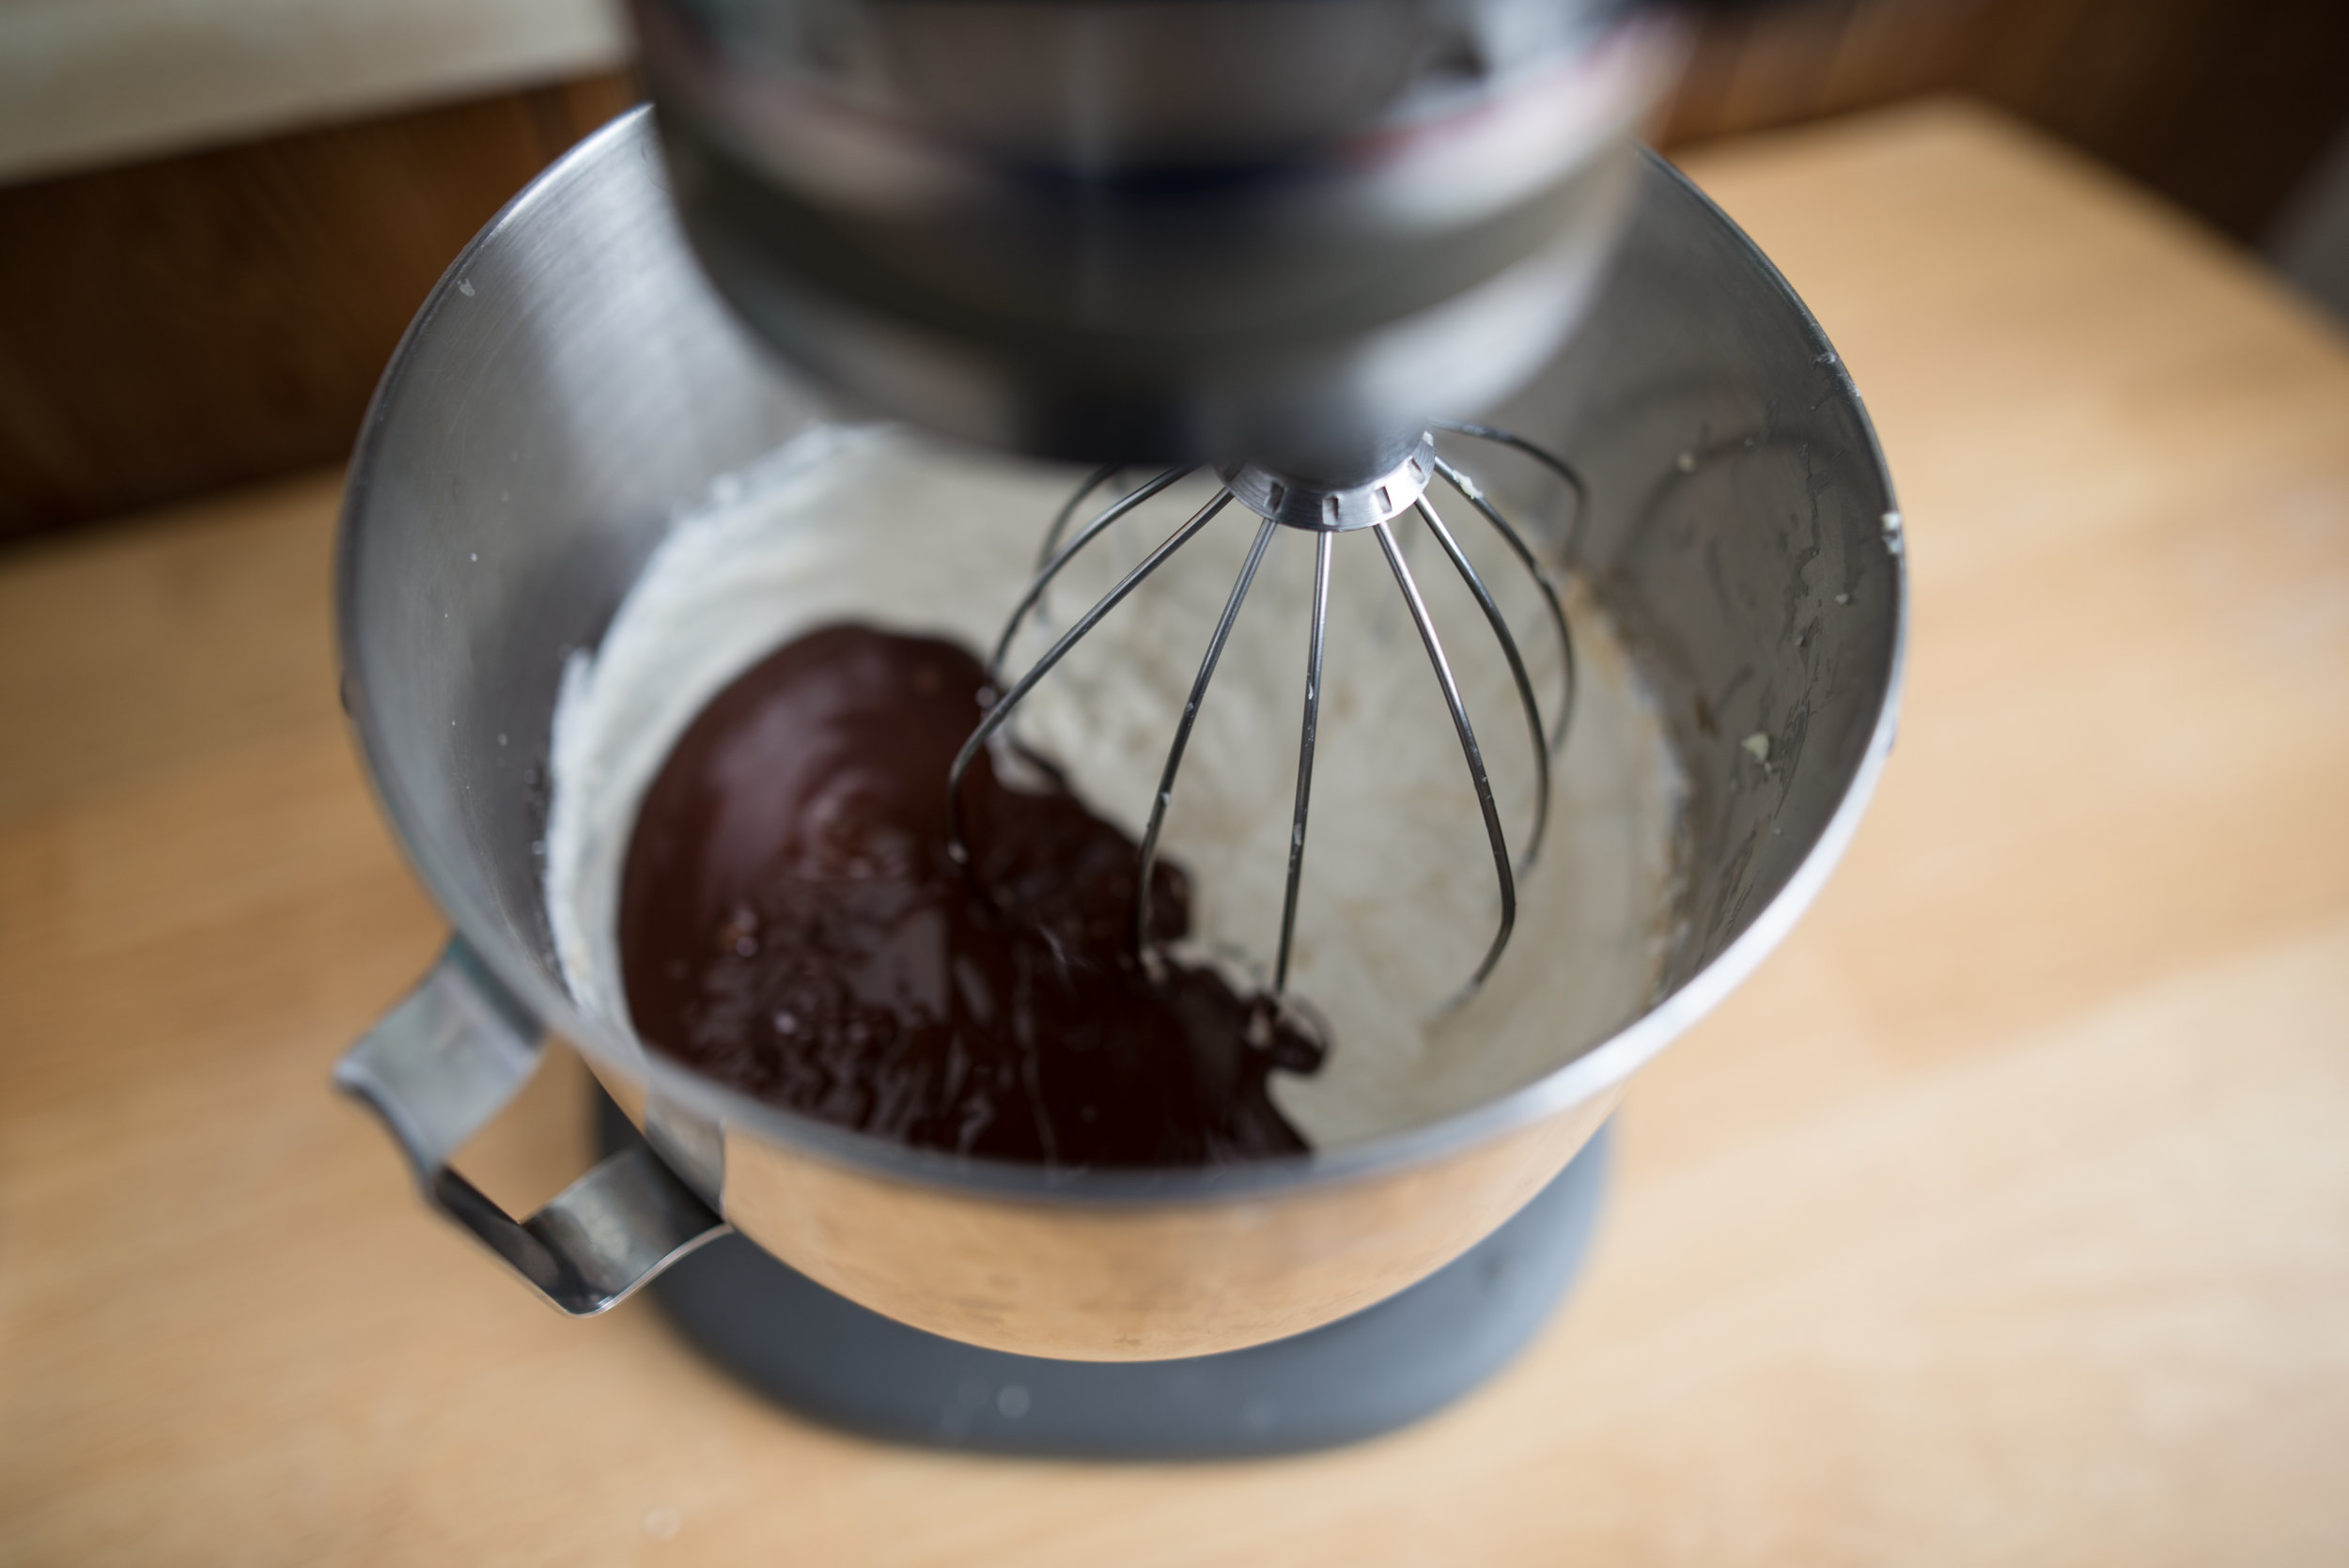
12.5oz chocolate (use a chocolate that is at least 60% cacao) 

  • Melt chocolate in a double boiler (or a heat-safe bowl over a pot with a little water in it), set aside. 
  • In another double boiler (psst: I put my Kitchenaid bowl over a pot for one less dish), whisk together egg whites and sugar. Cook, stirring regularly, until the sugar has dissolved. I like to rub a little between my fingers to feel for sugar granules. 
  • Using a stand mixer with the whisk attachment, whip egg white mixture until it forms stiff peaks and has cooled to room temperature. 
  • With the mixer running, slowly add in the butter, one cube at a time. Allow most of the butter to mix in before adding each additional cube.
  • When all the butter has been mixed in and the chocolate has cooled to room temperature, slowly pour in the chocolate with the mixer running. 
  • Whip mixture for a few minutes after the chocolate has been added, until thick and smooth. 

Comment

Chocolate Ginger Tart

1 Comment

Chocolate Ginger Tart

I am SO excited to share this chocolate ginger tart recipe with you! I've had the idea for this recipe in the back of my head for months now, waiting for the perfect chocolate to make it with from Grocer's Daughter and the perfect time of year to arrive. This recipe has Christmas written all over it. It's always hard when I think about a recipe for a long time, because my expectations get insanely high. 

Good news, friends - this recipe totally lives up to my insane expectations! 

DSC_7171.jpg

I absolutely love my graham cracker crust (from this Key Lime Pie), so I altered it slightly to use gingersnaps and added some ground ginger to boost the spice. I filled the crust with a simple chocolate ganache using the best 70% chocolate from Grocer's Daughter and grass-fed heavy cream from Shetler's Dairy. I topped the tart with crispy fried strips of fresh ginger for the perfect finish. 

In a simple recipe like this one, high-quality ingredients make all the difference in the flavor of your final dish. It's definitely worth it to use the best ingredients you can get your hands on.  

DSC_7173.jpg

Winter has arrived in northern Michigan, where some days it feels like we live in our own private snow globe. All that snow made last weekend the perfect time to cut a Christmas tree with our new pup! Atlas is an Aussiedoodle (the perfect combination of an Austrailian Shepherd and a Poodle!) who joined our family last week. You're sure to see plenty more of him soon and if you're as in love with him as I am, you can follow him on Instagram @atlasthepupperdoodle  (crazy dog owner, party of one).

I'm so happy to have brought my camera and my parents along for the adventure, resulting in some incredible family photos, like this one! It makes my heart so happy :) 

DSC_7124.jpg

A rich and satisfying tart like this one is the perfect thing to cozy up to at the end of a good long adventure in the snow or while celebrating the holidays with your friends & family. 

And if some of those friends and family are gluten free - this definitely works with GF gingersnaps!

DSC_7176.jpg

Even better than how incredible this tastes is how easy it is to make. While it looks and tastes like something you slaved over for hours, despite requiring very little hands-on time. All you could ever ask for in a holiday recipe - am I right?! 

We're all busy these days, so lets get to it. A few ore photos, then the recipe! 

DSC_7191.jpg
DSC_7184.jpg


Chocolate Ginger Tart

Gingersnap Crust

1 ¾ cup pulverized gingersnaps (I did this in my vitamix - you can also use a blender or put the cookies in a plastic bag and smash with a rolling pin). Measure the crumbled cookies, not the whole ones!

3 Tbsp sugar

1 tsp ground ginger

Pinch of salt

3.5oz unsalted butter, melted

  • Combine gingersnaps, sugar, ginger and salt in a medium mixing bowl and stir to evenly combine.
  • Drizzle melted butter over the gingersnap mixture and stir until the butter is evenly distributed and everything is moistened with butter.
  • Pour into a tart pan and evenly press it to cover the bottom of the pan and all the way up the sides. I like to use a small measuring cup to smooth it out and create clean sides.
  • Place the tart pan on a baking sheet and bake at 350 degrees for about 15 minutes, until it takes on a golden hue.
  • Let cool completely before filling, leaving it in the tart pan.

Chocolate Ganache Filling

12oz high-quality bittersweet chocolate - I used 70% discs from Grocer's Daughter

1 cup heavy cream

¼ cup unsalted butter

  • Weigh chocolate into a medium mixing bowl. If you’re using a bar, chop the chocolate into small pieces.
  • In a small saucepan, heat cream and butter over medium heat until the butter has melted and the cream is just about to simmer.
  • Pour cream mixture over chocolate and let sit for one minute.
  • Whisk together the cream and chocolate until the ganache is smooth and no pieces of chocolate remain.
  • Pour the filling into the cooled tart crust. Spread it evenly with a spatula then gently tap the tart pan on the counter to help smooth out the top.
  • Chill in refrigerator for at least 4 hours.

Crispy Ginger Topping

4in piece of fresh ginger

¾ cup vegetable oil

  • Prepare a space to place your cooked ginger by setting a few layers of paper towel over a plate or baking sheet.
  • Peel the ginger, then slice it into shoestring pieces as thin as you possibly can.
  • Combine ginger and oil in a small pan, and place over medium heat. Allow the oil to heat to a temperature where it is bubbling gently with the ginger. If the oil ever starts to smoke, turn it down.
  • Cook until the ginger starts to crisp up and turn a golden brown.
  • Strain into another container then place ginger on the paper towels to cool. Be sure to save the oil, it’ll have a nice gingery flavor!
  • Top tart with ginger after the filling has set.

1 Comment

The Best Chocolate Chip Cookies

Comment

The Best Chocolate Chip Cookies

Over the course of the past few years, I've truly fallen in love with making chocolate chip cookies. My baking takes so many different forms and I'm constantly looking for something new to make or new flavors to try. But chocolate chip cookies are a staple - something that comes together nearly without thought, allowing me to fully pour my heart into each batch of cookies. Daniel and I regularly joke about the fact that any time he requests chocolate chip cookies, there's a fresh batch coming out of the oven within 12 hours.

It absolutely never fails. 

I always have what I need on hand to whip these cookies together (or at least, a very similar version). Because it's important to have easy access to chocolate chip cookies : ) 

DSC_6166.jpg

I'm regularly tweaking this recipe, ever so slightly, wondering if I might be able to improve upon what I already love so much. If I've learned anything substantial over the years, it is that ingredients matter.

I've always been picky about what goes into my chocolate chip cookies, but the best version I've made to date uses chocolate baking discs from Grocer's Daughter Chocolate, which they source from Conexion, a woman-owned company making incredibly high-quality bean-to-bar chocolate in Ecuador. The complex and fruity flavors in this chocolate bring these cookies over the top. 

DSC_6174.jpg

I also use Sonoma Syrup Co.'s vanilla bean CRUSH, a vanilla extract packed with vanilla seeds and unparalleled in flavor. The dough of these cookies pairs the rich caramel flavors of turbinado sugar with floral vanilla, creating the perfect match for our chocolate. 

This is heaven in a cookie, friends.  

DSC_6186.jpg


The Best Chocolate Chip Cookies

ingredients: 

1/2 cup unsalted butter, softened 

2 Tbsp organic cane sugar 

2 Tbsp turbinado sugar (use brown sugar if you don't have turbinado) 

3/4 cup plus 2Tbsp light brown sugar 

1 large egg 

1 tsp vanilla 

3/4 tsp baking soda 

heaped 1/4 tsp salt 

1 cup all-purpose flour 

3/4 cup bread flour

1/2 pound bittersweet chocolate disks (I pefer a mixture of 64% and 88%) 

flaky sea salt 

instructions: 

  • Cream together butter, all three sugars and vanilla, beating for at least 5 minutes with a stand mixer with the paddle attachment (or a really buff arm!).  
  • Add egg. Continue mixing until fully incorporated.
  • Combine flours, baking soda and salt in a separate bowl.  Whisk to combine. 
  • Add half of dry ingredients and mix on low, just until it starts to mix into the creamed butter. Add remaining dry ingredients and mix on low until just a few streaks of flour remain. 
  • Add chocolate and mix until just incorporated. 
  • Scoop cookies onto baking sheets lined with silicone baking mats or parchment paper. I use a cookie scoop to get nice clean circles. Sprinkle each cookie with a few flakes of salt. 
  • Bake at 360 degrees, for 10-12 minutes - until the edges just start to brown and the centers are still soft. Let cool completely on the baking sheet (or for at least 5 minutes before moving to a cooling rack). 

Comment